Google Business Profile Guide
A practical all-in-one Google Business Profile guide for business owners and marketers.
Updated: 2026-02-26
The Complete Guide to Your Google Business Listing
You found it! The complete resource with everything you need to know to get the most out of your Google Business listing in 2026 — management best practices, improvement strategies, tracking your results, troubleshooting problems, and so much more.
We’ve pulled together everything we know about your Google Business listing (formerly Google My Business) into one place. Our goal? To help you make your listing work harder, get found by more people on Google, and turn visitors into paying customers.
Many business owners find the constant changes to Google Business listings both confusing and frustrating. We’ve designed this guide to help you cut through the noise and take full advantage of the platform to:
- Get found by more people searching for what you offer.
- Make your business look its best when people find you on Google.
- Control what people see when they search for your business name.
- Turn more visitors into paying customers.
Google Business Profile features and functionality are constantly evolving. We will keep this guide updated with the latest management strategies and best practices. By the time you’ve finished reading, you’ll have a solid understanding of how to get the most out of your listing — so read on and get those Google tastebuds tantalized!
The guide is divvied up into key areas and then subdivided into sections:
Table of Contents
- What is a Google Business Profile?
- Creating, claiming & verifying your Google Business Profile
- Business information
- Categories
- Services
- Products
- Bookings & appointments
- Attributes
- Photos & videos
- Google posts (AKA updates)
- Reviews
- Q&A
- How your Google listing is performing
- Business settings
- Maintaining & protecting your Google Business Profile
- Bulk management of Google Business Profiles
Chapter 1: What is a Google Business Profile?
Google Business Profile is a free tool that allows business owners to engage with customers and potential customers on Google.
With a Google Business Profile, you can easily represent your business on Google and connect with searchers across Google Search and Maps.
The History of Google Business Profile
The platform’s history is a long-winding road of rebrands that reflects Google’s evolving strategy for local search. It first launched in March 2004 as Google Local, essentially a digital replacement for the Yellow Pages, before being integrated into the newly launched Google Maps in 2005 as the Google Local Business Center.
Over the next decade, the tool underwent several identity shifts to align with Google’s other projects, appearing as Google Places (2009), then merging with social efforts to become Google+ Local (2012), and briefly Google Places for Business.
In June 2014, Google sought to simplify the experience by consolidating these features under the name Google My Business (GMB), a title it held for seven years until it was officially rebranded to its current name, Google Business Profile (GBP), in late 2021. Read this Near Media article for the full historical timeline.
Find out about what Google has to say about Google Business Profiles here: https://business.google.com/en-all/business-profile/

How much does it cost to set up your Google Business listing?
Setting up your profile costs nothing but time, making it one of the most cost-effective ways to grow your bottom line.
However, there is a “hidden” cost: because it’s a free tool, official support from Google can often be, shall we say, lacking. To avoid the headache of a “suspended” account or a rejected listing, you need to be proactive. Make sure that your business is eligible for a listing, that it stays within the guidelines, and keep supporting official documentation (like utility bills and business licenses) ready in case you ever need to fight a suspension.
We’ll dive deeper into how to handle these hurdles in the Troubleshooting section of this guide.
What are the benefits of having a Google Business listing?
- More people finding your business – When a user searches for a local business, Google will show Google Business Profiles in the search results. A complete, well-maintained listing gives your business the best chance of appearing when people nearby are searching for what you offer.
- Increased visibility – Your Google Business listing can show up in the map results at the top of Google, in an expanded list of local businesses, and directly in Google Maps. For many businesses, this means more people finding them.
- Enhanced brand recognition – A fully filled-out listing gives people all the information they need right there in the search results. As a brand, you can better control how your business is presented through the data you share.
- More business! —-Your Google Business Profile can and will drive direct leads to your business, just like a website. As people read your reviews, look at your images, and learn about your services, they’ll likely contact you to learn more or take a conversion action directly in your business profile – such as calling you, messaging you, or getting driving directions to your location.
Where does the Google Business Profile show up?
The details you add to your profile – along with third-party info like customer reviews – pop up in various ways across different devices and platforms.
The most important thing to remember? Google “chops and changes” exactly what information it shows, and how it formats it, all the time. Instead of obsessing over the exact layout, focus on the big picture: every bit of data you provide feeds Google’s understanding of your business entity. The more useful and accurate your information is, the better Google can represent you.
In the Local Knowledge Panel
When someone searches specifically for your business name, your Google Business Profile will often take centre stage. A dedicated information box (the ‘Local Knowledge Panel’) appears to the right of the search results (on a desktop). On a mobile device the fields that show in the Local Knowledge Panel can vary to that which shows on a desktop, and these fields are often broken up by other search features. The Local Knowledge panel will often draw information from your Google Business Profile, your website, and other third party sources such as maps users, third part review sites, and sometimes influential websites like Wikipedia.
When someone searches specifically for your business name, your Google Business Profile will often take center stage. On a desktop, a dedicated information box – known as the Local Knowledge Panel – appears to the right of the search results.
On a mobile device, the experience is a bit different; the fields within the panel can vary from the desktop version and are often interspersed with other search features. Regardless of the device, the Knowledge Panel acts as a digital billboard, drawing information from:
- Your Google Business Profile: The primary source for your core details.
- Your Website: Which helps Google verify your services and location.
- Third-Party Sources: This includes feedback from Maps users, third-party review sites, and occasionally influential platforms like Wikipedia.
 An image showing Whitespark's Local Knowledge Panel when viewed on a desktop
In the Map Results at the Top of Google
When people search for a specific type of local business (think “coffee shop near me” or “plumber in Edmonton”), Google shows a short list of nearby businesses right at the top, with a map alongside them.
The vast majority of the data shown there is pulled directly from each business’s Google listing. If you want to show up there, your listing needs to be complete, accurate, and active.
 An image showing the map pack for a search query for 'boat trips' on a mobile device
In the Local Finder
If someone wants more options, they can click “More businesses” or “More places” at the bottom of the map results. This opens up the Local Finder, an expanded list of local businesses paired with a map.
Just a heads-up: while it looks very similar, the Local Finder is actually a different feature than the standalone Google Maps.
 An image showing the 'local finder' for a search query for 'boat trips near me' on a desktop.
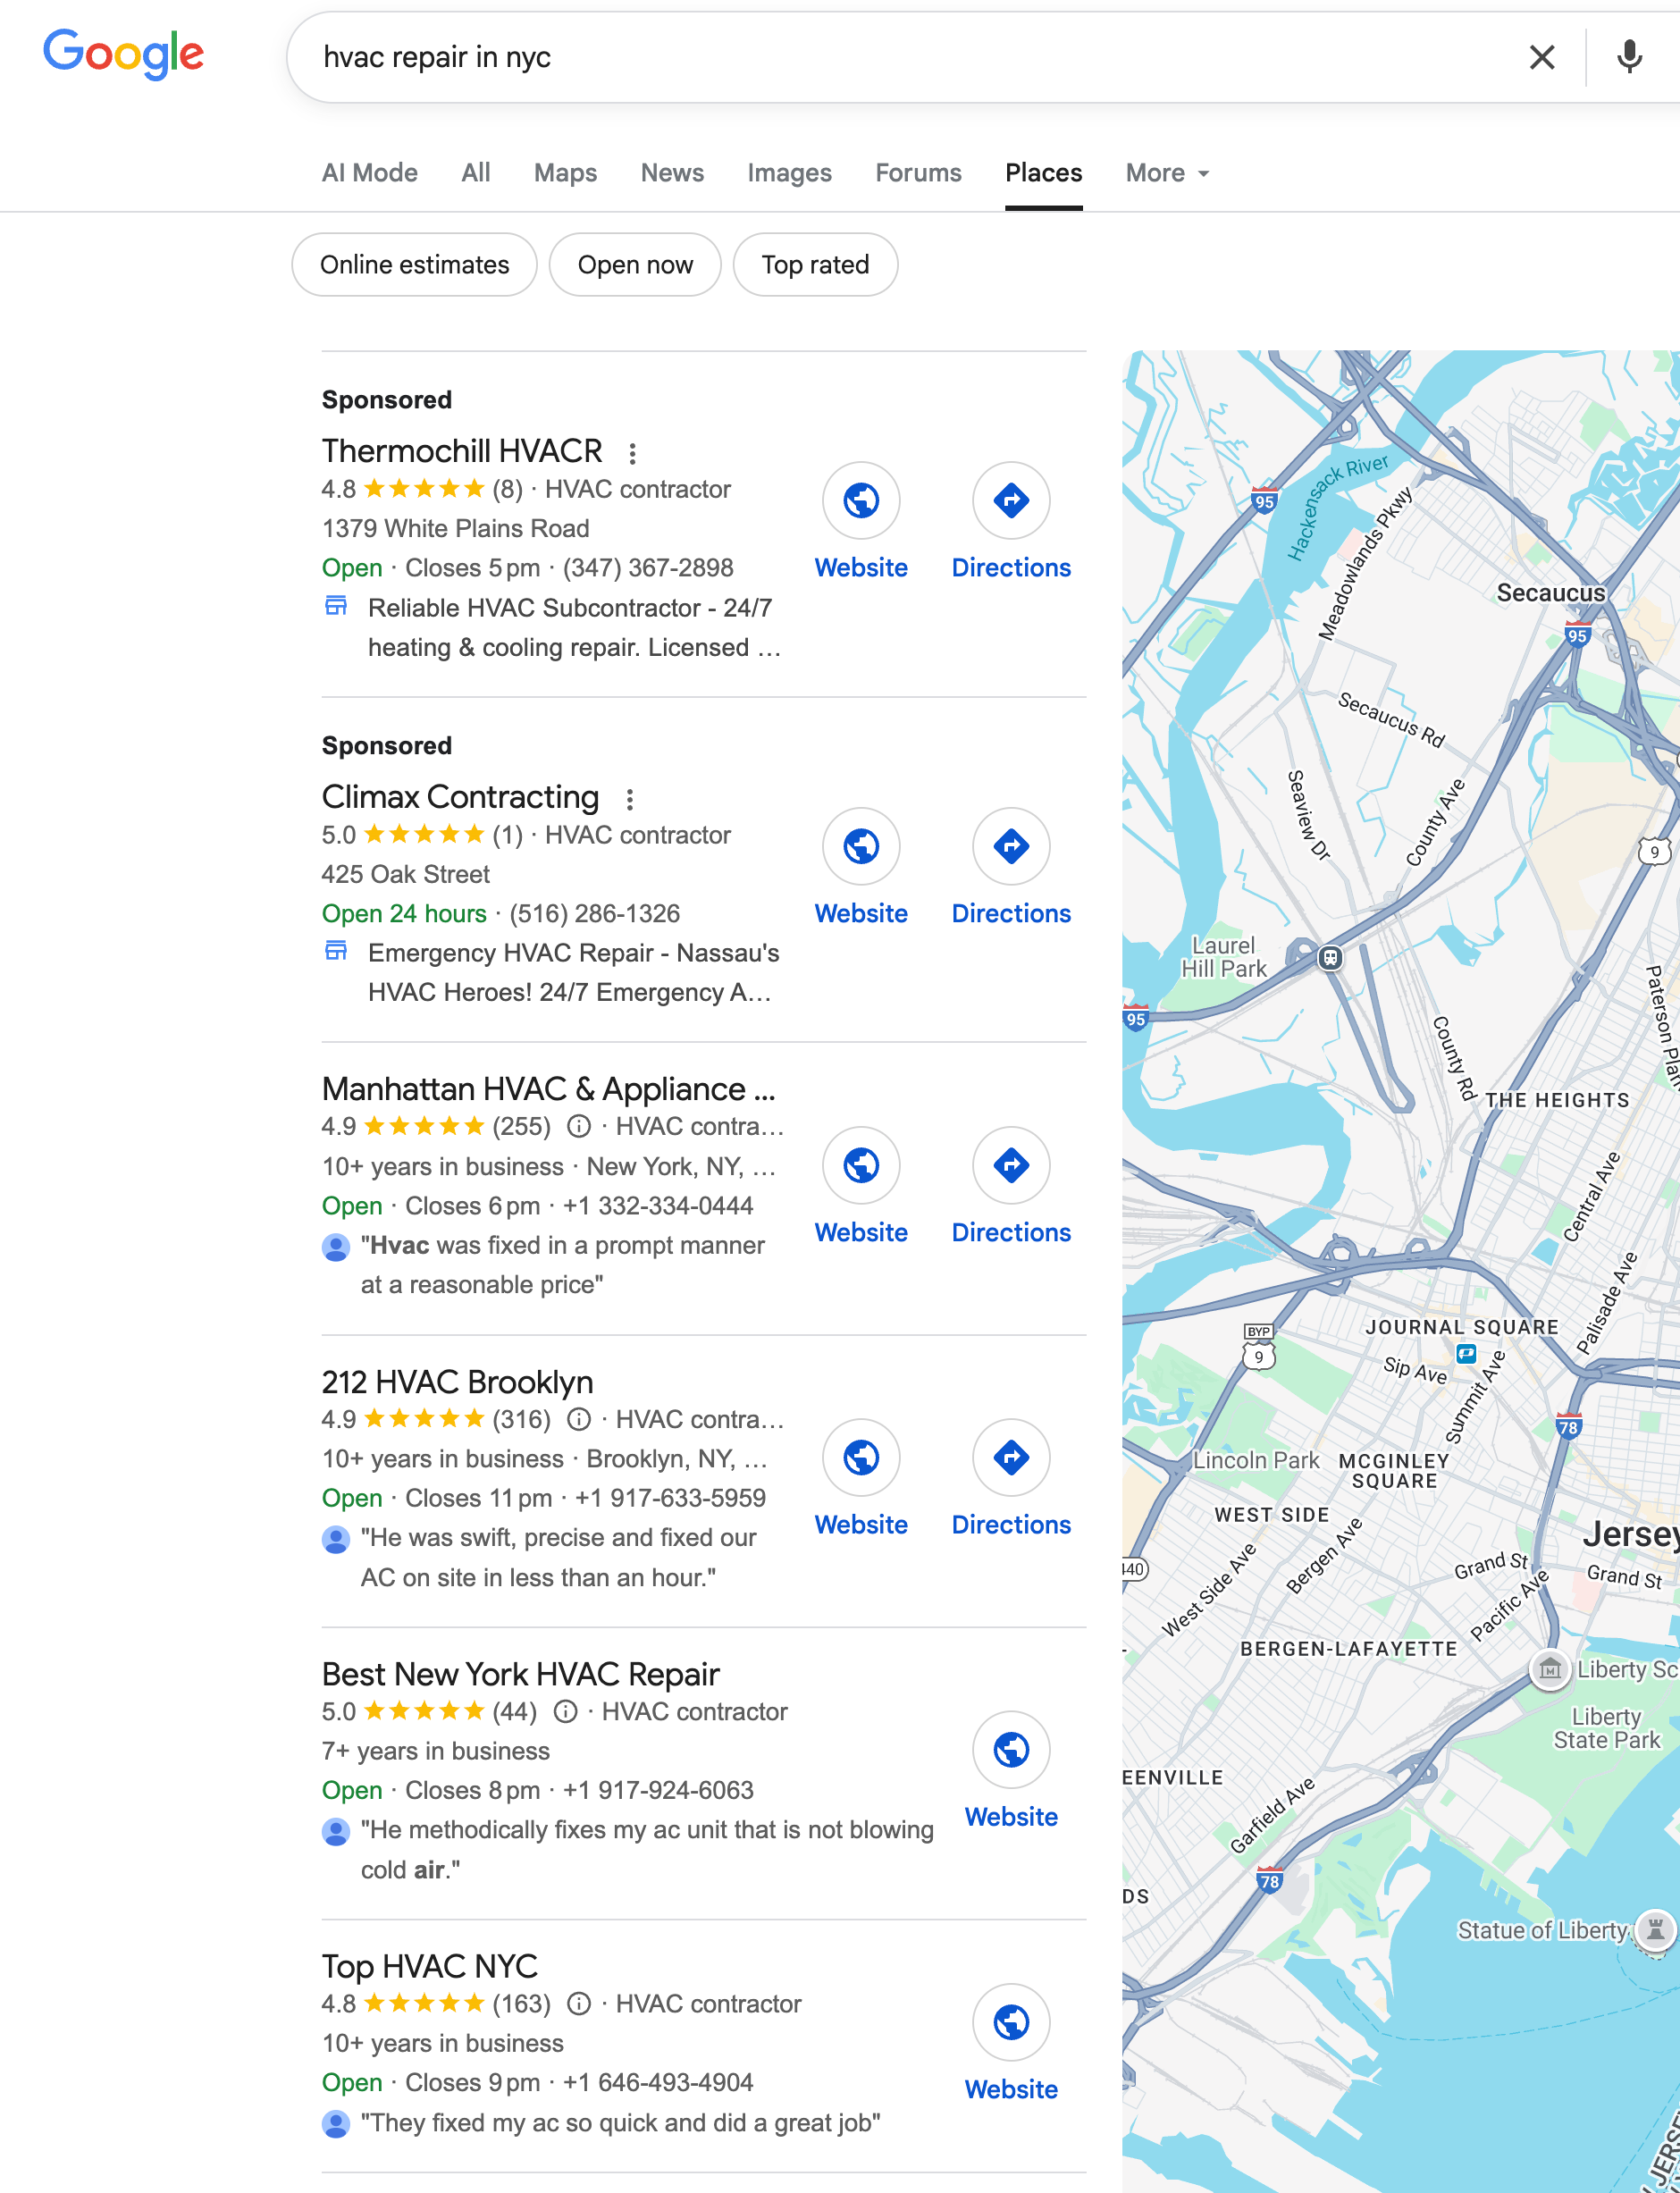
In the Local Service Finder
The Local Service Finder looks a lot like the Local Finder – except Google shows these results for service-type searches such as ‘HVAC repair near me’. The top spots are usually taken up with businesses that are running Local Service Ads.
In Google Maps
You’ll find Google Business Profile profiles in the Google Maps app and also Google Maps on a desktop.
Chapter 2: Creating, claiming & verifying your Google Business Profile
Create a Google Business Profile
To create a new Google Business Profile go to business.google.com/create and typing in your full business name.
Don’t rush – go slow here – this is your chance to make sure that a business listing doesn’t already exist. You don’t want to end up with a duplicate! If there already exists a business listing with that name Google will show this in the drop down and you’ll have the chance to claim that listing.
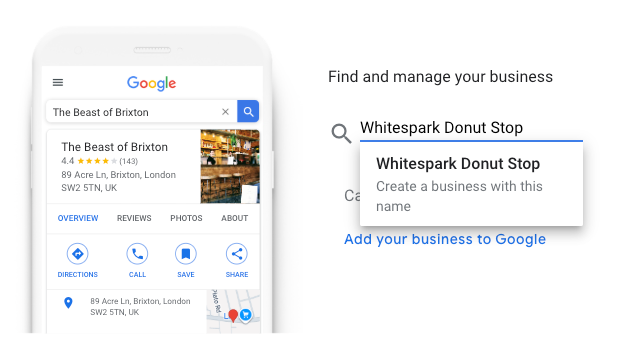
If Google doesn’t ‘see’ an existing business listing for the business name you’re adding click on the ‘create a business with this name’ message and go ahead and set up the listing.
NB If you’re using an agency account you’ll get an error when you visit https://business.google.com/create – agency accounts can’t create listings.
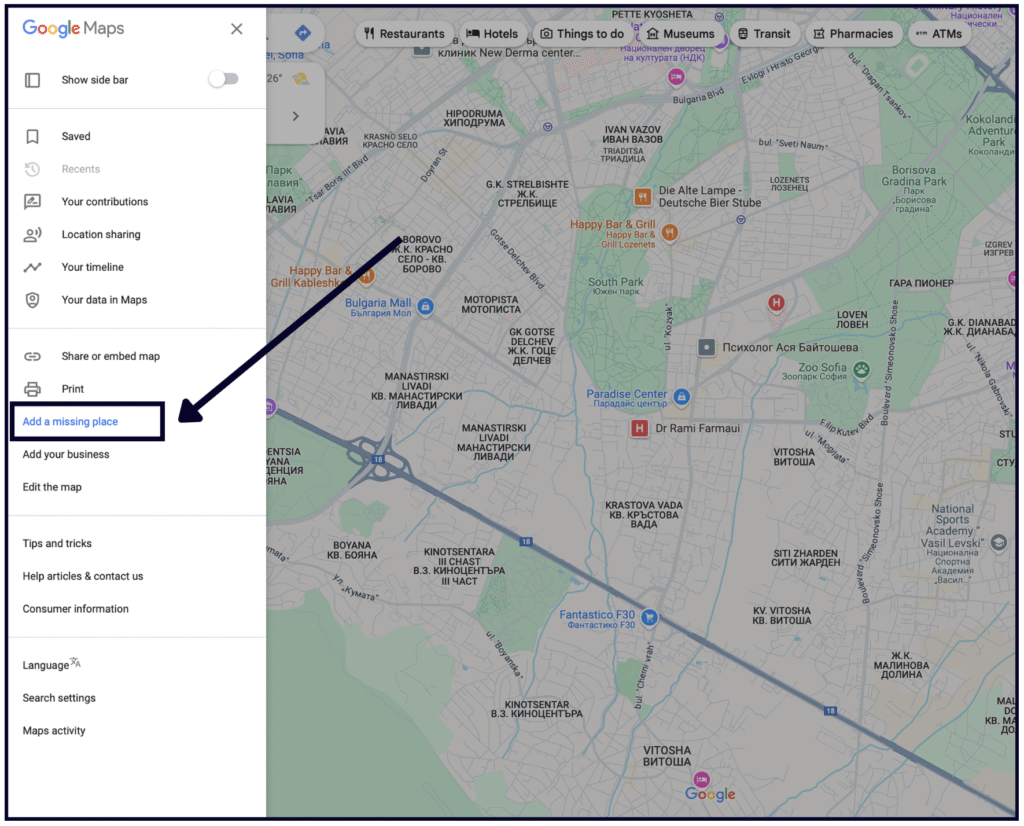
Google doesn’t show service area businesses in their drop down, so if you’re looking to check to see if a service area business has a listing on maps before you create a new profile you’ll need to check on Google Maps first.
Claiming an existing Google Business Profile
If you want to claim or get an access to a Google Business Profile that already exists, and is showing in the drop down at https://business.google.com/create click on the name of the business and Google will show you next steps.
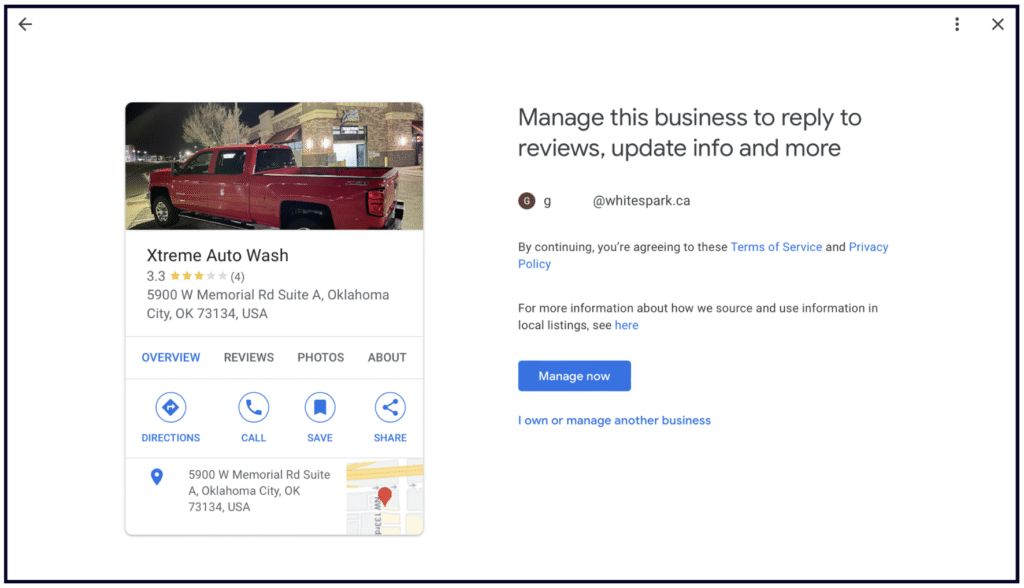
If the business HAS NOT been claimed Google will show you a message like the below. Click on ‘manage now’

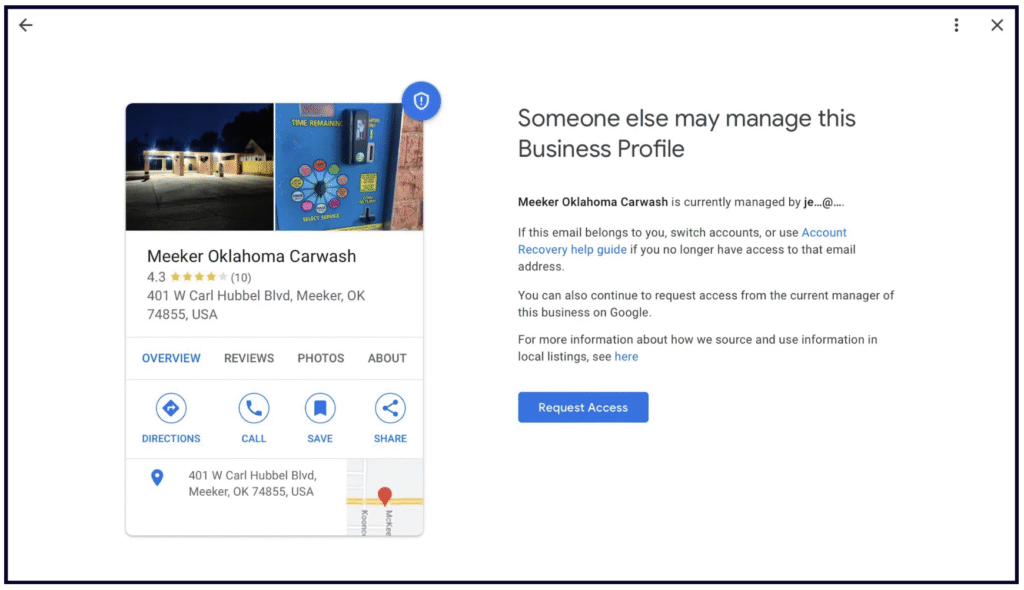
If the profile is already managed by someone you’ll see a message like the one below
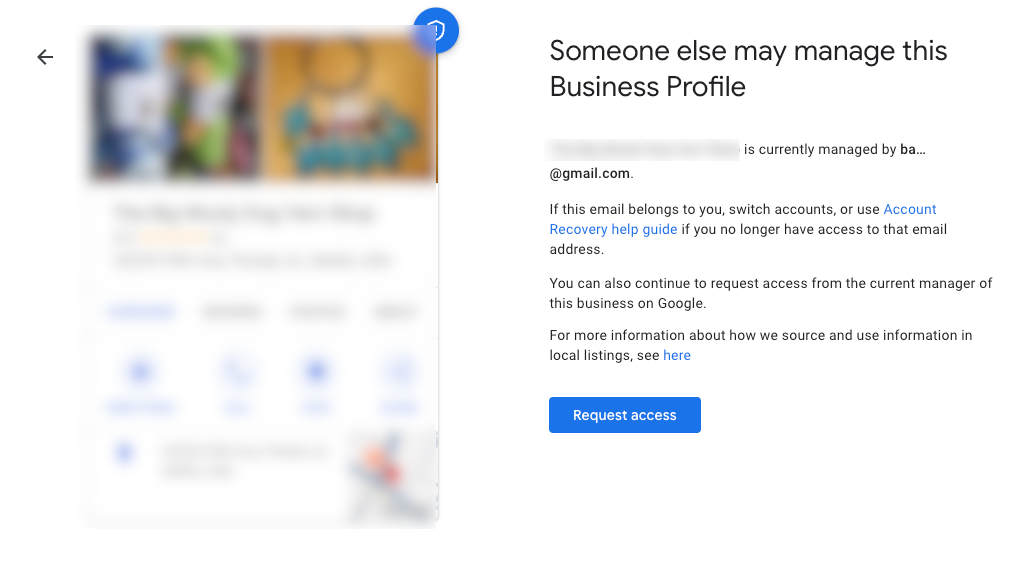
This will give you a clue as to the email address that manages that listing – it could well be an email that you recognise and potentially have access to.
When you click ‘request access’ Google will email both you, as the requester of access, and also the account that is the owner of the listing. The owner has three days to respond. To check the status of your request you can click the link in the email that Google sent to you.
If your request is approved you’ll get another email from Google to let you know. If your request is denied you’ll also get an email, with the option to appeal the decision.
If you don’t get a response after three days you may have the option to claim the profile – open the confirmation email that you got about your ownership request – select ‘view request’ and then select ‘verify’.
If the business you are looking for is a service area business it won’t appear in the drop down, nor will ‘claim this business’ appear on Google Maps. The official stance by Google here is that you need to use the get help form, In the ‘Tell us what we can help with’ field, enter Transfer ownership of listing, and then when you submit your request, select Transfer ownership of listing as the issue description.
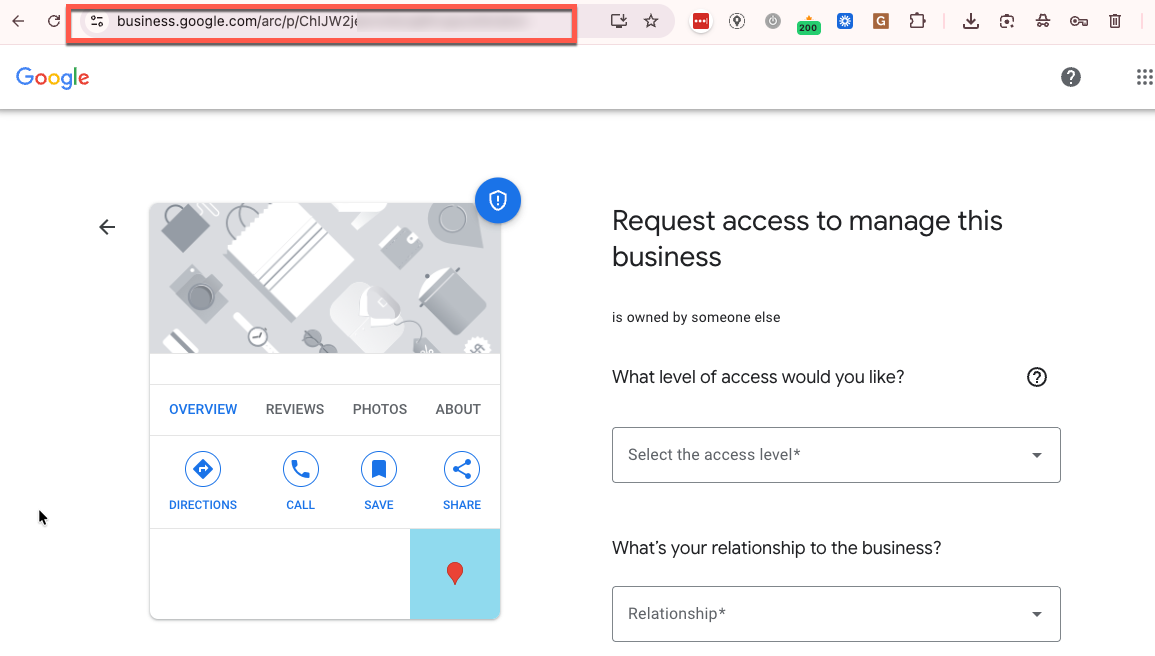
A shortcut ‘hack’ for claiming or gaining access to a service area business is to find the Place ID of the existing listing on Google Maps and then go to this link to claim the profile https://business.google.com/arc/p/[paste the PLACE ID here]
Verify your Profile
To be clear, you don’t have to verify your Profile in order to show up in the local search results. However, a verified Profile grants you access to all its features.
If your Profile is unverified, you will not be able to add Google Posts, a direct booking button, Products, or Services, and you won’t be able to respond to reviews. What’s worse, you won’t be able to fix any incorrect information about your business.
This is why we recommend that every business verifies their listing.
Unfortunately, the most common verification method Google provides these days is video verification, which is universally dreaded. If you need help with this method, check out our guide on how to get through Google’s video verification process.
Other (more rare) verification methods include:
- phone verification
- email verification
- instant verification
- postcard verification (more common outside of North America)
💡 There is a way to avoid the headache of video verification, but you’ll have to do some work beforehand:
-
Make a website for your business (or add a new location page), and make sure your business name, address, and phone number are listed in the footer of every page.
-
Connect the website to Search Console and Google Analytics (GA4).
-
Build citations on all the key sites Google looks at to validate your business information: Facebook, BBB, industry-specific sites, data aggregators, social profiles.
-
Wait a few weeks for Google to find and index those citations.
-
Using a Google account that will not be a manager of the Google Business Profile, go to Google Maps and add a business as a regular Google user (not through the Google Business Profile dashboard). Even better, if you know someone with “Local Guide” status, ask them to do this for you.
-
Get a few reviews on the newly created Profile over the course of a couple of weeks.
-
Finally, claim the Google Business Profile, using the same email you used to connect GA4 and Search Console.
If all goes well, you will get instant, phone, text, or email verification.
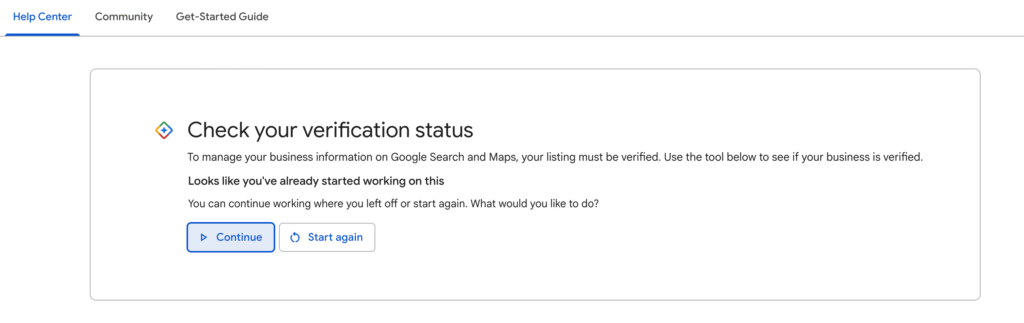
How do you know if your listing has been verified?
If you see a blue checkmark next to your business’s profile picture in your Google Business dashboard, that means that you have successfully verified your Profile.
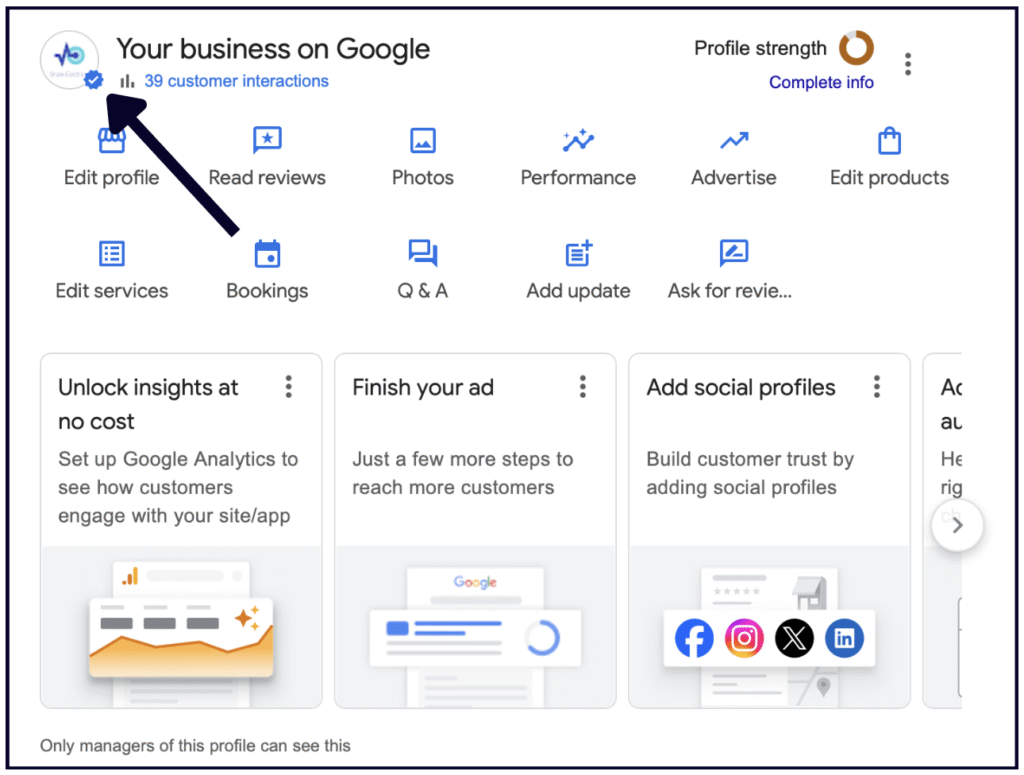
If you see an exclamation point, it means that you need to verify or reverify.

You can also see the status of your Profile(s) by going to https://business.google.com/locations
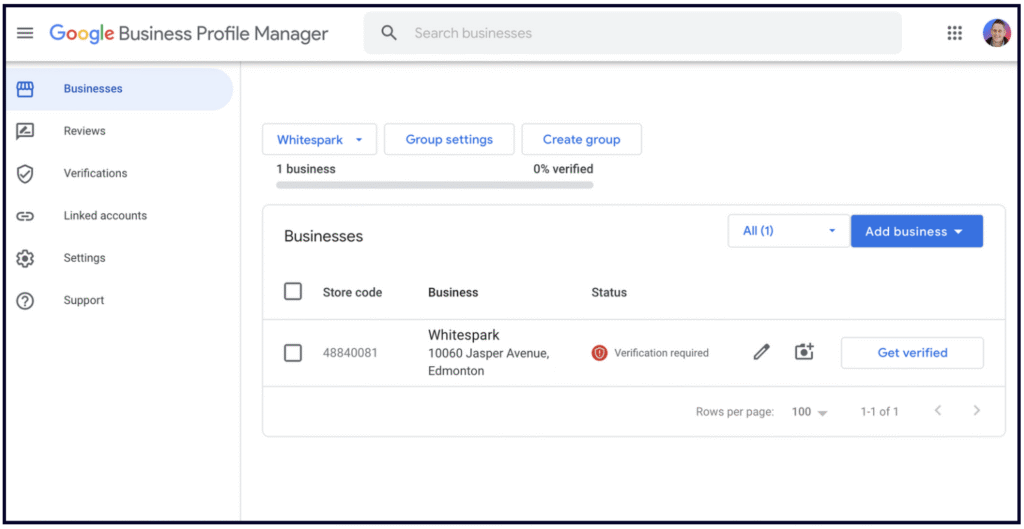
and by using Google’s verification tool here – https://support.google.com/business/workflow/12825603
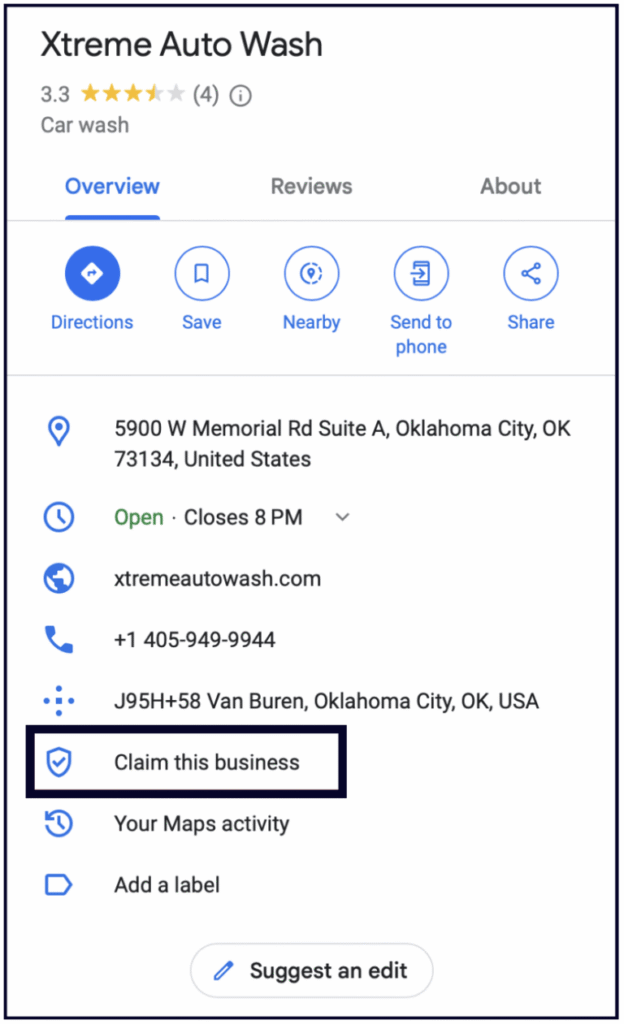
How do you know if someone else has already claimed your listing?
1. Search for your business on Google Maps (must be Maps) and see if the the profile has a “Claim this business” button.
If it doesn’t, then someone else has already claimed that listing.
If it does, you can click on “Claim this business” and begin the process of claiming your Profile.
2. Search for your business and address on Google and check if the knowledge panel says “Own this business?”
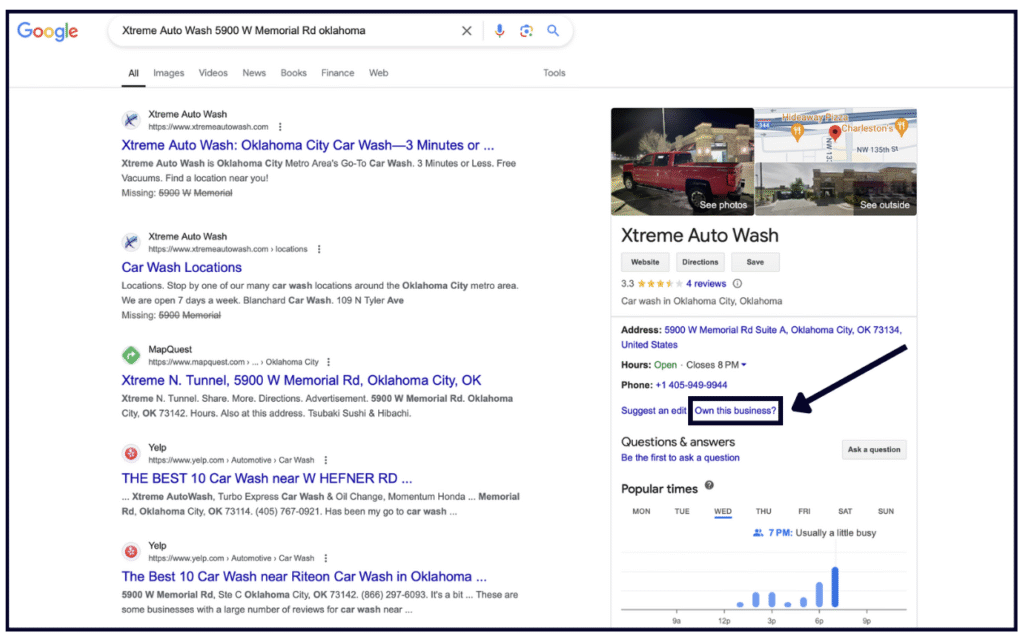
If no one has claimed the listing, Google will prompt you to claim and verify it.
However, if someone else has already claimed the Profile, you will have to request access from that person.
To request ownership of an existing Profile, click the “Request Access” button and follow the steps.
Chapter 3: Business information
How to Edit Your Google Business Profile
In the past, the place where you'd go to edit your listing was called the "Google My Business Dashboard". Makes sense, right? But then Google decided to rename it to the "New Merchant Experience" — why? Because Google is terrible at naming things, that's why. We'll just call it your dashboard from here on.
Here's how to get to your dashboard:
- Be sure you're signed into the Google account that you manage your listing from.
- Go to Google and type in "my business". Alternatively, you can type in your business's full name and city.
- The dashboard should pop up at the top of the search results page and will likely look a lot like this:
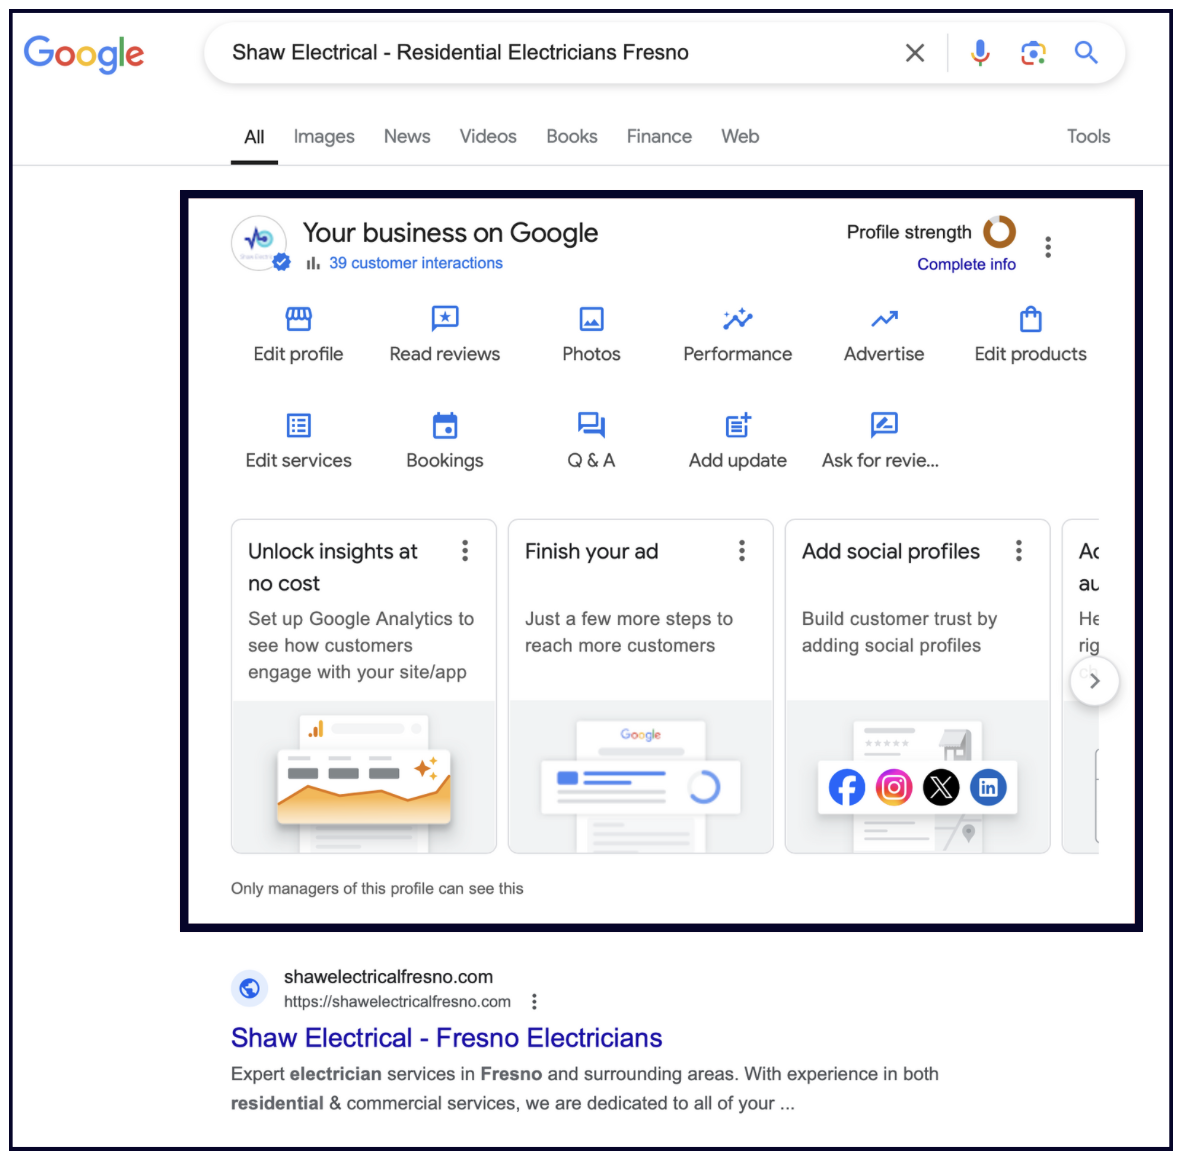
The features available to your business in this section will depend on your business category, country, and other factors. For example, not every business will have the "Bookings" feature.
✍️ Note: If you manage multiple locations, you can go to this URL to access them: https://business.google.com/manage/
Okay, you've claimed your Google Business listing. Now it's time to make it work harder for you! You should complete every field Google provides — this gives your listing the best chance of being seen by the right people and helps turn visitors into customers. We'll walk you through each field below.
Your Google Business listing can be edited in your dashboard, or you can use software like Whitespark's Local Platform, which not only costs $1/month, but is also super slick and intuitive.
As a reminder, in order to get to your dashboard, go to Google and search either your full business name and address, or simply type in "my business".
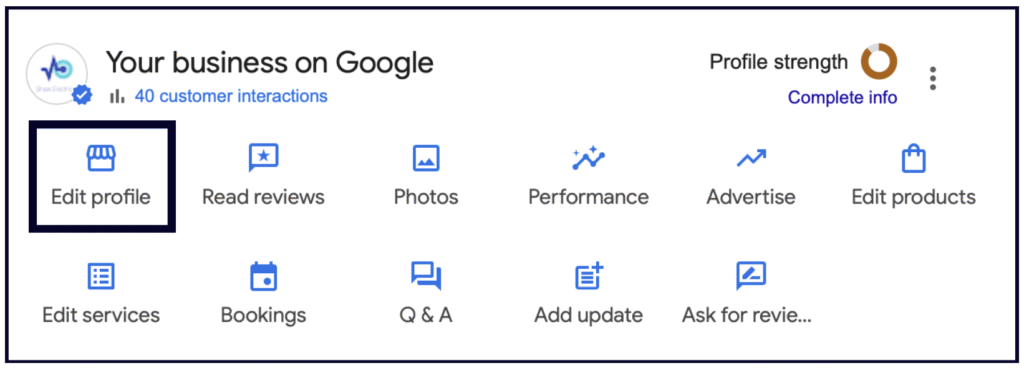
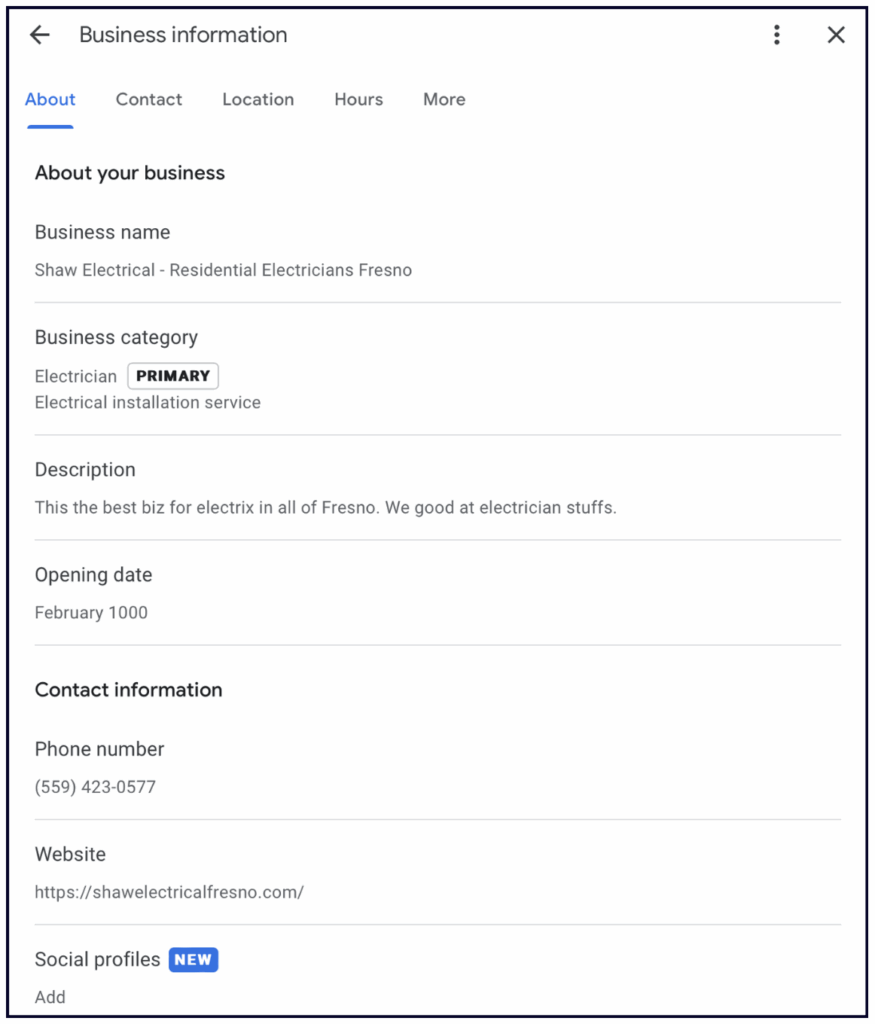
To update your business details in the dashboard, click "Edit Profile" in the top left:
Then, choose the section you'd like to edit. Here you'll find the About, Contact, Location, Hours, and More sections:
Fill in everything — yes, all of it
Make the most of your listing by filling out all of the information possible.
Section 3 of this guide — 'Making your listing work harder' — covers many of the elements of Google Business Profile in more detail.
In this section we'll cover some super important parts of your listing that you should go ahead and complete right away. For your convenience, we have noted whether or not each field helps more people find your business.
Business Name
- Helps more people find you
What's the single biggest thing you can do to help more people find your business on Google?
Add keywords to your business name (with the caveats below).
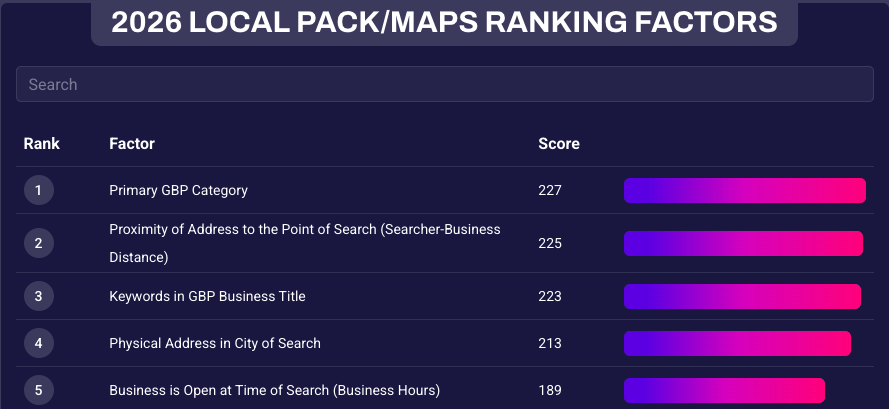
Having the right words in your business name is the third most important thing Google looks at when deciding which businesses to show in the map results, according to the 2026 Local Search Ranking Factors survey.
Your Google listing's business name holds a lot of weight because of "branded search": Google can't know if you're searching for a keyword or a specific business; if there is a specific company whose name is a very close match to what you searched, then Google must return it in case you are looking for that specific business.
This is why many businesses add keywords to their business name on Google. We call this "keyword-stuffing".
There is a slight problem, though. Officially, stuffing keywords in your business name is against Google's guidelines. It's rare for Google to suspend a listing for keyword-stuffing the name, but they will often remove the keywords that are not part of your official business name.
However, there are ways to avoid this:
- If you change your business name on Google, you should also change it officially in these places:
- Government sources (register a "Doing Business As" name).
- In your logo.
- On your website.
- In your signage (if you don't have a service area business).
- In official business documents, such as with your tax authority, banking, utilities, internet providers, and mobile providers.
- Update your other online directory listings across the web. This will help prevent Google from reverting your name on your Google Business listing. Do it yourself, or you can use a service like Whitespark's Listing Service.
- If you're going to add keywords to your name, consider these potential downsides:
- Google could eventually reduce the impact of keywords, leaving you with a keyword-stuffed business name instead of a "brand" name.
- If everyone has a keyword-stuffed name, how will you stand out?
For a deeper dive on this, check out Darren's video on keywords in the business name. And if you want to see the impact of keywords in the business name for yourself, just look what happened to this business once they changed their name.
Description
- Does not affect how many people find you
Let's get something straight: the description field does NOT affect how many people find your listing.
This has been tested numerous times by many local SEO experts, and we have even heard it direct from Google that they don't use this field when deciding which businesses to show.
So, when it comes to writing your description, make sure you:
- Don't keyword stuff.
- Don't add links.
- Don't use all caps.
- Don't add a phone number or website URL (suspension risk)
- Don't include promotions, offers and pricing
Imagine you are writing copy for an advertisement. How would you write that to convince someone to choose your business? You would use these 750 characters to tell your potential customers why your company is the right fit for them!
Make sure your description is well-written and compelling, and that it shows some personality, like the example below:

If you want to explore the description field further, check out this video on how to write a description that works harder for your business.
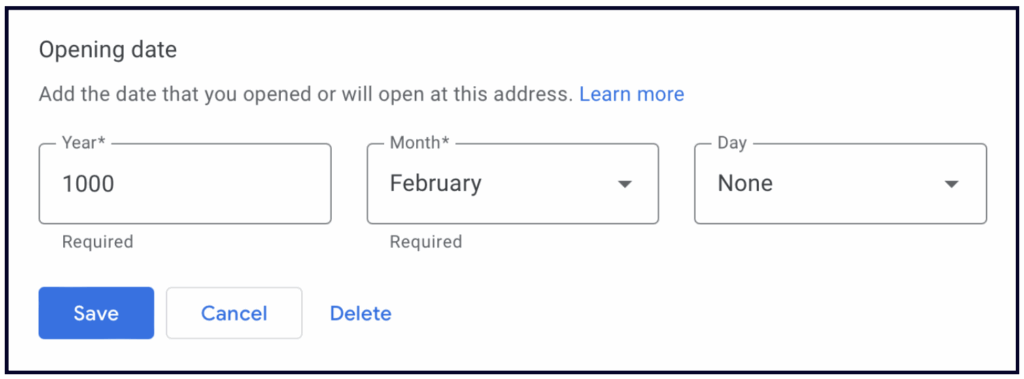
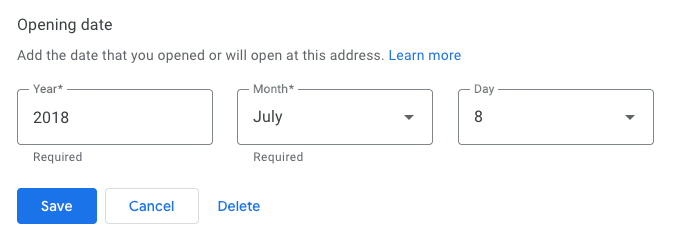
Opening Date
- Does not affect how many people find you
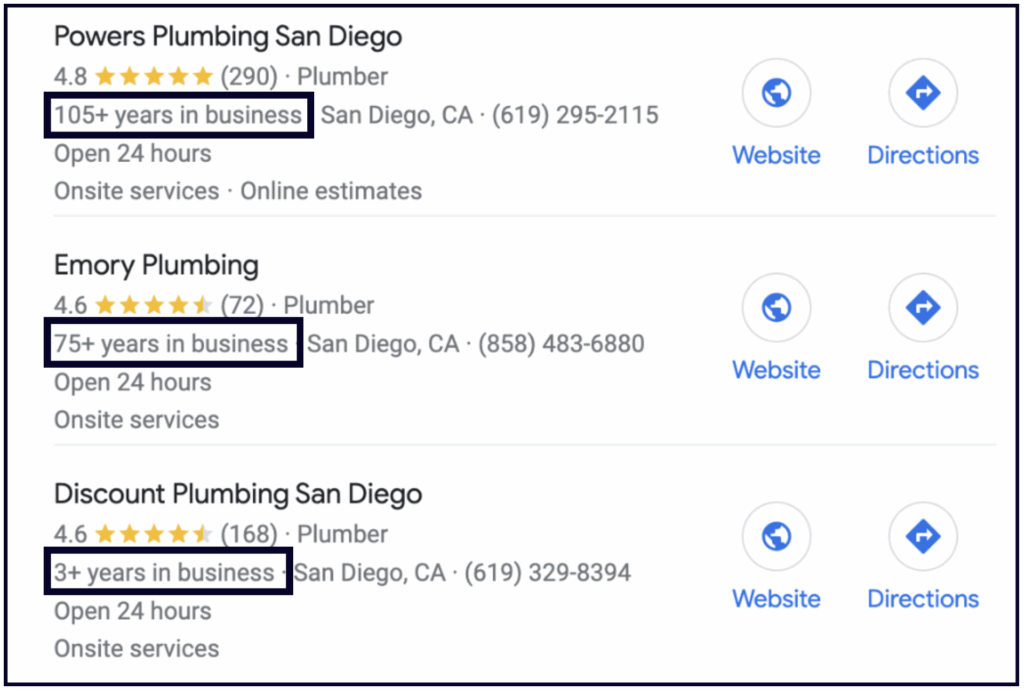
Add the year and month of your business's opening to help Google determine how long your business has been in operation.
If you have multiple locations, it's up to you whether you add the date your business started or the date you opened at that location. Keep in mind that Google often uses this information to display a note on your listing that says, "__ Years in Business" which can build trust with potential customers:
💡 Tip: you can create your Google Business listing before your official opening date, and there are multiple benefits of doing so.
Opening date
Use this field in Google Business Profile to establish credibility, showcase longevity, and inform customers about new, upcoming, or established locations. Google sometimes uses this data to display "years in business" labels on Search and Maps. You can set an opening date up to one year in the future, but it will not appear publicly until 90 days before that date – don't forget you'll need to verify the listing!
Phone Numbers
- Does not affect how many people find you
Add the phone numbers associated with your business here. List your primary number first, then add up to two secondary numbers (e.g. a toll-free number) in the fields below.
If you use a call-tracking number, list that number as your primary, and your actual business number as your secondary.

And no, before you ask, this will not cause a problem for your consistency across other online directories. Since you've put your business number as an additional number, all your listings on the web will stay connected to your listing correctly.
We strongly recommend using a call-tracking number, as the call data in your listing's Performance section only shows the number of people who tapped the "Call" icon on your listing on mobile. Desktop calls aren't captured. You can learn how to add call tracking numbers to your Google Business listing here.
Website field
- Helps more people find you
Where you link your listing to will depend on how many locations you have. We recommend that you link to your homepage if your business has up to 3 locations. Be sure that you equip your homepage with content that relates to your primary category, top keywords, and business. This can make a huge difference in your chances of showing up in the map results at the top of Google.
If your business has more than 4 locations, then you could consider creating individual location pages on your website.
💡 Tip: Don't forget to add a tracking tag to your website link to track traffic from your Google Business listing.
‼️Important note: Making changes to your listing's core information (name, category, address, phone number, and website) should be approached with caution, as they can sometimes lead to the listing being flagged by Google and unverified or suspended.
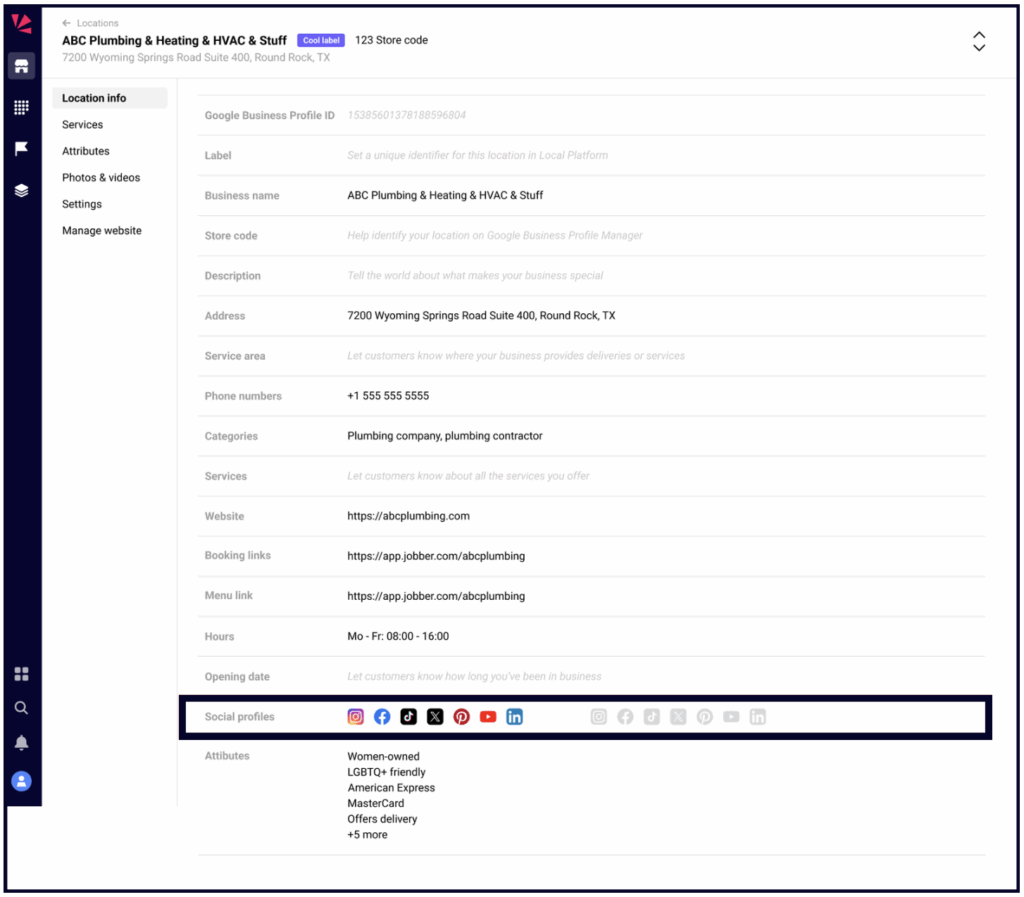
Social Profiles
- Does not affect how many people find you
Add all the social profiles you have. We haven't seen any research showing that these have any direct effect on how many people find your business, but the more information Google has about your business, the better.
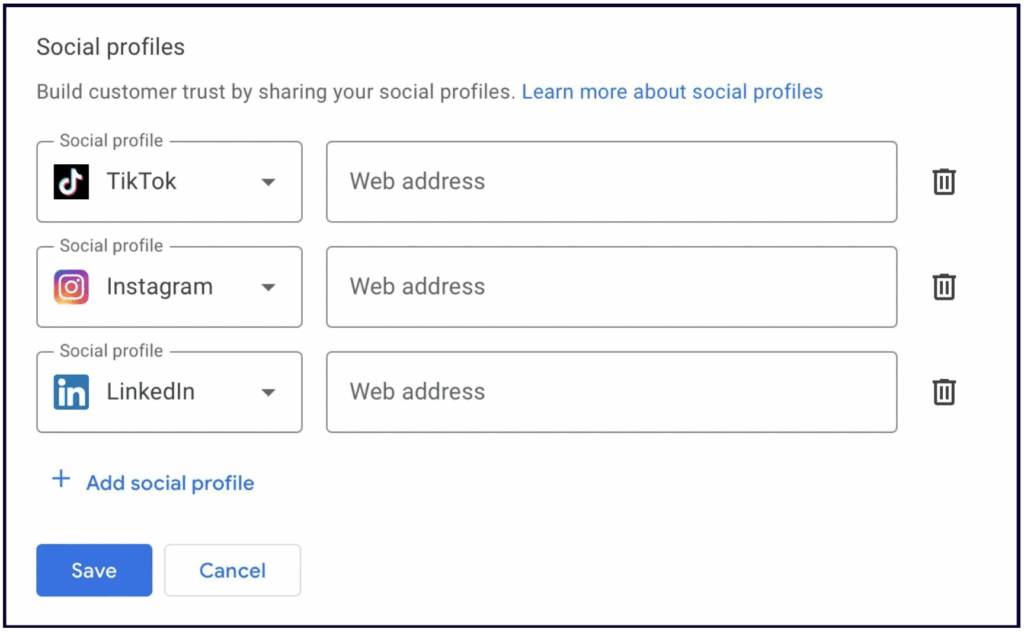
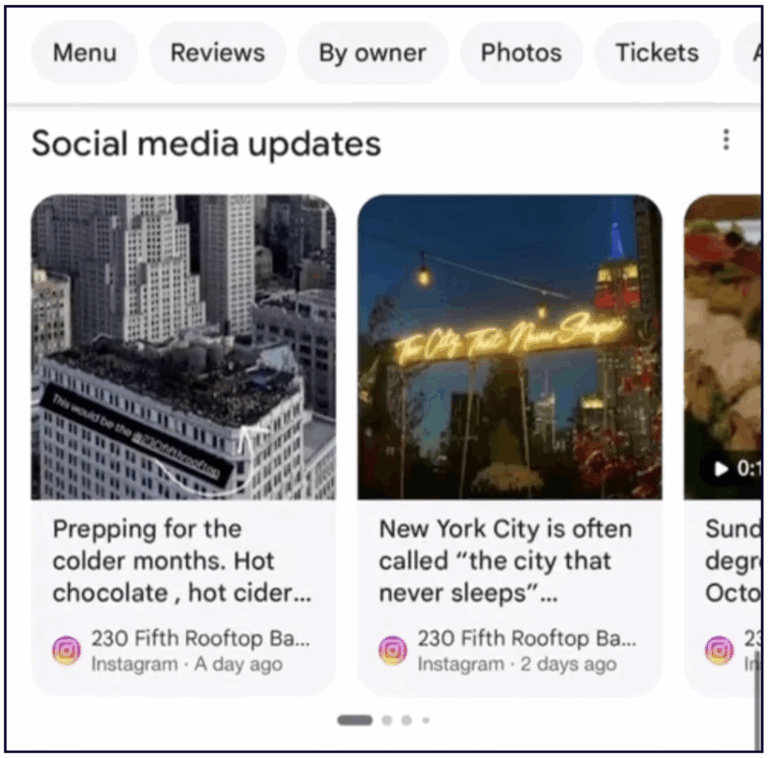
Plus, Google now sometimes displays your social media posts on your Google Business listing, so keep that in mind when you execute your social media strategy. We have some thoughts on this.
You can also manage these in Whitespark's Local Platform.
Business Address
- Helps more people find you
How you fill out your location information depends on the type of business you have. Below are instructions for physical location businesses and service area/hybrid businesses.
One of the most important things to remember about your address is that businesses that show their addresses on their Google Business listing must make IN PERSON contact with their customers at that location.
The location must have permanent signage, and the location cannot be a PO box or a virtual office. If you're using a co working space you'll need to have permanent signage and your own dedicated office at that location. The location will need to be staffed by your staff during the opening hours.
Physical Location Businesses
If customers can visit you in person, then you may make your address visible on the listing.
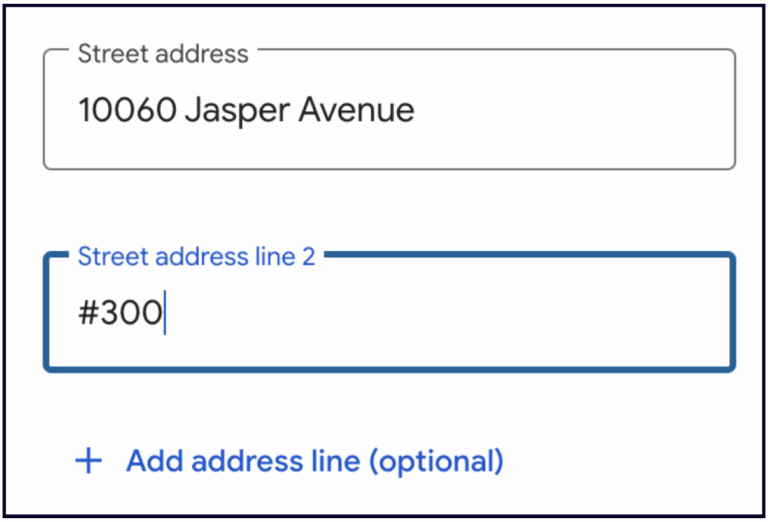
The current recommended best practice for suite numbers is to place them on the second address line and enter it like this: #300. Google ignores suite numbers for ranking and verification, but you should add suite numbers to help your customers find you easier.
Using the "located within" feature on your Google Business listing
"Located within" is not a feature that shows up in your dashboard. It is actually a Google Maps feature, and to access it you need to edit the information directly on the listing in Search or Google Maps via the "Suggest an edit" button:
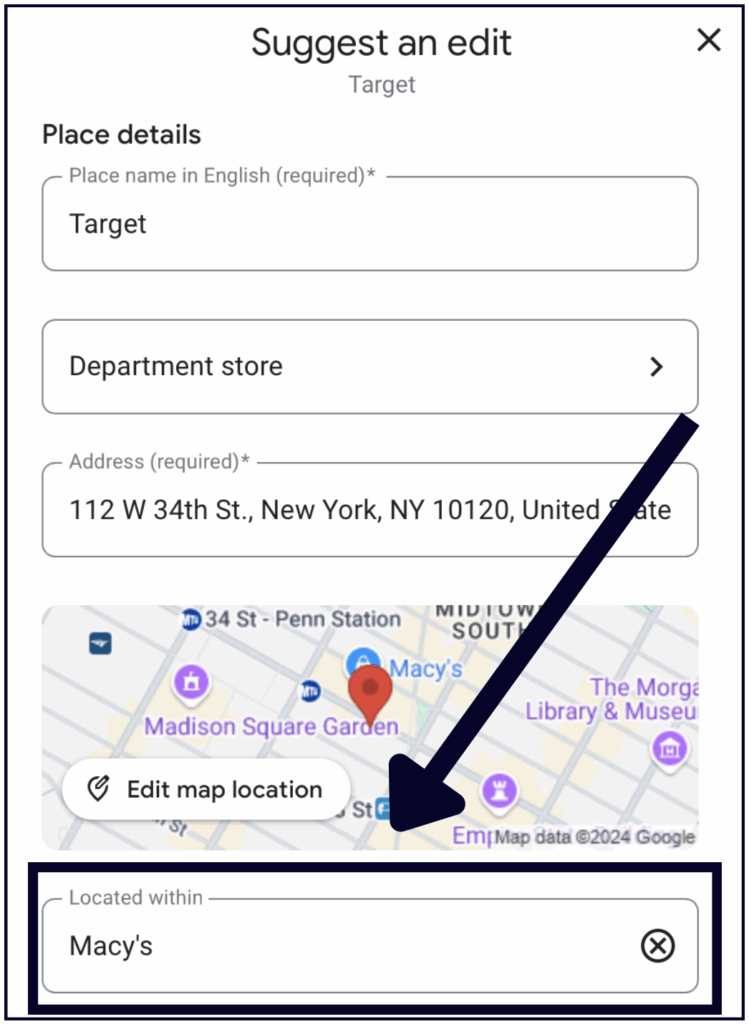
You will see the "Located within" feature for:
- Businesses that operate within a mall or office tower
- Companies with separate departments that operate as distinct entities within a business (e.g. a service department within an auto dealership)
- A business that shares/leases space within another business (e.g. kiosks inside brick-and-mortar locations)
Guidelines for using the Located In feature:
- You cannot use this feature to highlight a specific department/section within a store, for example the "Toy Department in Target".
- Each distinct business or entity has to have a different primary category from the main business or building that it is located in, and it needs to best represent what that entity does.
- Examples of acceptable distinct listings
- Costco Optical
- Walmart Auto Center
- Examples of unacceptable non-distinct profiles:
- The Apple products section of Best Buy
- The hot food bar inside the Whole Foods Market
- Examples of acceptable distinct listings
If you're located in another building or business and you think this feature would benefit both your business and searchers, you should add it to your listing via the Suggest an Edit button, as shown above.
You can also use Suggest-an-Edit to remove the Located In feature from your listing if Google Maps is incorrectly displaying your business within another location. If your edit is not approved, you can take it a step further and contact business support.
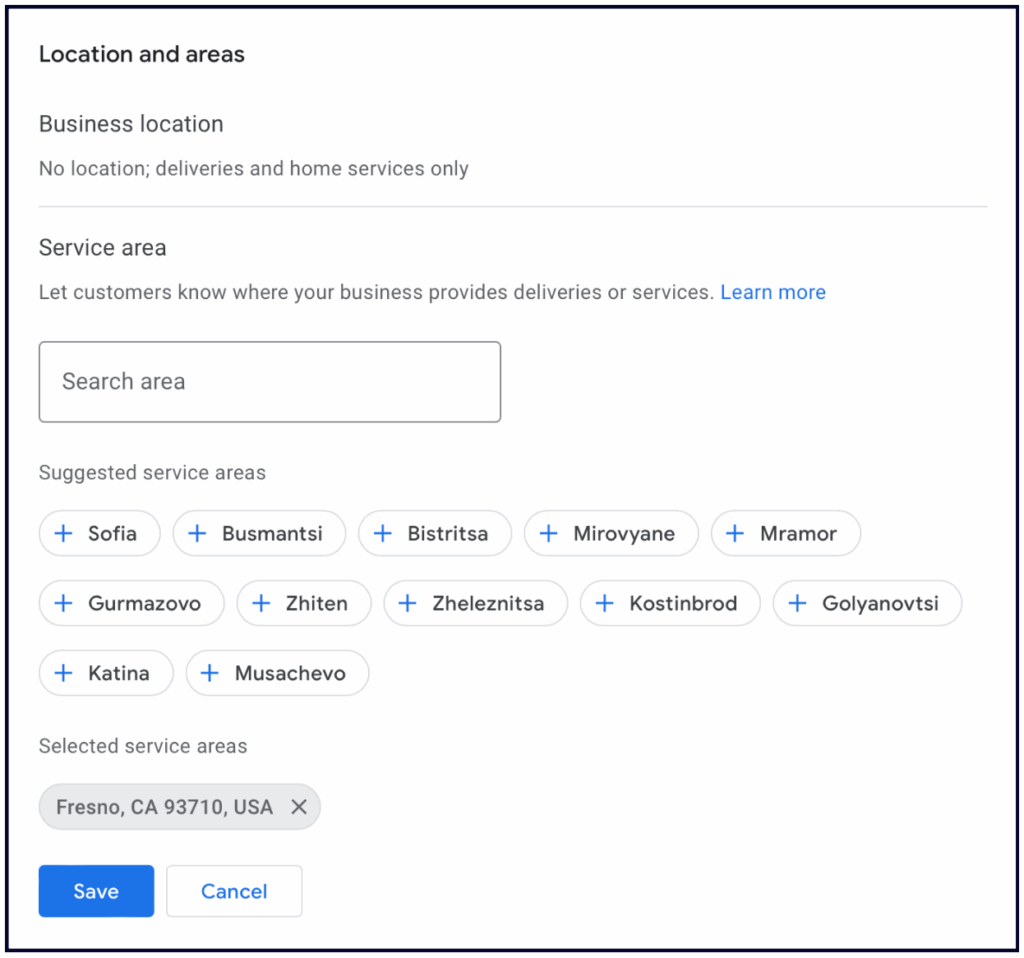
Service Area Businesses or Hybrid Businesses
If customers do not come to you, then you should define a service area based on the regions, cities, Zip/Postal Codes, or districts that your business serves. When updating your business information, you have the option of entering your address, service area, or both.
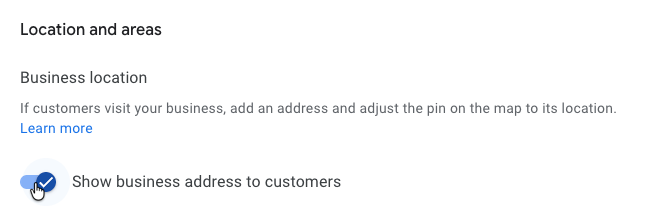
- Service Area Businesses – If you don't serve customers at your business address you'll need to hide your address using this toggle (see note below about service areas).
- Hybrid Businesses – If you serve customers at your business address and you travel to visit or deliver your goods or services to customers, then you can show your storefront address, set specific hours for your store, and define your service areas.
Your business can set a maximum of 20 service areas and should be no farther than up to 2 hours of driving time from your base of operations.
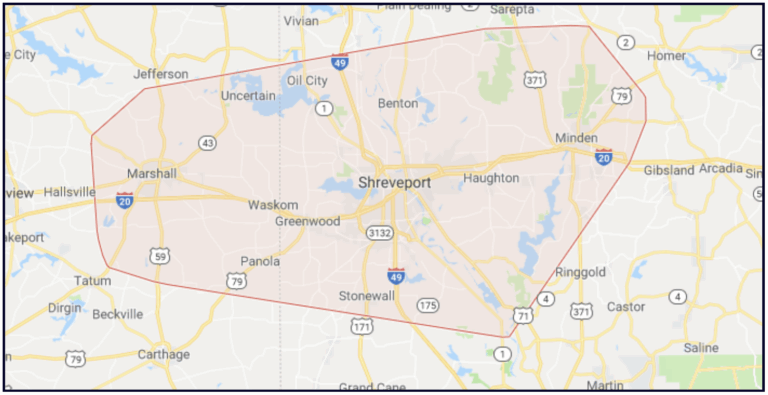
‼️ Important note: Service Areas do NOT affect how many people find your listing. If you tell Google the areas you serve, this will draw a red outline on the map Google displays with your business, but it will have no effect on whether you show up in those areas. Google's local results are based around the address you verified your business at.
This is stupid, I know. Sorry, I don't make the rules, Google does.
Opening Hours
- Helps more people find you
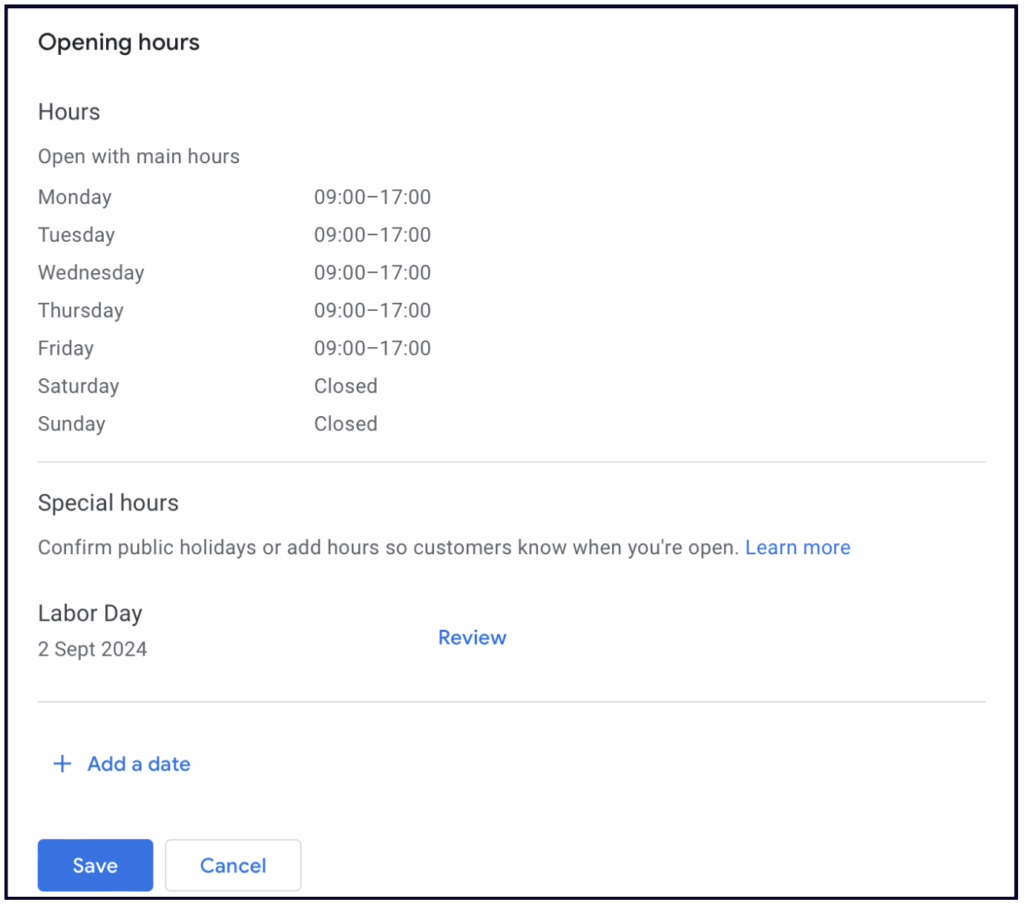
Add your regular business hours and use the Special Hours feature for holiday hours or irregular/one-off changes in business hours for team days, events, etc. It's important to keep your hours updated, as incorrect hours can result in bad reviews from customers who drove all the way to your business only to realise that you're closed.
It's also essential to know that keeping your hours accurate affects how often your listing is shown. Google shows businesses that are currently open more than those that are closed. So, if your business closes at 6pm and usually shows up alongside John's business, but John's business is open 24/7, then John's listing may appear more often than yours from 6pm until you open the next day.
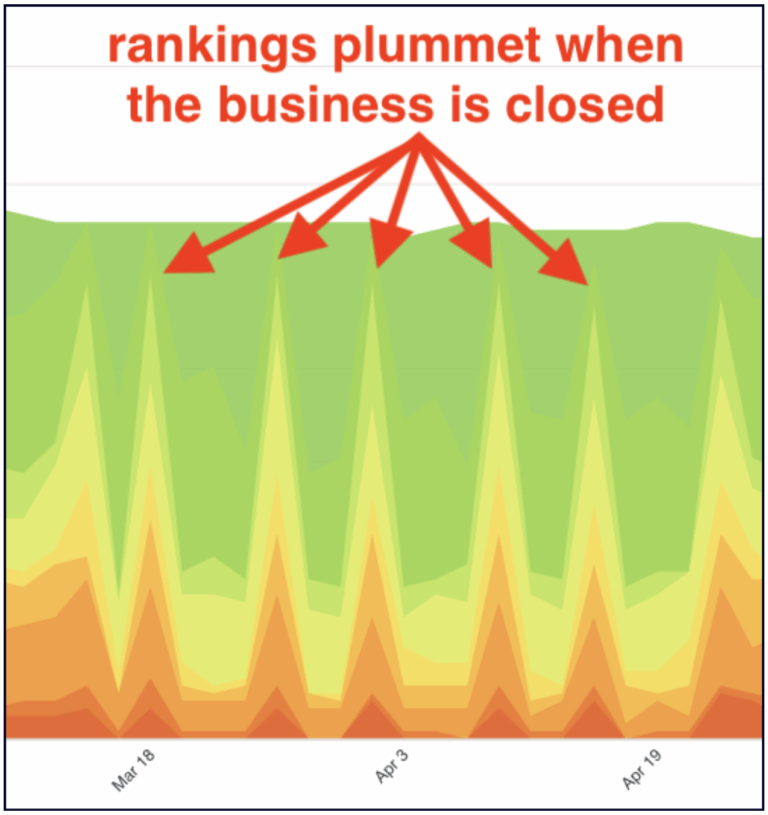
The red and orange spikes represent this business's drops in visibility on the days when they are closed (Screenshot from theWhitespark Local Rank Tracker)
Knowing this, you might be tempted to set your hours to "Open 24/7" — this works just fine if customers can come in 24 hours a day, or, in the case of Service Area and appointment-only businesses, if someone is there to answer the phone 24/7.
However, if you change your hours, but you are not actually open (or you don't answer the phone) 24/7, you are risking doing more harm than good to your business. You might frustrate customers who call your business or show up at your door when you're actually closed, which could lead to negative reviews.
It may not make sense to set your hours to 24 hours, but you could consider extending your hours. If most of your competition closes at 5pm and you're open until 7pm, then Google will show your listing to more people during those extra two hours, and more people will end up contacting your business during that time frame.
💡Tip: Don't forget to adjust your tracking software to check your listing's performance during your opening hours if you want to get a true sense of how you're doing.
If you're considering getting a rank tracker, the Whitespark Local Rank Tracker is perfect for this: You can specify the time that you want it to check your listing, which allows you to precisely track your performance during open hours and understand how you compare to the competition.
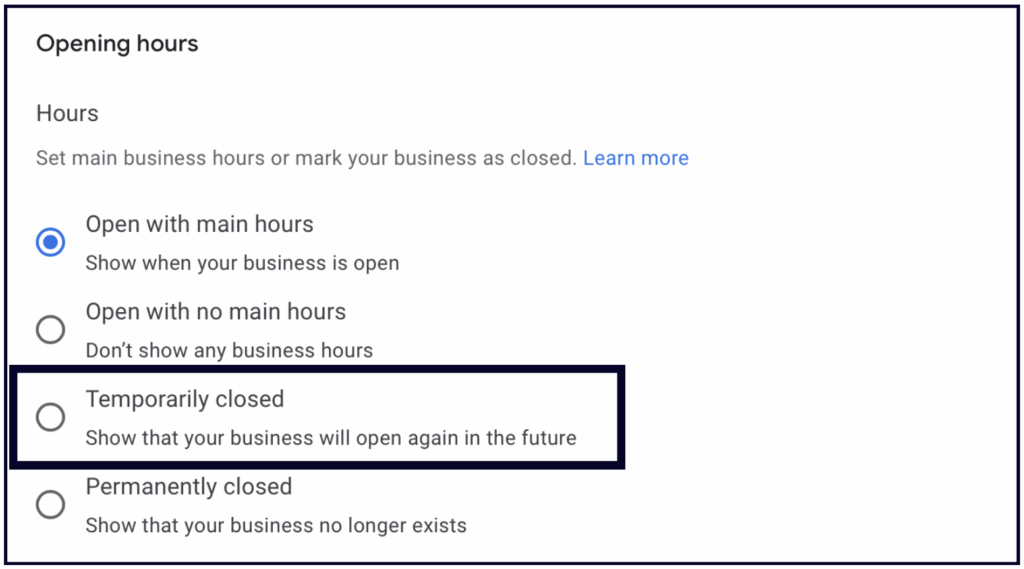
Temporarily closed
In the Opening Hours section, you will see the option to mark your business as "Temporarily closed". Only use this option if you are actually temporarily closed, as it will stop your listing from appearing in Google's local search results until you change it.
💡 Opening a new business soon?
Business owners often build buzz on social media before opening their business, but they forget about Google, which is a big mistake because when potential customers Google your new business, they should find information about it on Google.
Your Google Business listing has a ton of features to help you build buzz and excitement about your soon-to-open business, so we advise you to create it 90 days before you open your doors.
Here's what you need to do:
- Create a Google Business listing for your new business.
- When asked to verify, choose "Verify later".
- Edit the listing and set an official grand opening date.
- Create Google Posts with information about your business promoting the grand opening.
- Add photos and videos.
- Fill out your Google Business listing completely: add business hours, social links, etc. Basically, fill out every section — sorted!
If you do all of this before you open, you'll hit the ground running from day one. You'll be ready to welcome customers from the moment you open your doors.
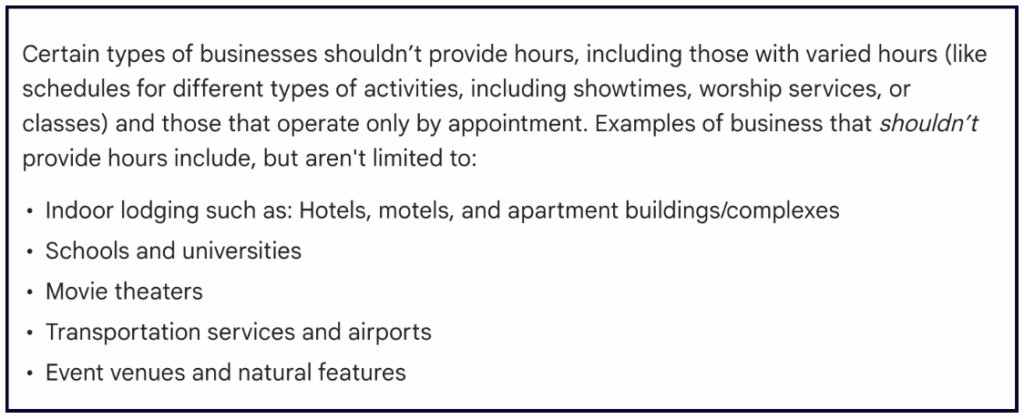
Hours For Appointment-Only Businesses
Right now there is no feature available for appointment-only businesses. If you don't run regular hours at your location, or if someone can't just come visit at a specific set time Google's official stance is that you should leave the hours section blank:
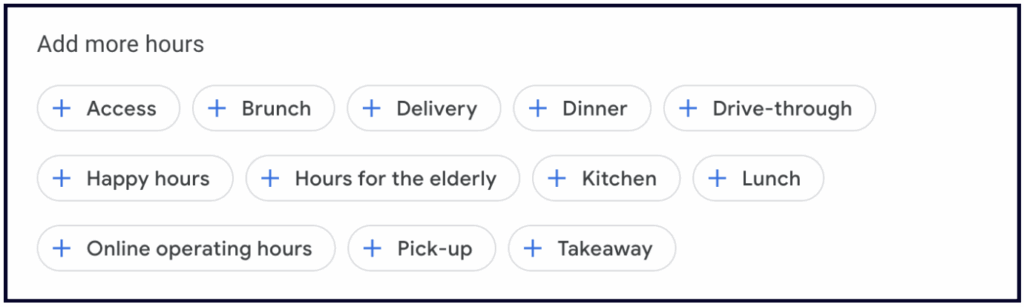
More Hours
The more hours feature allows you to post special hours for specific services to your business profile, such as senior hours, pickup, delivery, drive-through, or online service hours. You can only add more hours when your regular hours are filled in. This is also a category-dependent feature.
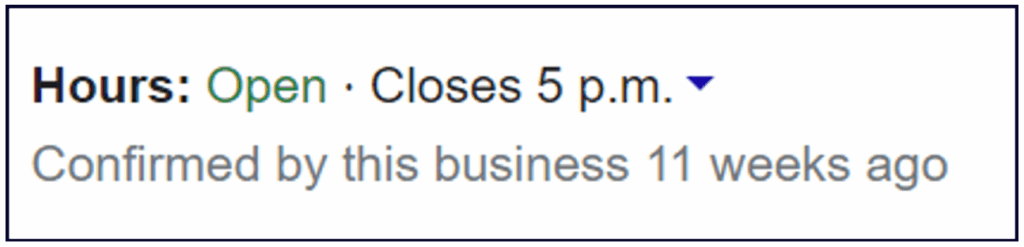
Google has also added a "confirmed by _____" label to some listings where they are verifying the published business information.
Seasonal hours
If you run a seasonal business (such as AC Repair), then we recommend that you mark your business as temporarily closed during your off season.
💡Tip: If you have a service area business, mark your business as open 1 month prior to the start of the season and set your hours according to when you answer the phone. This way, you can get your calendar booked prior to the start of the season.
✍️ Note: If your business is Brick and Mortar, then your hours must represent the times when your location serves customers in person.

Whitespark provides powerful software and expert services to help businesses and agencies drive more leads through local search.
Founded in 2005 in Edmonton, Alberta, Canada, we initially offered web design and SEO services to local businesses. While we still work closely with many clients locally, we have successfully grown over the past 20 years to support over 100,000 enterprises, agencies, and small businesses globally with our cutting-edge software and services.
WHITESPARK
DARREN SHAW
Never miss a beat
Join our list and get our best local SEO research and advice in your inbox.
Local SEO software
- Local Platform
- ↳ GBP Website Builder
- Local Ranking Grids
- Local Rank Tracker
- Local Citation Finder
- Reputation Builder
- BrightLocal alternative
Listings & SEO services
- SEO Services
- Listings Service
- GBP Reinstatement Service
- Citation building
- Yext Replacement Service
- Data Aggregator Service
- Enterprise Services
Free tools & resources
- Review Checker
- Google Review Link Generator
- Free Local Ranking Checker
- Whitespark blog
- Top local citation sources
- Acceptable NAP variations
- Hidden address citation sites
Company
Contact us
© 2026 Whitespark Inc.
|
Made with ❤️ in Canada
|
Chapter 4: Categories
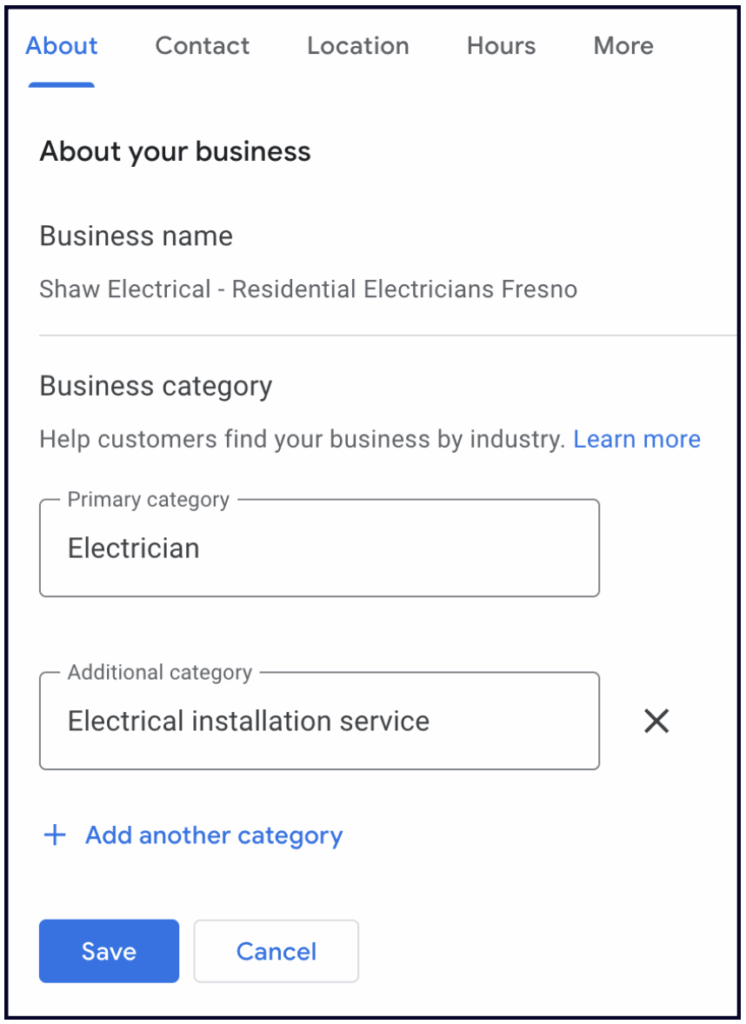
Choose your primary category carefully
Your primary category tells Google and its users what your business does (Law Firm, Dentist, Plumber, Hair Salon, etc). It is also the single most important thing Google looks at when deciding which businesses to show in the map results:
When someone searches for a specific business type, Google tries to return the businesses that have explicitly stated that they are that business type.
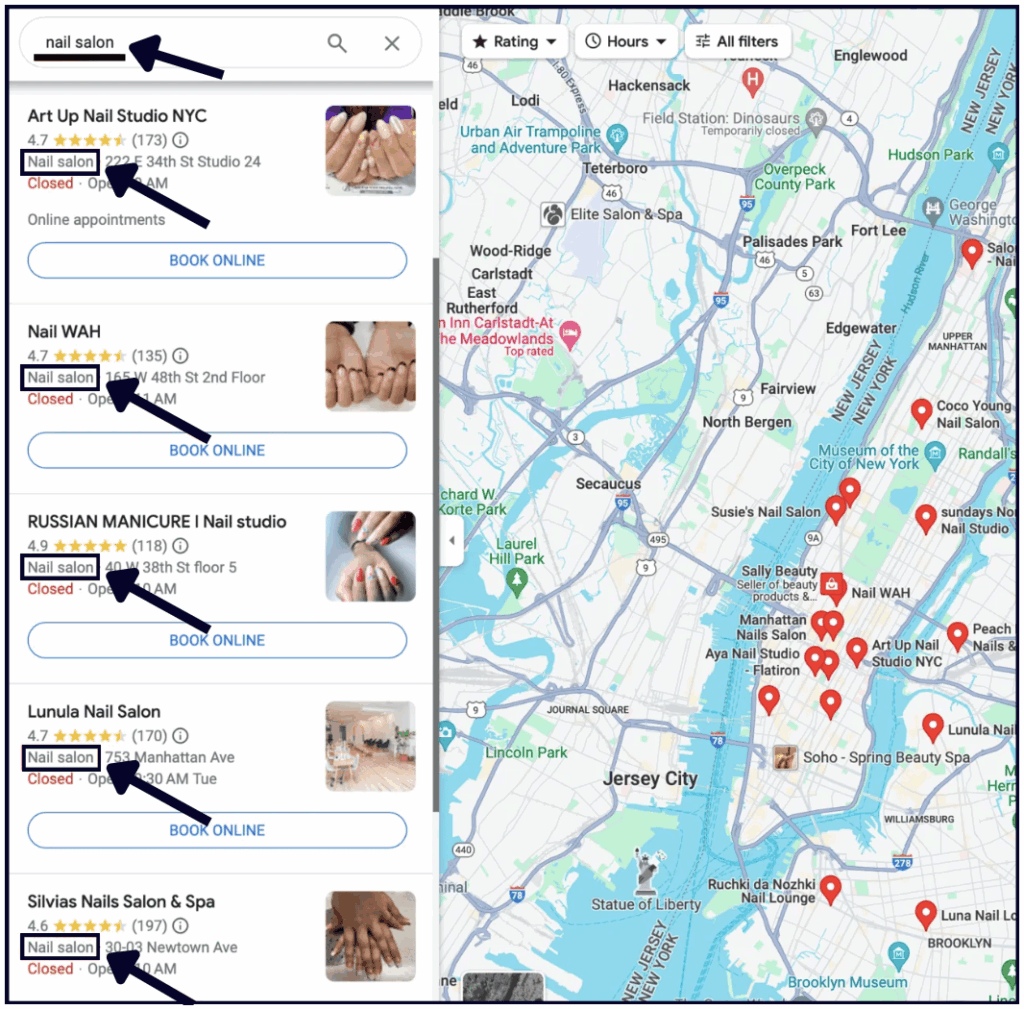
This is why it is critical that you select the primary category that most closely matches what your customers actually search for. For example, if you have a law firm, don’t make your primary category law firm. Instead, select a primary category that reflects the type of legal cases you specialize in (i.e. injury lawyer or divorce attorney).
🔥Pro tip: Change your primary category seasonally, especially if your business offers different products or services in the summer vs. winter.
For example: If you have an HVAC business, you can set your primary category to “Air conditioning contractor” in the summer, and “Heating contractor” in the winter. Another common example of this is lawn care in the summer and snow removal in the winter.
Add additional categories
You can add up to 9 additional categories to help more people find your listing on Google. Adding additional categories is one of the top things Google looks at when deciding which businesses to show — it's like telling Google: “Please show my listing for this type of search, too”.
🔥Pro tip: If you are wondering what additional categories to add, use this awesome report in the Whitespark Local Rank Tracker which will give you a detailed breakdown of all the categories your competitors are using.
It’s good practice to check for new categories every 6 months, since Google updates them frequently. Our SEO Services team uses Pleper’s tool to monitor for new categories we can add to our clients’ Google listings.
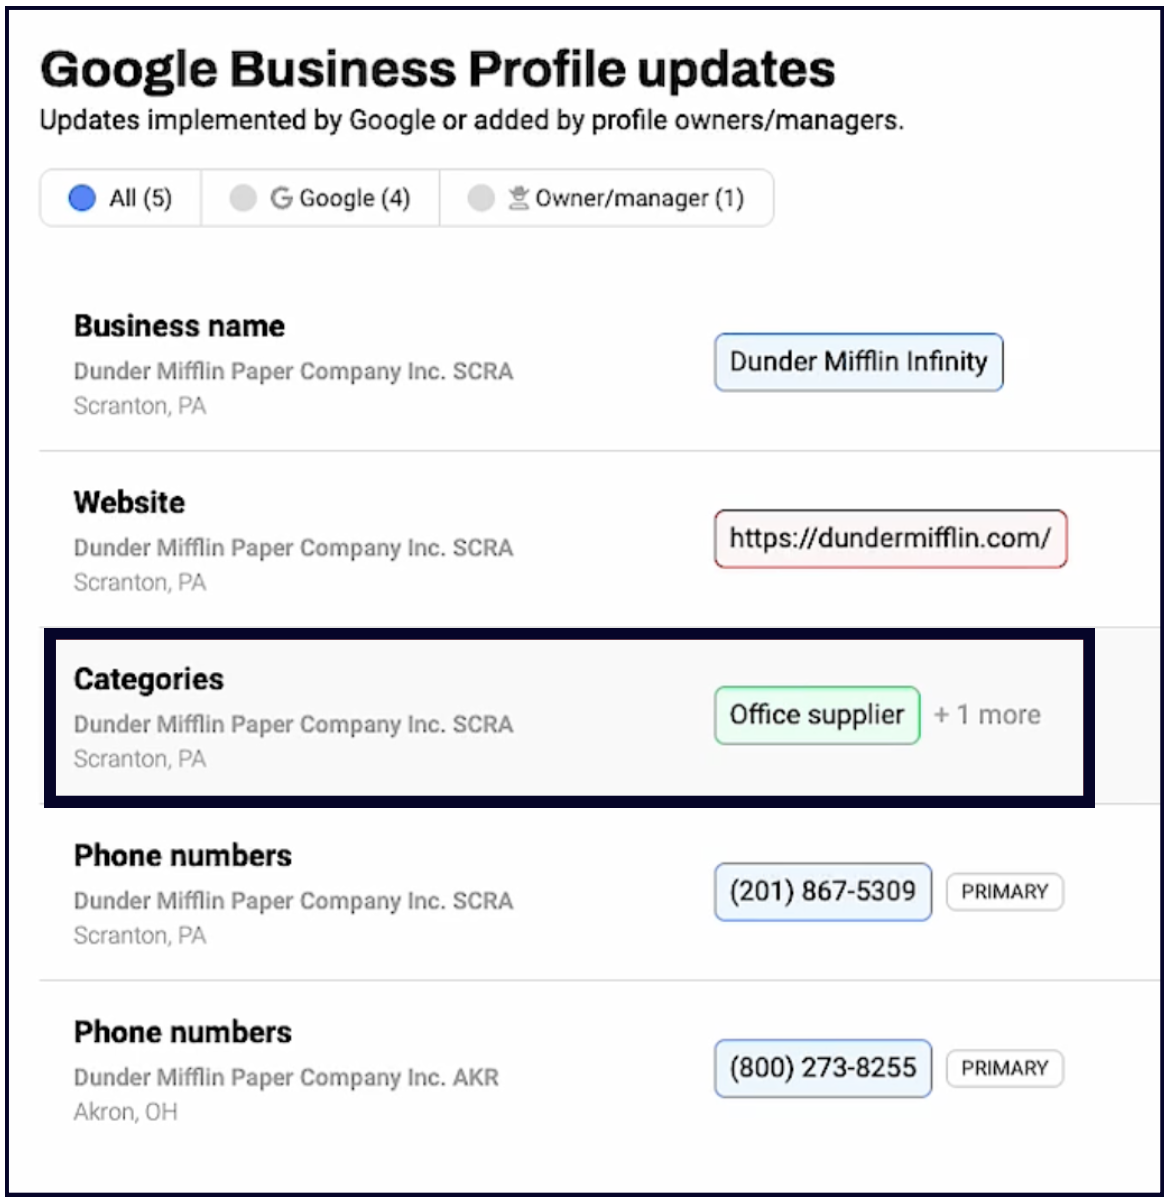
✍️ Note: The categories you add will indicate the services you can list on your Profile. This is yet another reason to add as many additional categories as you can. You can use our $1/mo Local Platform software to track any new categories that Google adds to your Profile:
Chapter 5: Services
Why should you add services to your Profile?
There are two major reasons to add services to your Google Business listing.
1. Will it help more people find you?
For the longest time, the Services section of the Google Business Profile had absolutely no effect on how many people Google showed it to. However, that changed in 2023 when Joy Hawkins published a very compelling article about Predefined Services — the services that Google suggests you add to your listing — and how they might actually help you get found.
We even conducted our own tests just to make sure:
The bottom line:
- Services can definitely help your listing show up for more searches, especially for specific, less common searches like "emergency boiler repair near me".
- Both pre-defined services (the ones Google suggests for your listing) and custom services seem to help you get found. Predefined services may carry more weight, but experts are still testing to learn more.
2. Conversion value
The Services feature can enhance your listing with rich details and information about your services that the business description doesn't allow for. It's a cracking way to inform customers about the services you provide and it's easier to read at a glance.
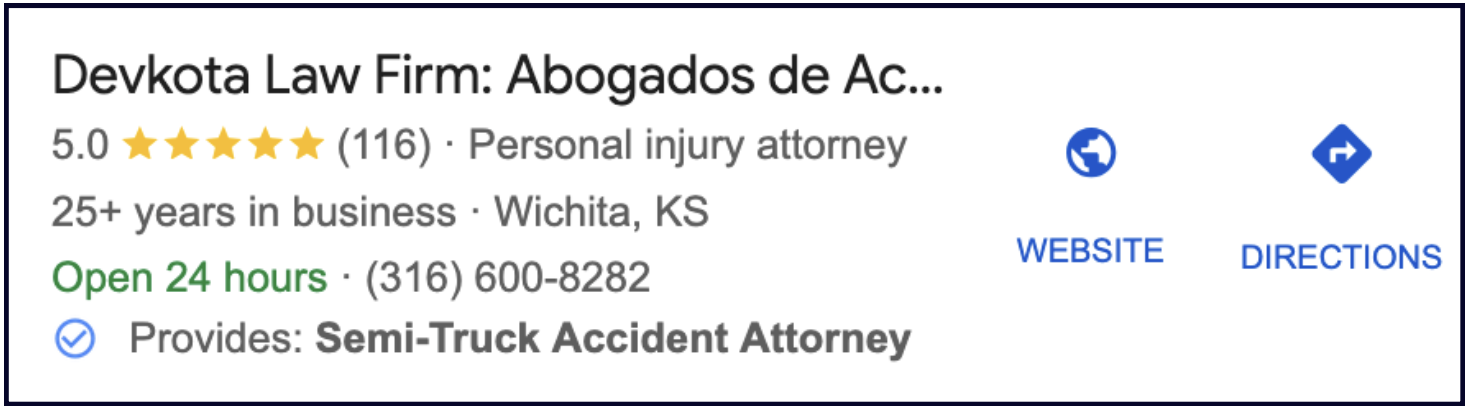
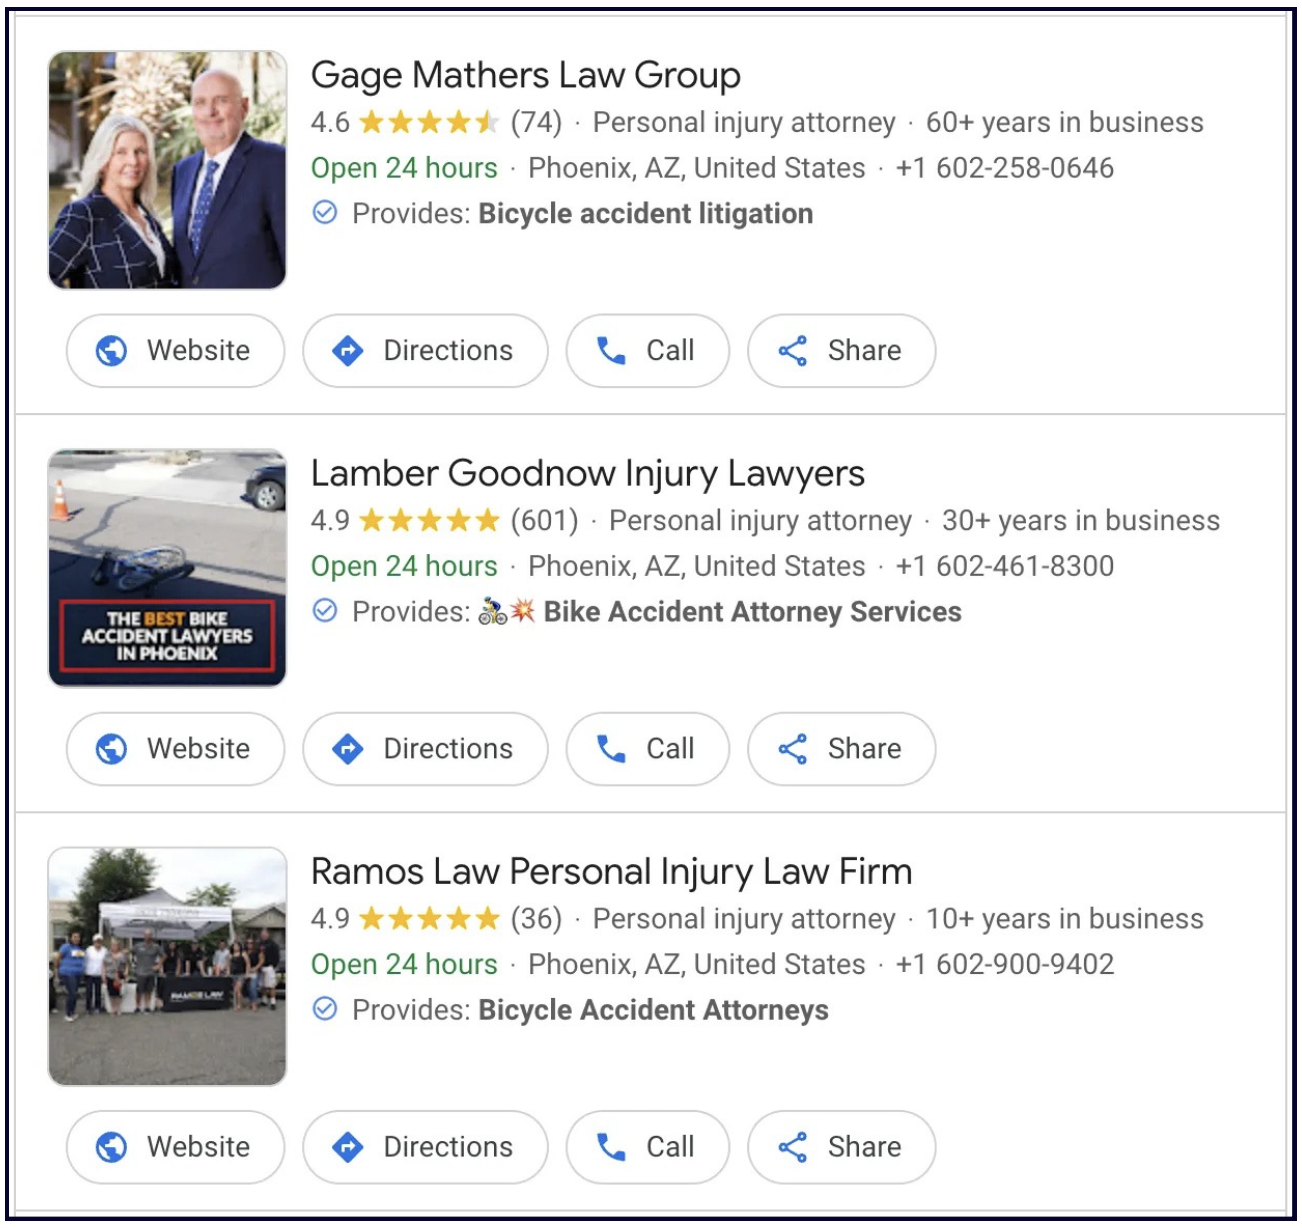
Another cool thing about Services is that they trigger "Provides" justifications in the search results.
When someone looks up "car accident attorney", the businesses who have listed this term as a service on their Google Business listing will get a highlighted label in the results saying "Provides: Car accident attorney", which is brilliant for two reasons:
- It makes the listing stand out immediately
- It shows the searcher that this business provides exactly what they are looking for
How to add services to your listing
You can add and edit your services via your Google Business dashboard.
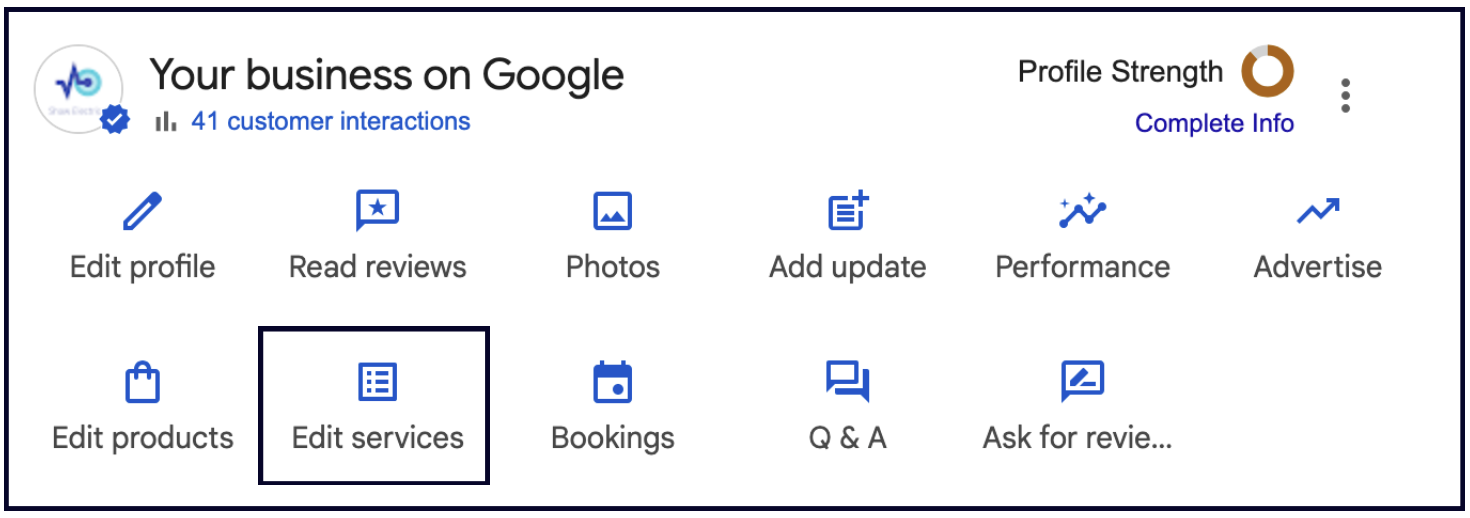
When you click the "Edit services" button, you will see that services are grouped by category.
💡Tip: This is another reason why adding all the additional categories that are relevant to your business (and watching out for new categories every month) is important. The more categories you have, the more predefined services Google will suggest for your listing, which means more chances to show up in front of the right customers.
To add a predefined service, click "add more services" under one of your categories and see what Google has suggested for your business:

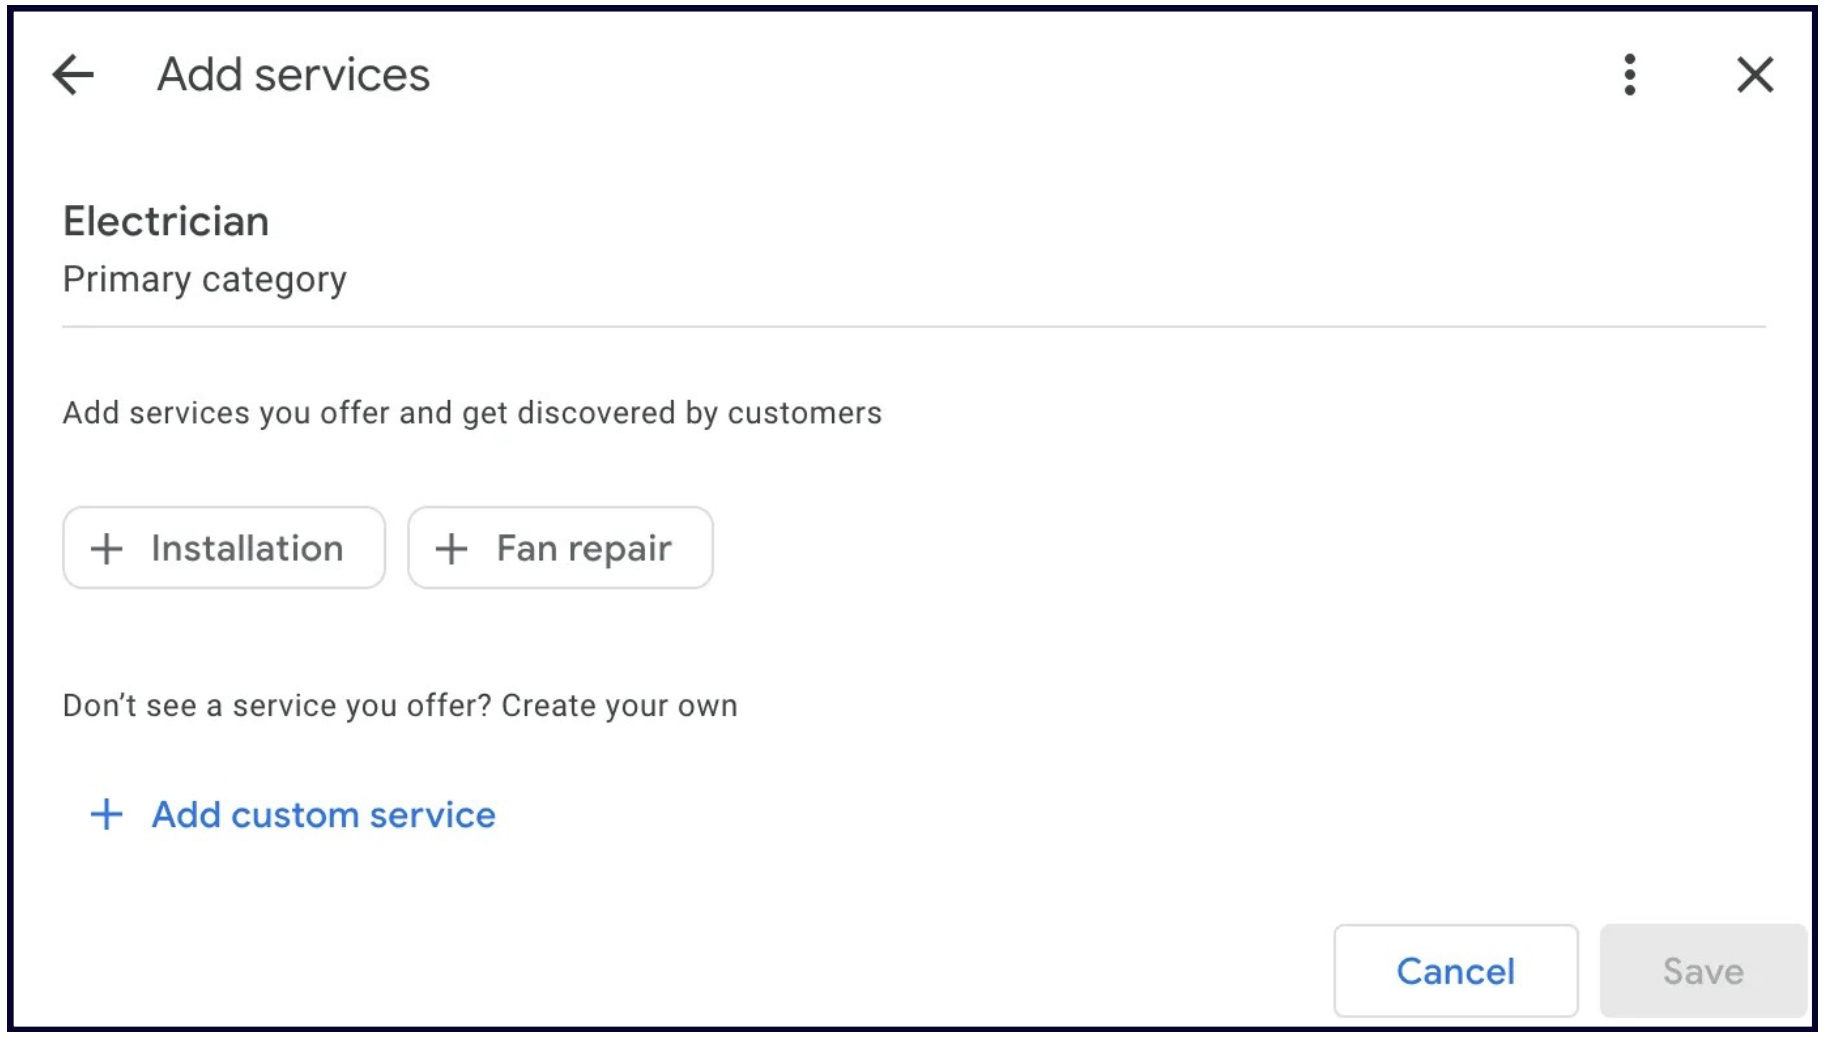
Then, select the services that your business offers and click Save. If you offer a service, but you don't see it in the list Google provides, just click "Add custom service" at the bottom and enter it yourself.
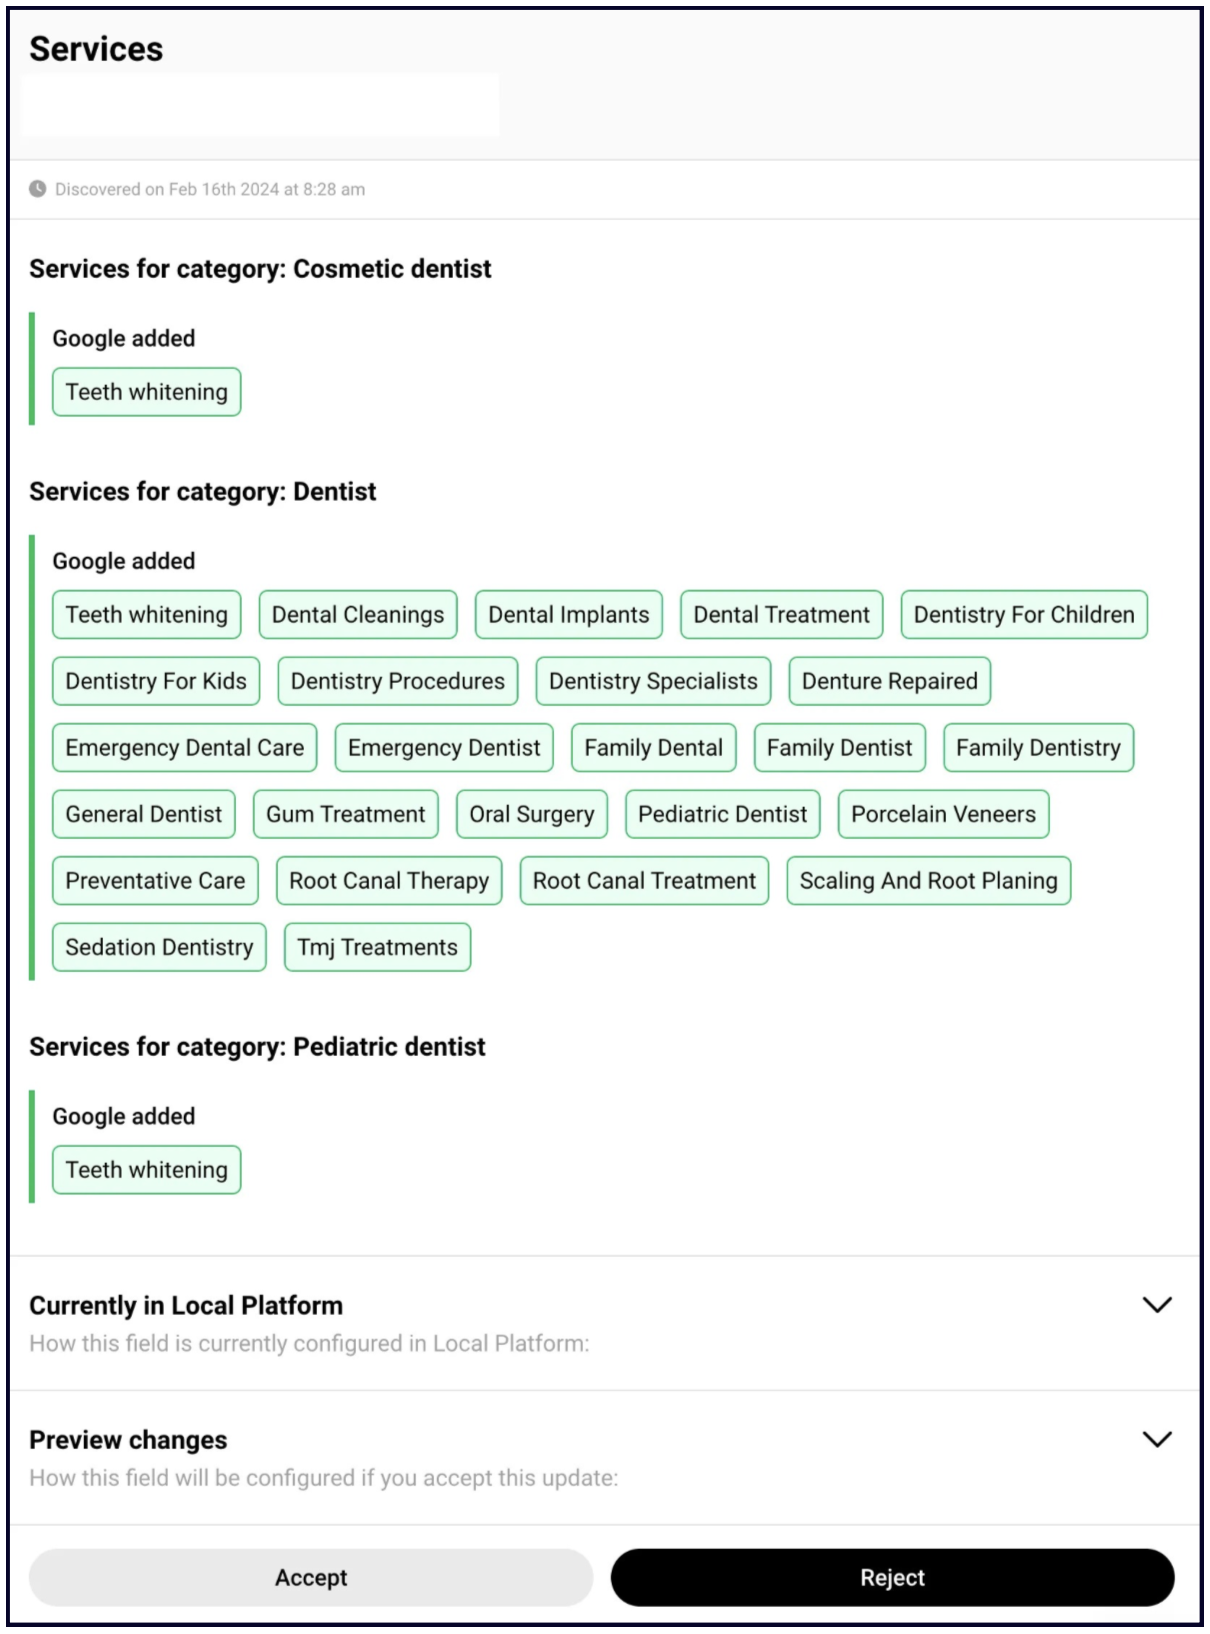
✍️ Note: It's important to check for new predefined services on your listing consistently. Google sometimes adds services to listings without asking the business owner for approval or even notifying them.
This is actually one of the reasons we developed our Local Platform software. It keeps an eye on your listing for unexpected changes — whether made by Google, a shady competitor, or someone else managing your listing — flags them for your review, and gives you the option to accept or reject those changes. And only costs $1/mo — check it out here!
Once you've added all your services, you can go back to your services list and click on each service to edit it. You can:
- Change the name of the service (if it's a custom service, not a predefined one)
- Add a description of the service (this is important and we speak more on it below)
- Include price (or price range) of the service
- Delete the service
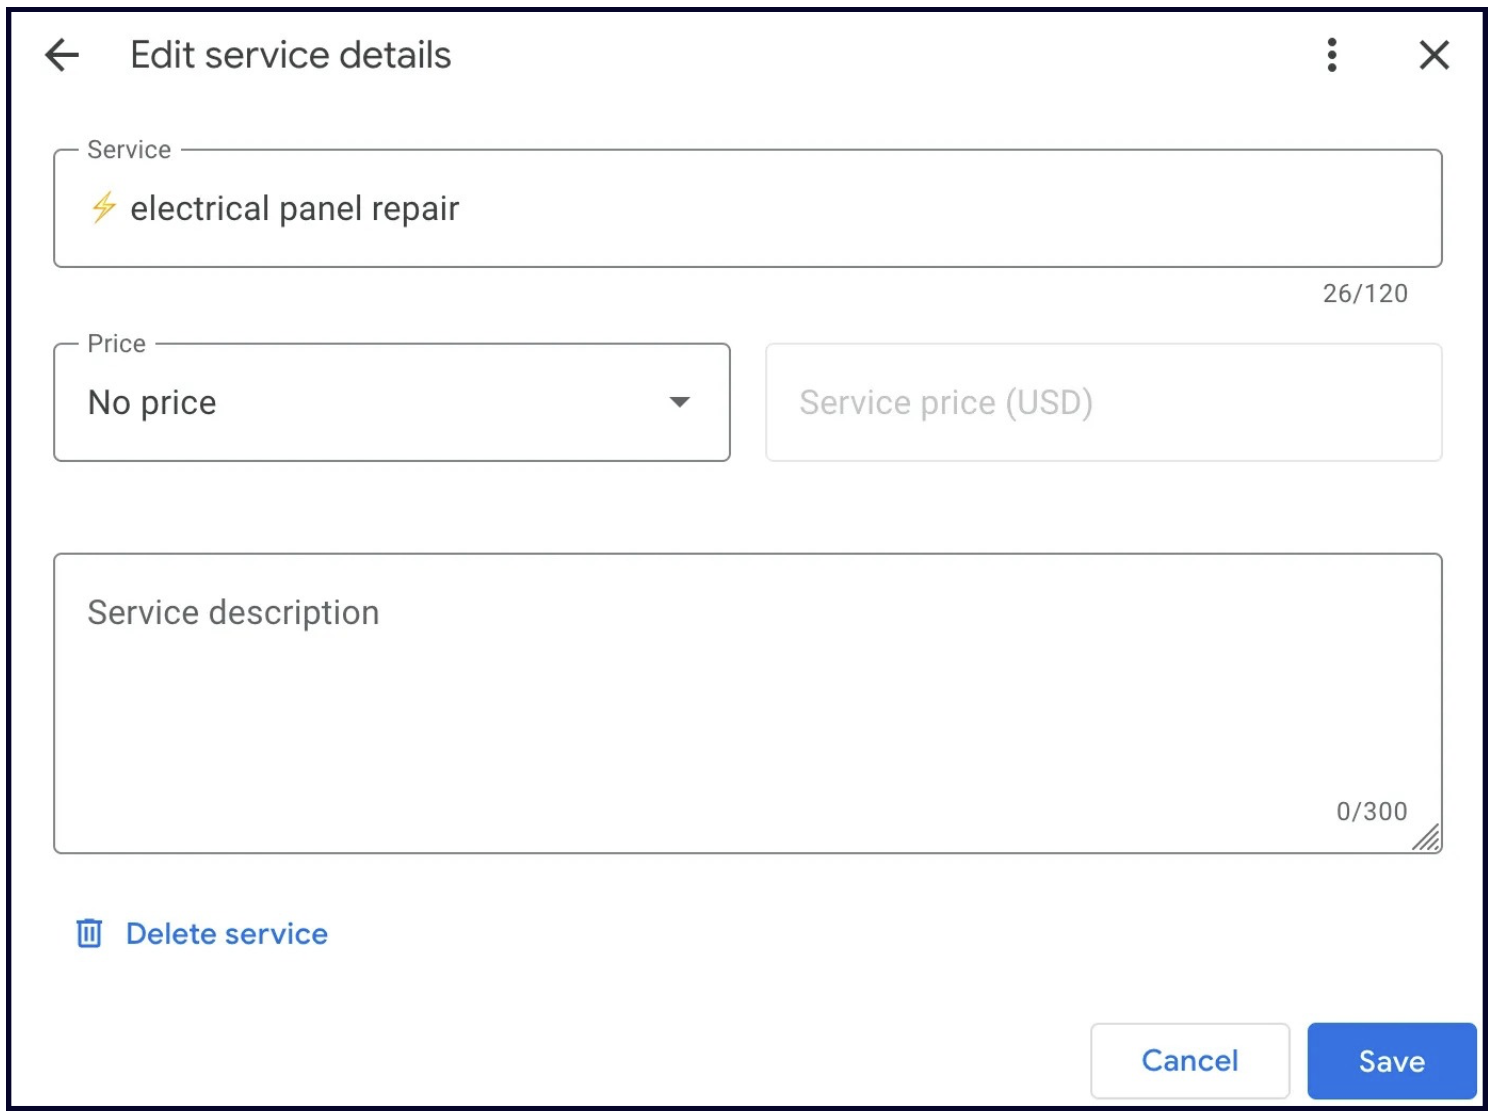
We recommend you add as much information as you can for every service you offer — the more detail you give, the more likely someone searching for that service is to contact you.
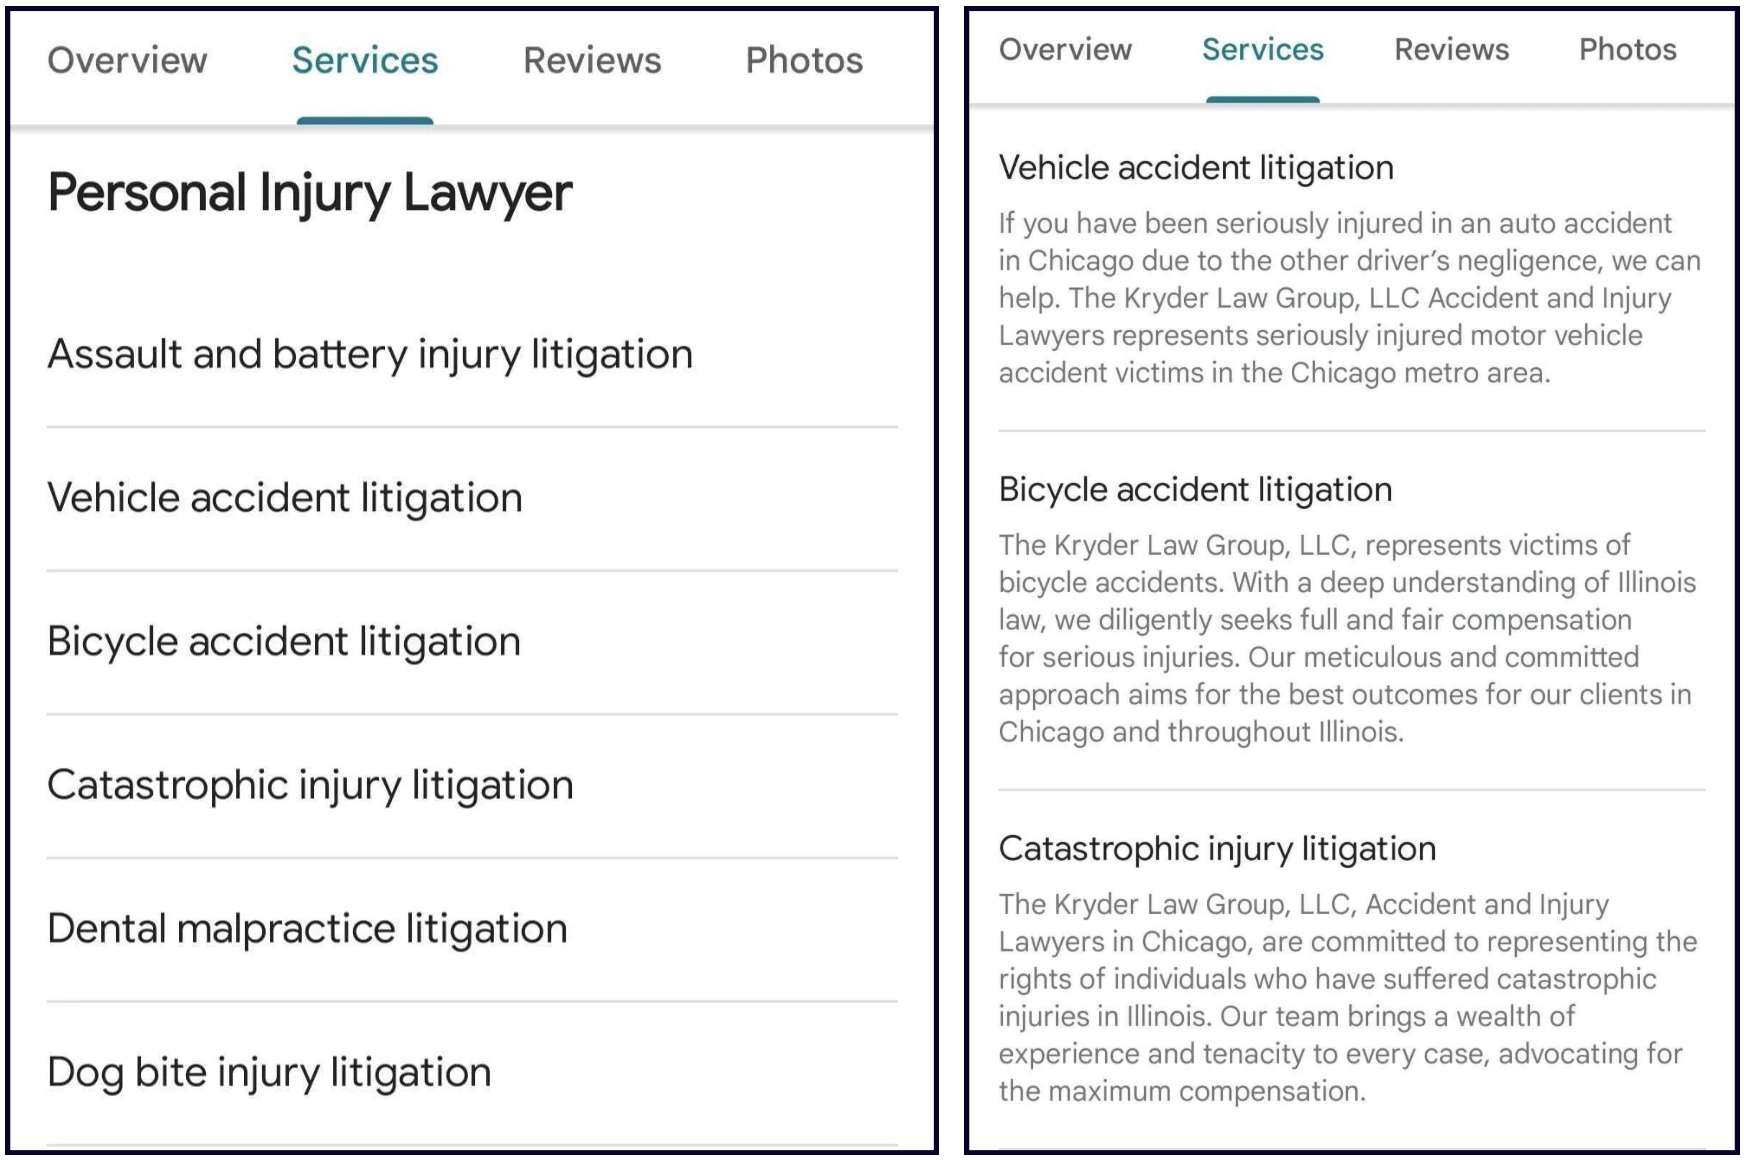
Don't forget to write descriptions for your Services
Here's the deal: Most of your competitors aren't adding descriptions to their services, so this is your chance to make your listing stand out. By adding descriptions, you're not just listing your services — you're selling them.
Think of each description as an additional advertisement or sales pitch for your business. Highlight why customers should choose your service over the competition. What sets you apart? What makes your service the best option?
Just compare the services section of a business not adding descriptions with one that is:
💡Bonus tip: Put emojis in the titles of the services to make them stand out even more 😉
Chapter 6: Products
There are two ways to add Products to your Google Business listing, and each one comes with a different set of pros and cons. Let's go over both of them.
You can find all of Google's details of this feature here. As Google outlines – 'Product Editor' is essentially for businesses that sell products that have bar codes. However, service based businesses have used Product Editor to showcase their services for a good while – this may or may not continue to work in the future.
1. The way that helps customers find your products on Google
Similarly to attributes, your Google Business listing's Products section can help your customers discover what you sell under specific conditions.
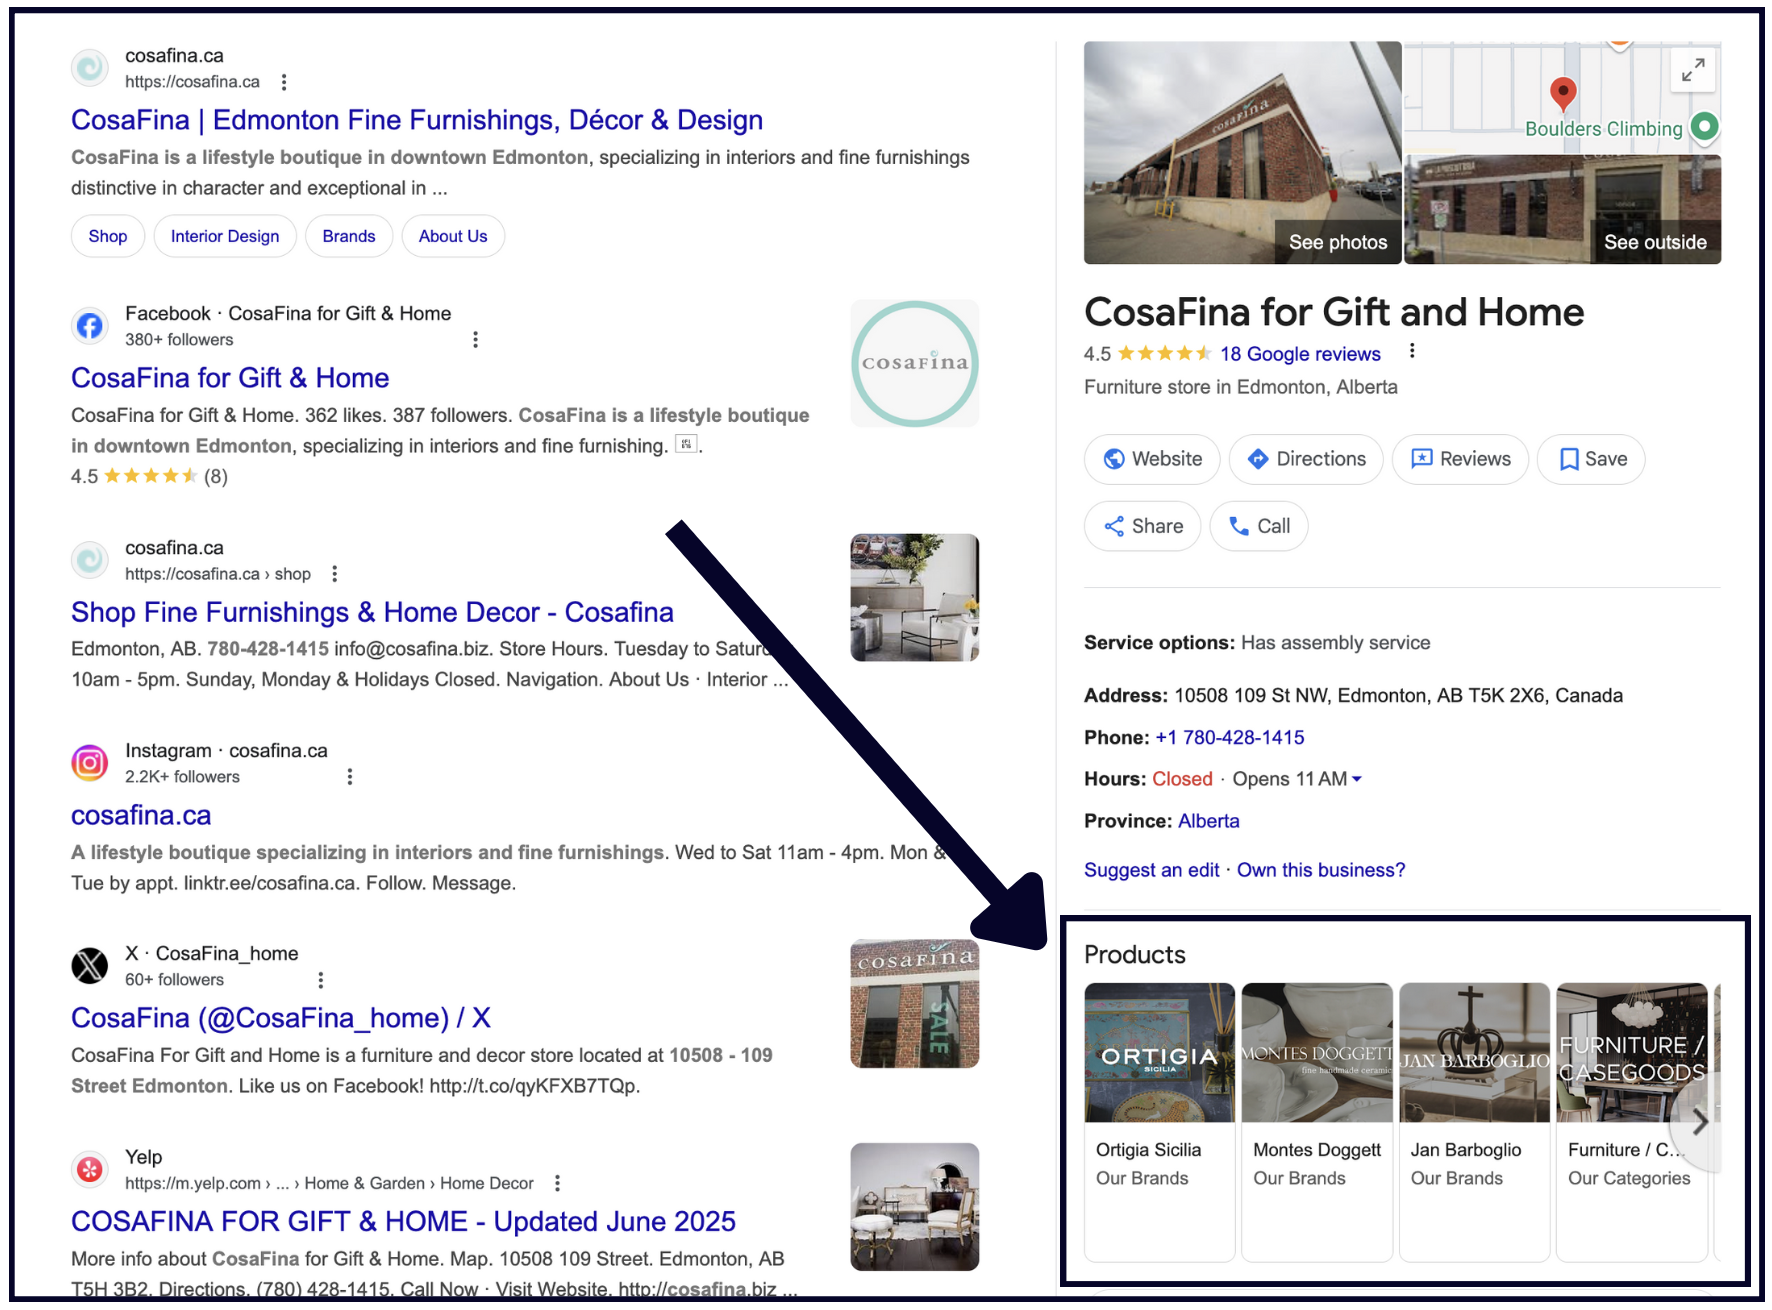
When someone searches for a product, Google will return businesses that sell that product in the local results. Back in 2022, Mike Blumenthal confirmed that Google had increased the visibility of Products in the map results at the top of Google, as well as the visibility of the businesses that have the products people are searching for.
However, your products will only show up in Google product searches if you have set up Merchant Center.
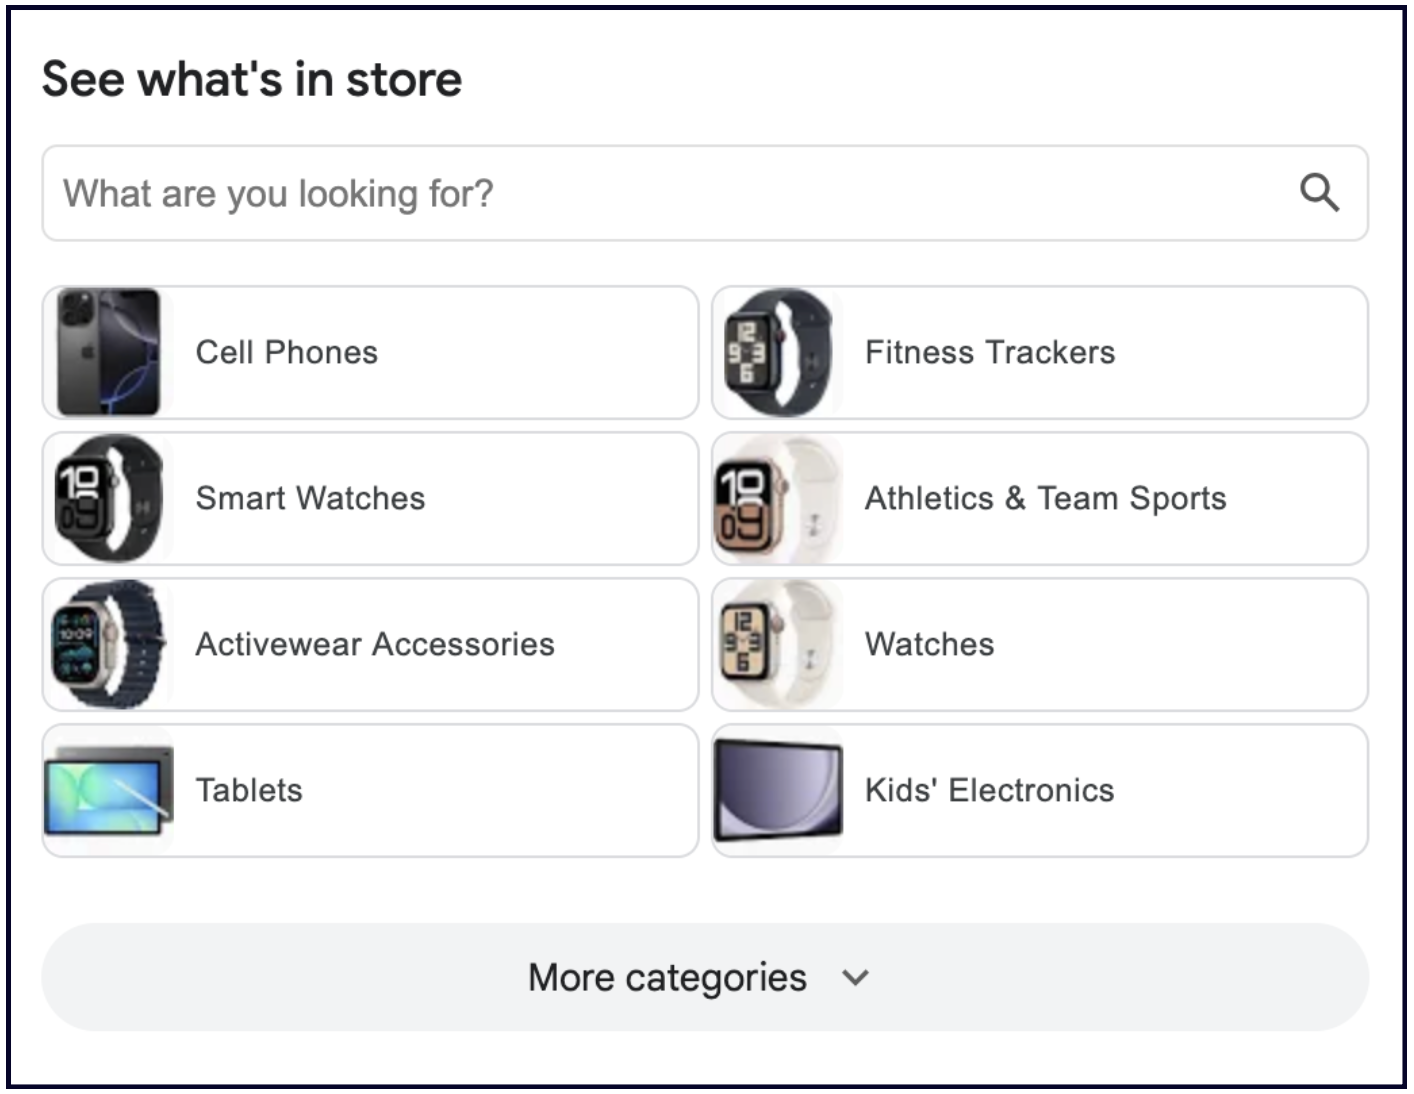
Pointy
If you sign up for the local inventory app, it will connect your point of sale (POS) system to your Google Business listing and automatically add your products to Merchant Center.
This means that your products will show up on your listing automatically in the "See what's in store" section:
Merchant Center
If you don't want to use the Local Inventory app, you can just sign up for a Merchant Center account and manually add your products one-by-one (or via spreadsheet).
While this option will still help your products show up in Google product searches, it will not display the "See what's in store" section on your listing.
✍️ Note: If you use the Local Inventory App or Merchant Center, you will not have access to the traditional Products section in your Google Business dashboard. More on that below.
There are many benefits to Merchant Center beyond getting your products to show up in Google searches. Some of them include:
- Merchant Center will showcase your products on Google Shopping.
- It integrates with Google Ads and lets you display Shopping Ads in search results, on YouTube, etc.
- It keeps track of local inventories, so customers can buy the product in-store if they want to.
- It makes managing products easy — you can adjust prices, descriptions, images, and availability all in one place.
- It has an analytics feature that provides insights into product performance, customer behaviours, etc.
- It works well with eCommerce platforms like Shopify.
But if Merchant Center doesn't sound right for your business, here's the traditional way to add Products to your Google Business listing:
2. The way that won't boost search visibility, but will help you convert
If you don't want to use Merchant Center or Pointy, you can still list your products directly on your Google Business listing via the Edit Products button in your Google Business dashboard:
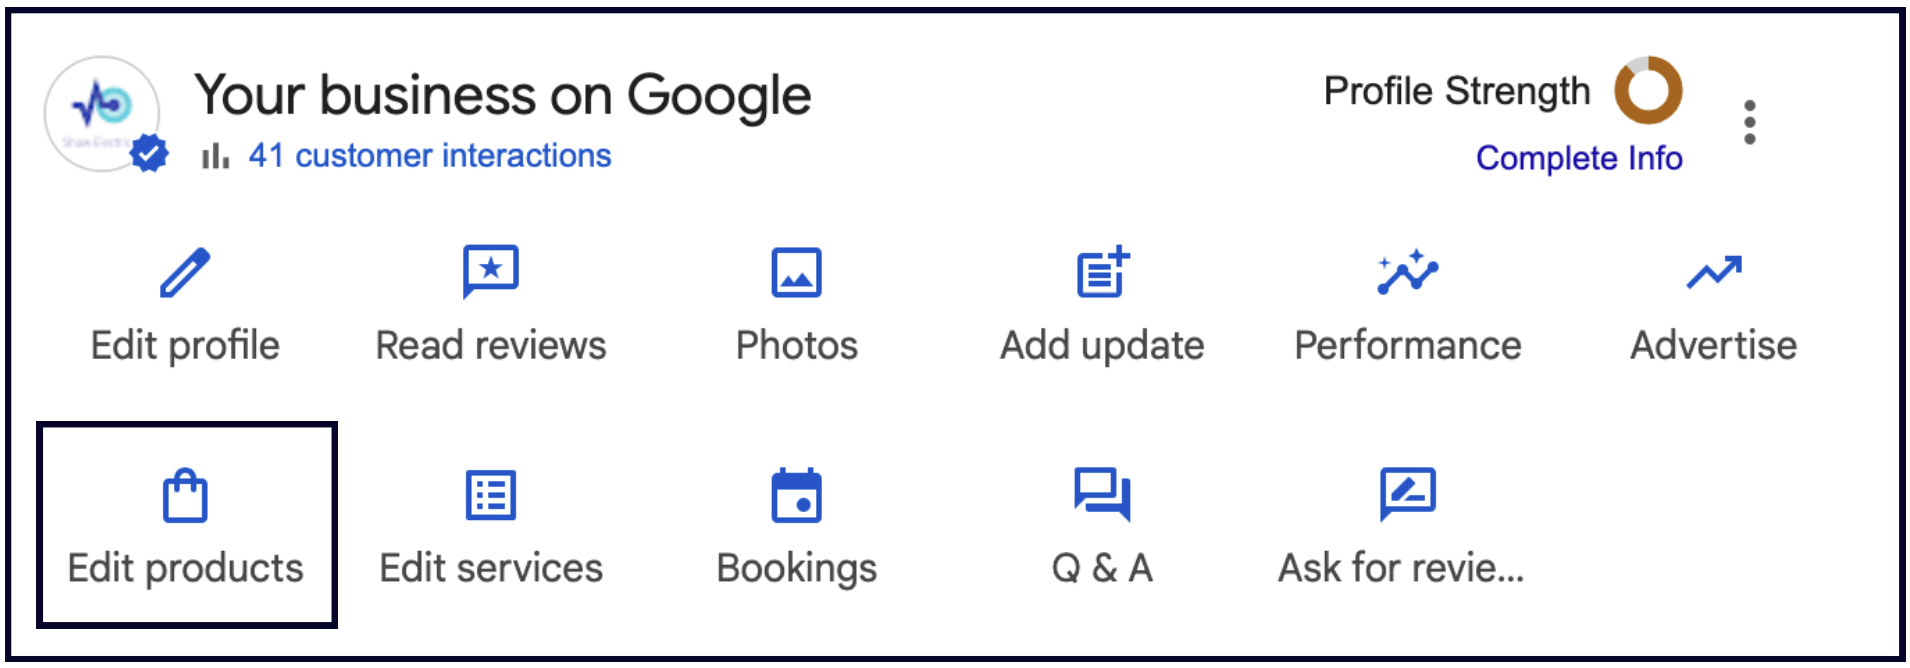
There are two downsides to adding products this way:
- You have to add each product manually
- It will not make your listing show up in product-specific searches
However, the benefits of having your products visible on your Google listing more than make up for these downsides:
1. This is a great opportunity to send viewers directly to your product inventory.
This section is one of the few places on your listing that has the potential to bring you direct enquiries. You can add a link directly to the product page on your site, where they can order the product!
2. Products have a prominent place on the Google Business listing.
- They appear high up on the listing, drawing eyes and clicks.
- Most of your competitors probably haven't filled this section out, so having this section can help differentiate you.
- You can also upload an image of every product, making this section even more eye-catching 👀
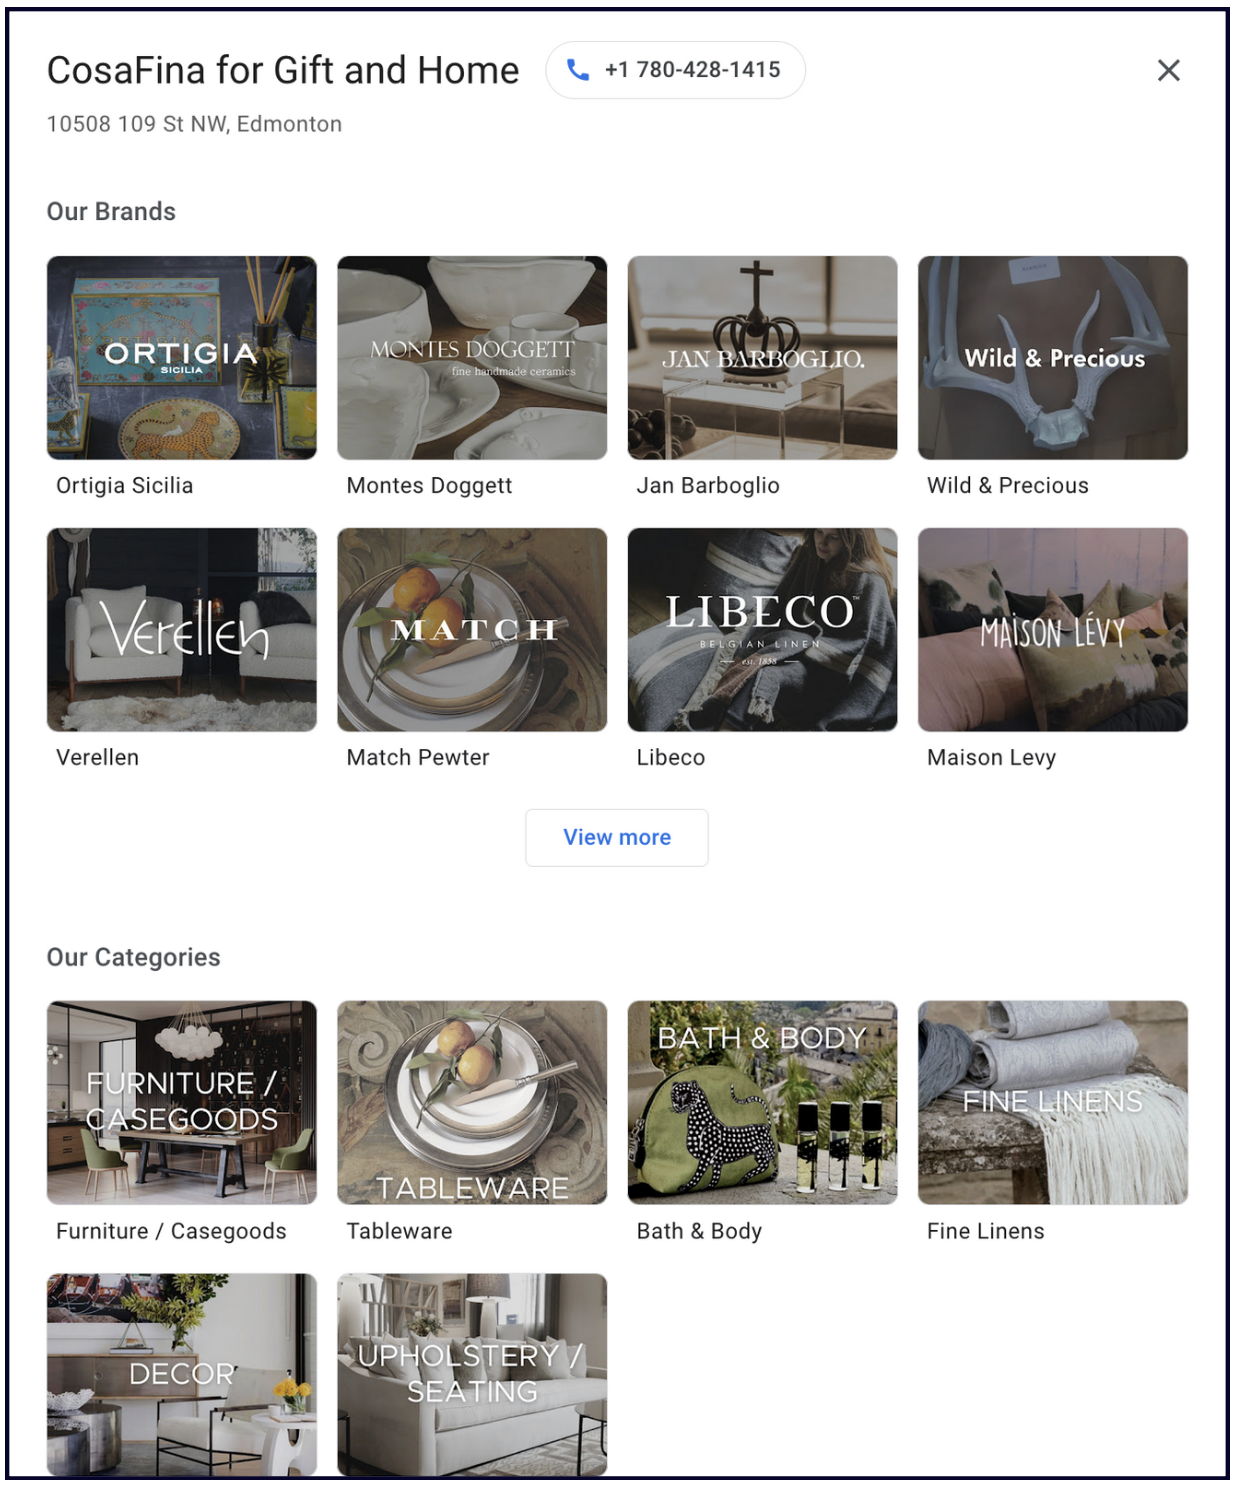
3. If you have too many products to add manually, you can just add the different categories of products that you offer.
Or switch them out and update them, highlighting the most popular products for the season.
💡**Tip:**If you don't sell products, add your services to the Products section:
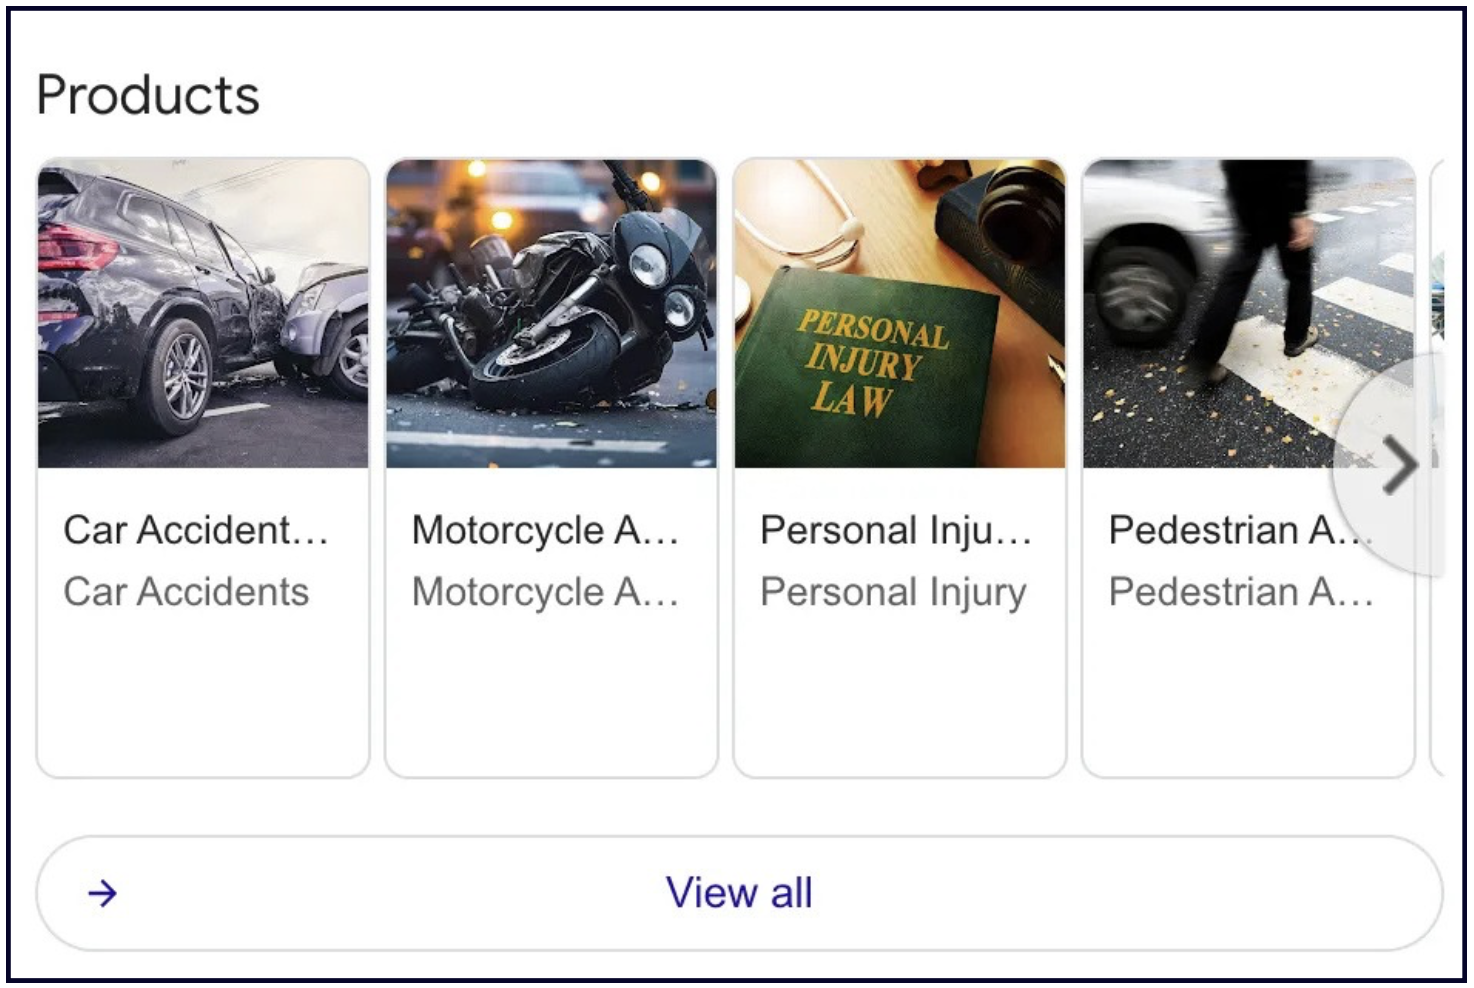
That's what we do for our service-based clients at Whitespark. We can do it for you, too.
Chapter 7: Bookings & appointments
We’re talking about 2 separate pieces of functionality in the Google Business Profile here. Let’s explore them below.
Appointments link
The appointments link is exactly that. It’s a link that you can add in Google Business Profile that links through to the page on your website that would be the most relevant for this – you might have a dedicated appointments page, or you might have a ‘contact us’ which would be relevant, or you might have a page that details the procedure for making an appointment.

You control the destination – it can be any page you want, although we do recommend making it a URL on your website so you can track those visitors in your website analytics (like Google Analytics). Don’t forget to add tracking tags to your link — your web person or marketing team can help you set that up – Claire Carlile has a handy template for that here.
The availability of an appointment link will depend on your business category – business that rely on patients or customers coming in for scheduled appointments, or businesses that sell time or consultations, are likely to have this functionality.
Booking Button
✍️ **Note:**The booking feature is not available for all business categories. Only businesses in the Dining, Activities, Beauty, Fitness, Shopping, Financial Services, and Local Services verticals have access to this feature.
This function is very different to the appointment link. This will rely on an official scheduling provider that has a third party integration with Google. You can check which platforms are available for your location and type of business here.
This is how this can look in your Google Business Profile:
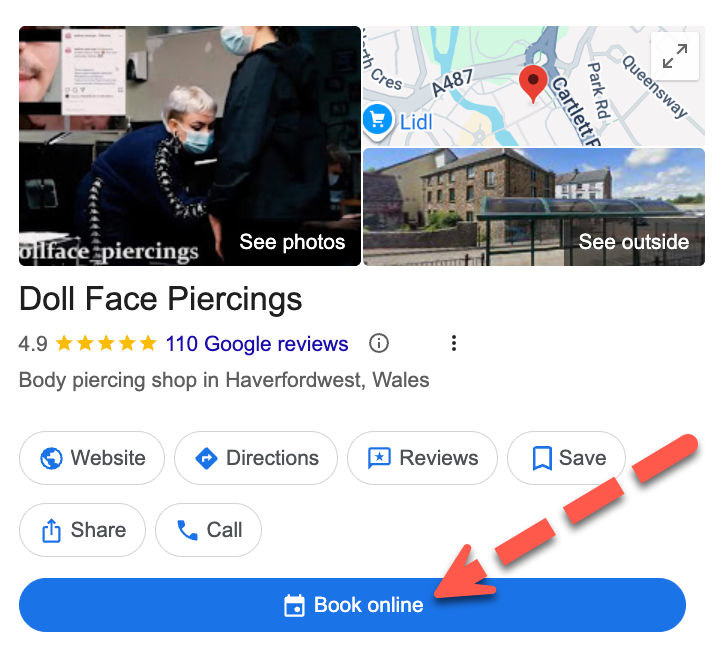
When a customer clicks the link, a scheduling window opens inside Google Maps or Search. The customer selects a time and books the appointment without ever visiting your website.
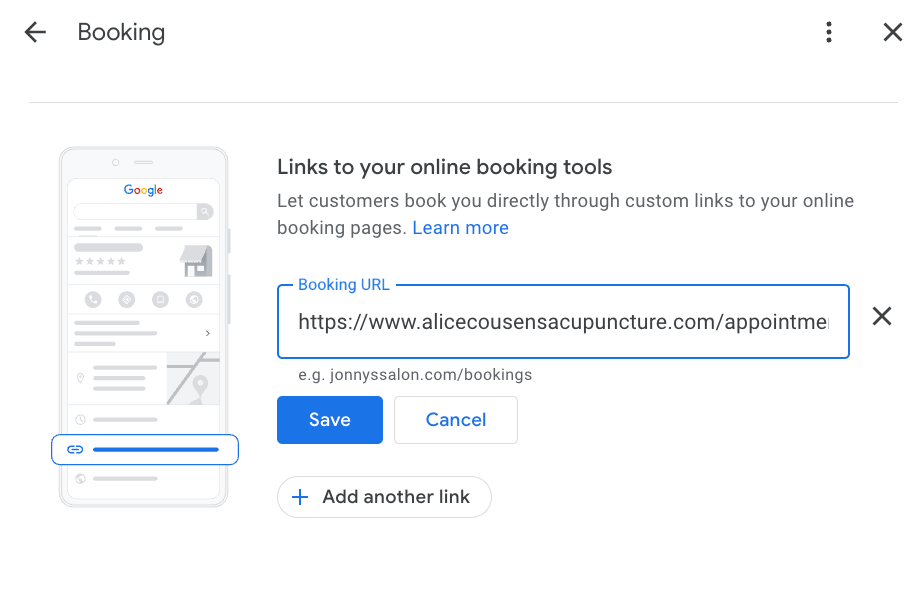
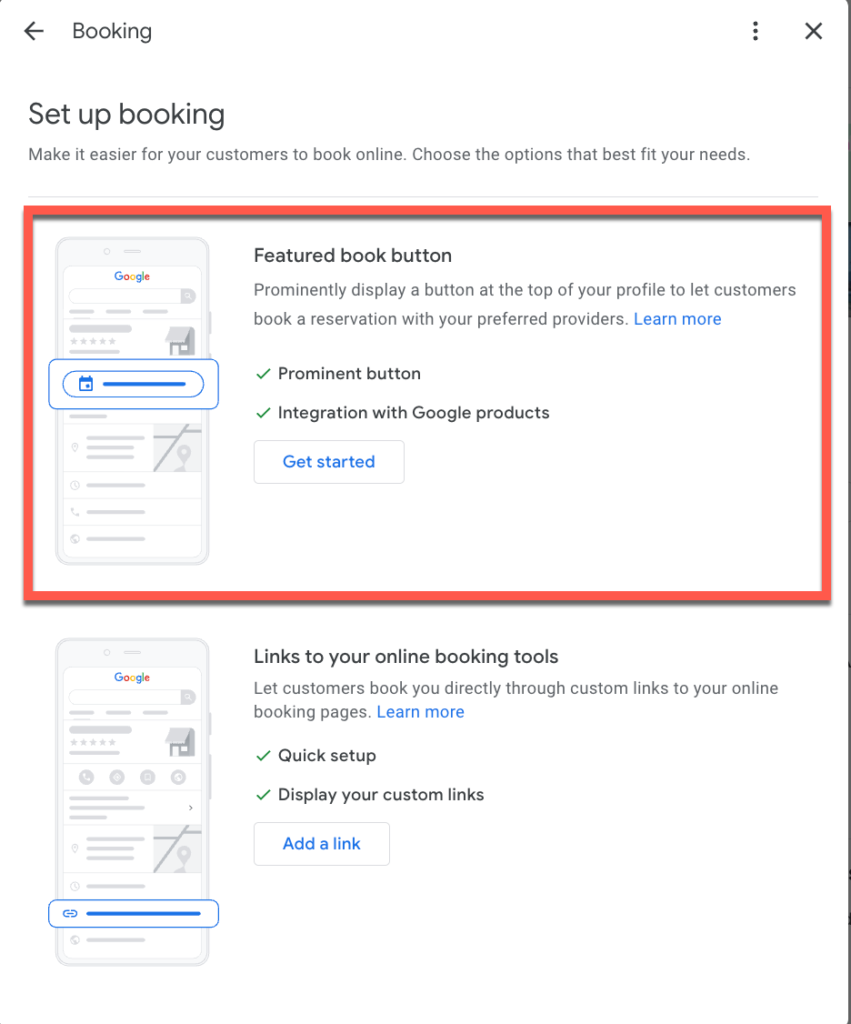
If you have the option to add a link to an integration you’ll see the following when you log into your Google Business dashboard and click the ‘booking’ option:
Click on ‘get started’ and you’ll see a list of potential integrations:
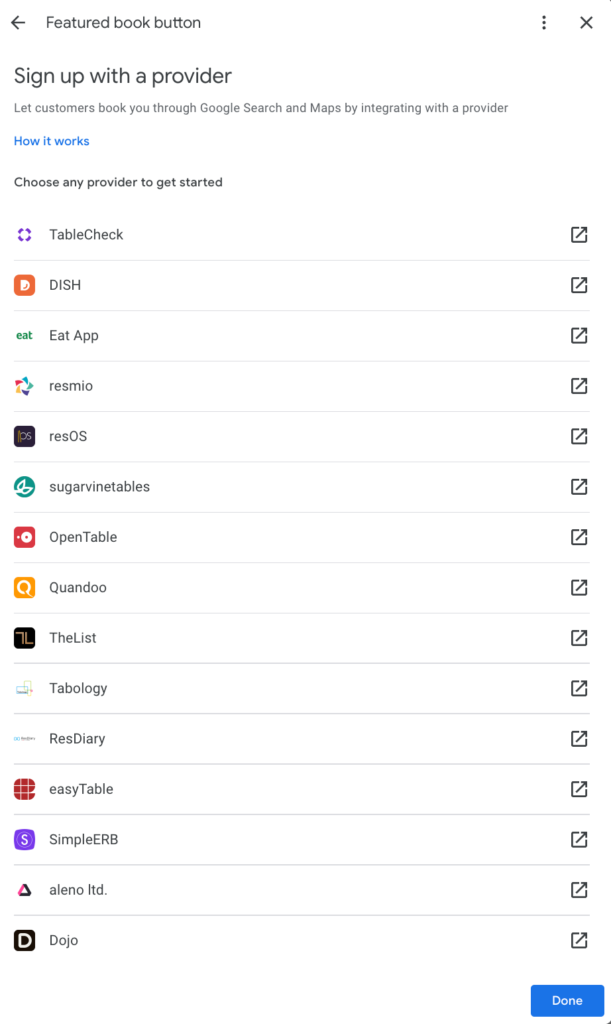
You can read what Google says about setting up booking through a provider here.
How users interact with the Booking feature
- First, a searcher will click the Booking button on the Profile.
- Next, the business’s service types will pop up (populated by services set up in the scheduling partner, not Services in Google Business Profile).
- Then, the business’ schedule will show upcoming available dates and times. Once the searcher clicks Book, Google will pre-fill the form if they are logged in.
- Finally, they’ll see a booking confirmation page containing quick links to call the business, or modify/cancel the booking.
In addition to any email notifications you set up with your chosen scheduling partner, Reserve with Google will send a 24 hour reminder email and modified/cancelled booking emails.
Bonus: Once the booking time has passed, Reserve with Google will send an email asking for a Google review! It also has a quick link to rebook your next appointment through Reserve with Google.
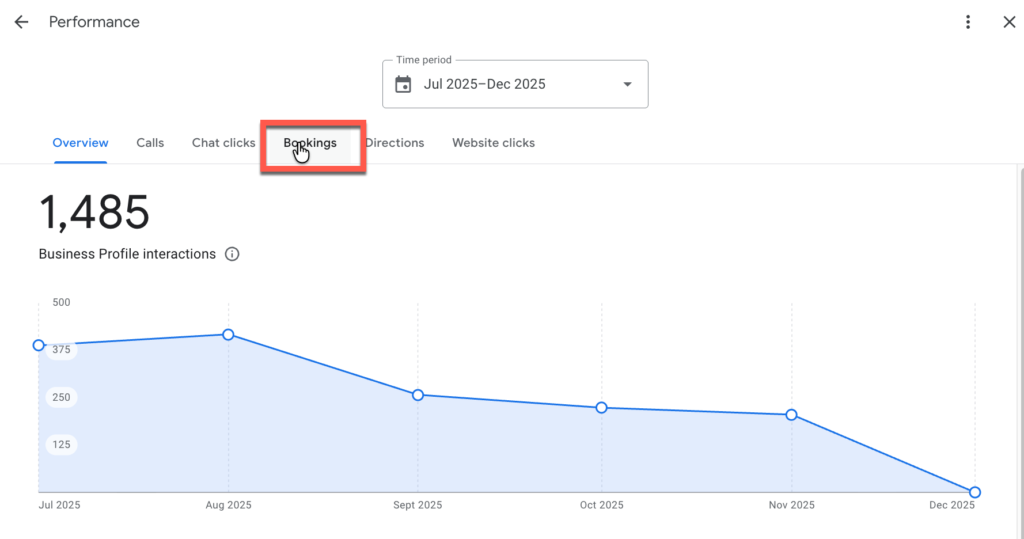
Once Bookings is enabled, your scheduling partner will sync information to your Google Business Profile Performance, you can see the metrics under the Bookings tab.
Benefits of third party integration
Bookings customers are new customers
A limited number of scheduling partners have shared that they estimate 50-75% of Bookings customers are new.
Bookings helps close deals after hours
One scheduling partner, MyTime, also estimated that 40% of bookings were made after hours as the option to self-schedule was now available.
Bookings converts searchers faster
Another partner, TimeTrade, said Bookings cut the steps to convert in half (but remember this simplified sign up may not get all the custom information you need).
Your customers also benefit
A simplified booking process with less steps means they don’t feel like they’re wasting time. When a customer can see all the available service types and availability, they have more choice.
A 2021 study by GetApp found that 59% of those surveyed find scheduling by phone frustrating and 95% said they were more likely to choose a new service provider if that provider offered online booking.
Benefits of the appointment link
It’s free!
You can add a link to a page on your website – you’re not paying for a third party platform to manage bookings.
Which option should I choose?
If you’re wondering which one you should choose for your listing – we’d recommend using the appointment link if you have a custom website flow you want customers to see, or if you use a booking system that doesn’t partner with Google, and use the Booking Button if you use a major scheduler (like Square, Mindbody, etc.) and you want to maximise the number of bookings you get by making it as easy as possible for customers.
Chapter 8: Attributes
Although attributes don’t affect which businesses Google shows in general searches, they can help you get found in specific situations. But first, what are attributes?
Attributes help explain what amenities your business offers, like whether your location has Wi-Fi, or whether it’s wheelchair accessible.
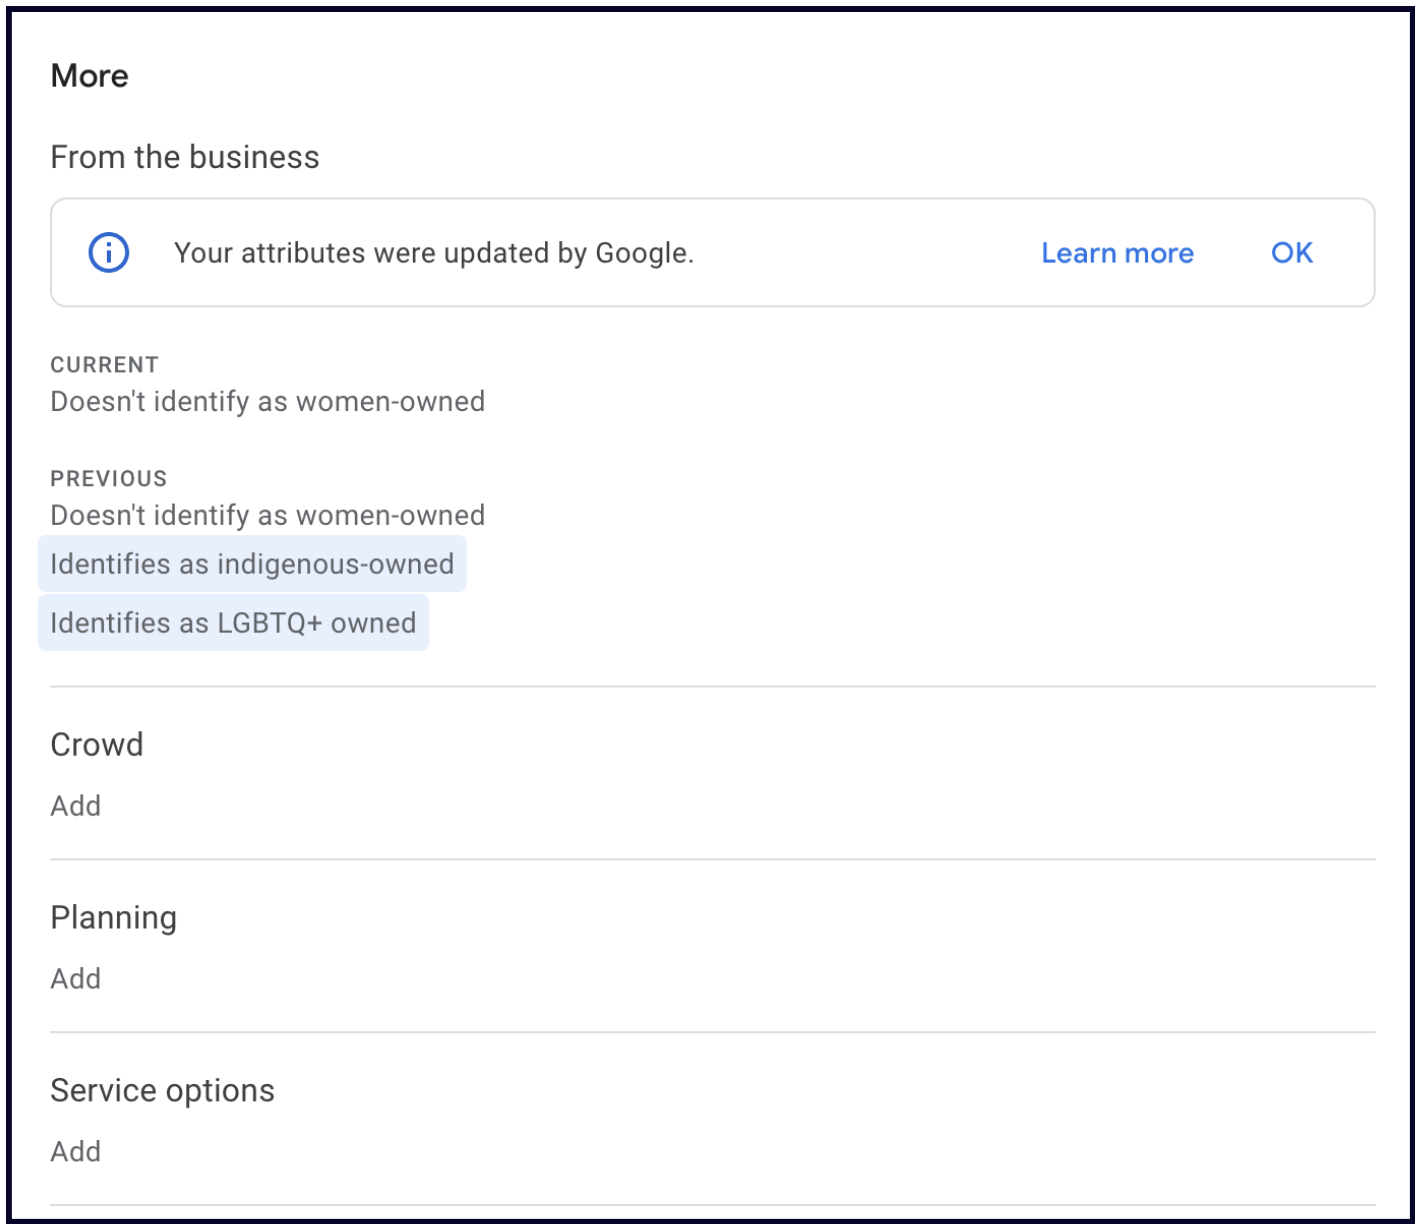
Some attributes are editable directly in your Google listing, and some are crowdsourced from maps users or are added based on Google’s understanding of your business based on your business website and other third party mentions of your business. These attributes aren’t directly editable by the business.
Google will often update the attributes that are available to a business – so make sure you check your Google listing regularly to see what’s available.
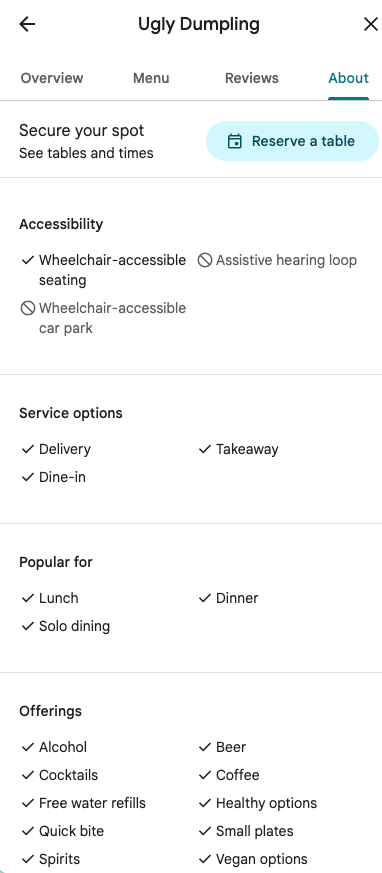
Where do attributes show up in my Google Business Profile?
As always, Google is always chopping and changing how the business details show up in Google search results and on Google Maps and across other Google surfaces.
Why are attributes important?
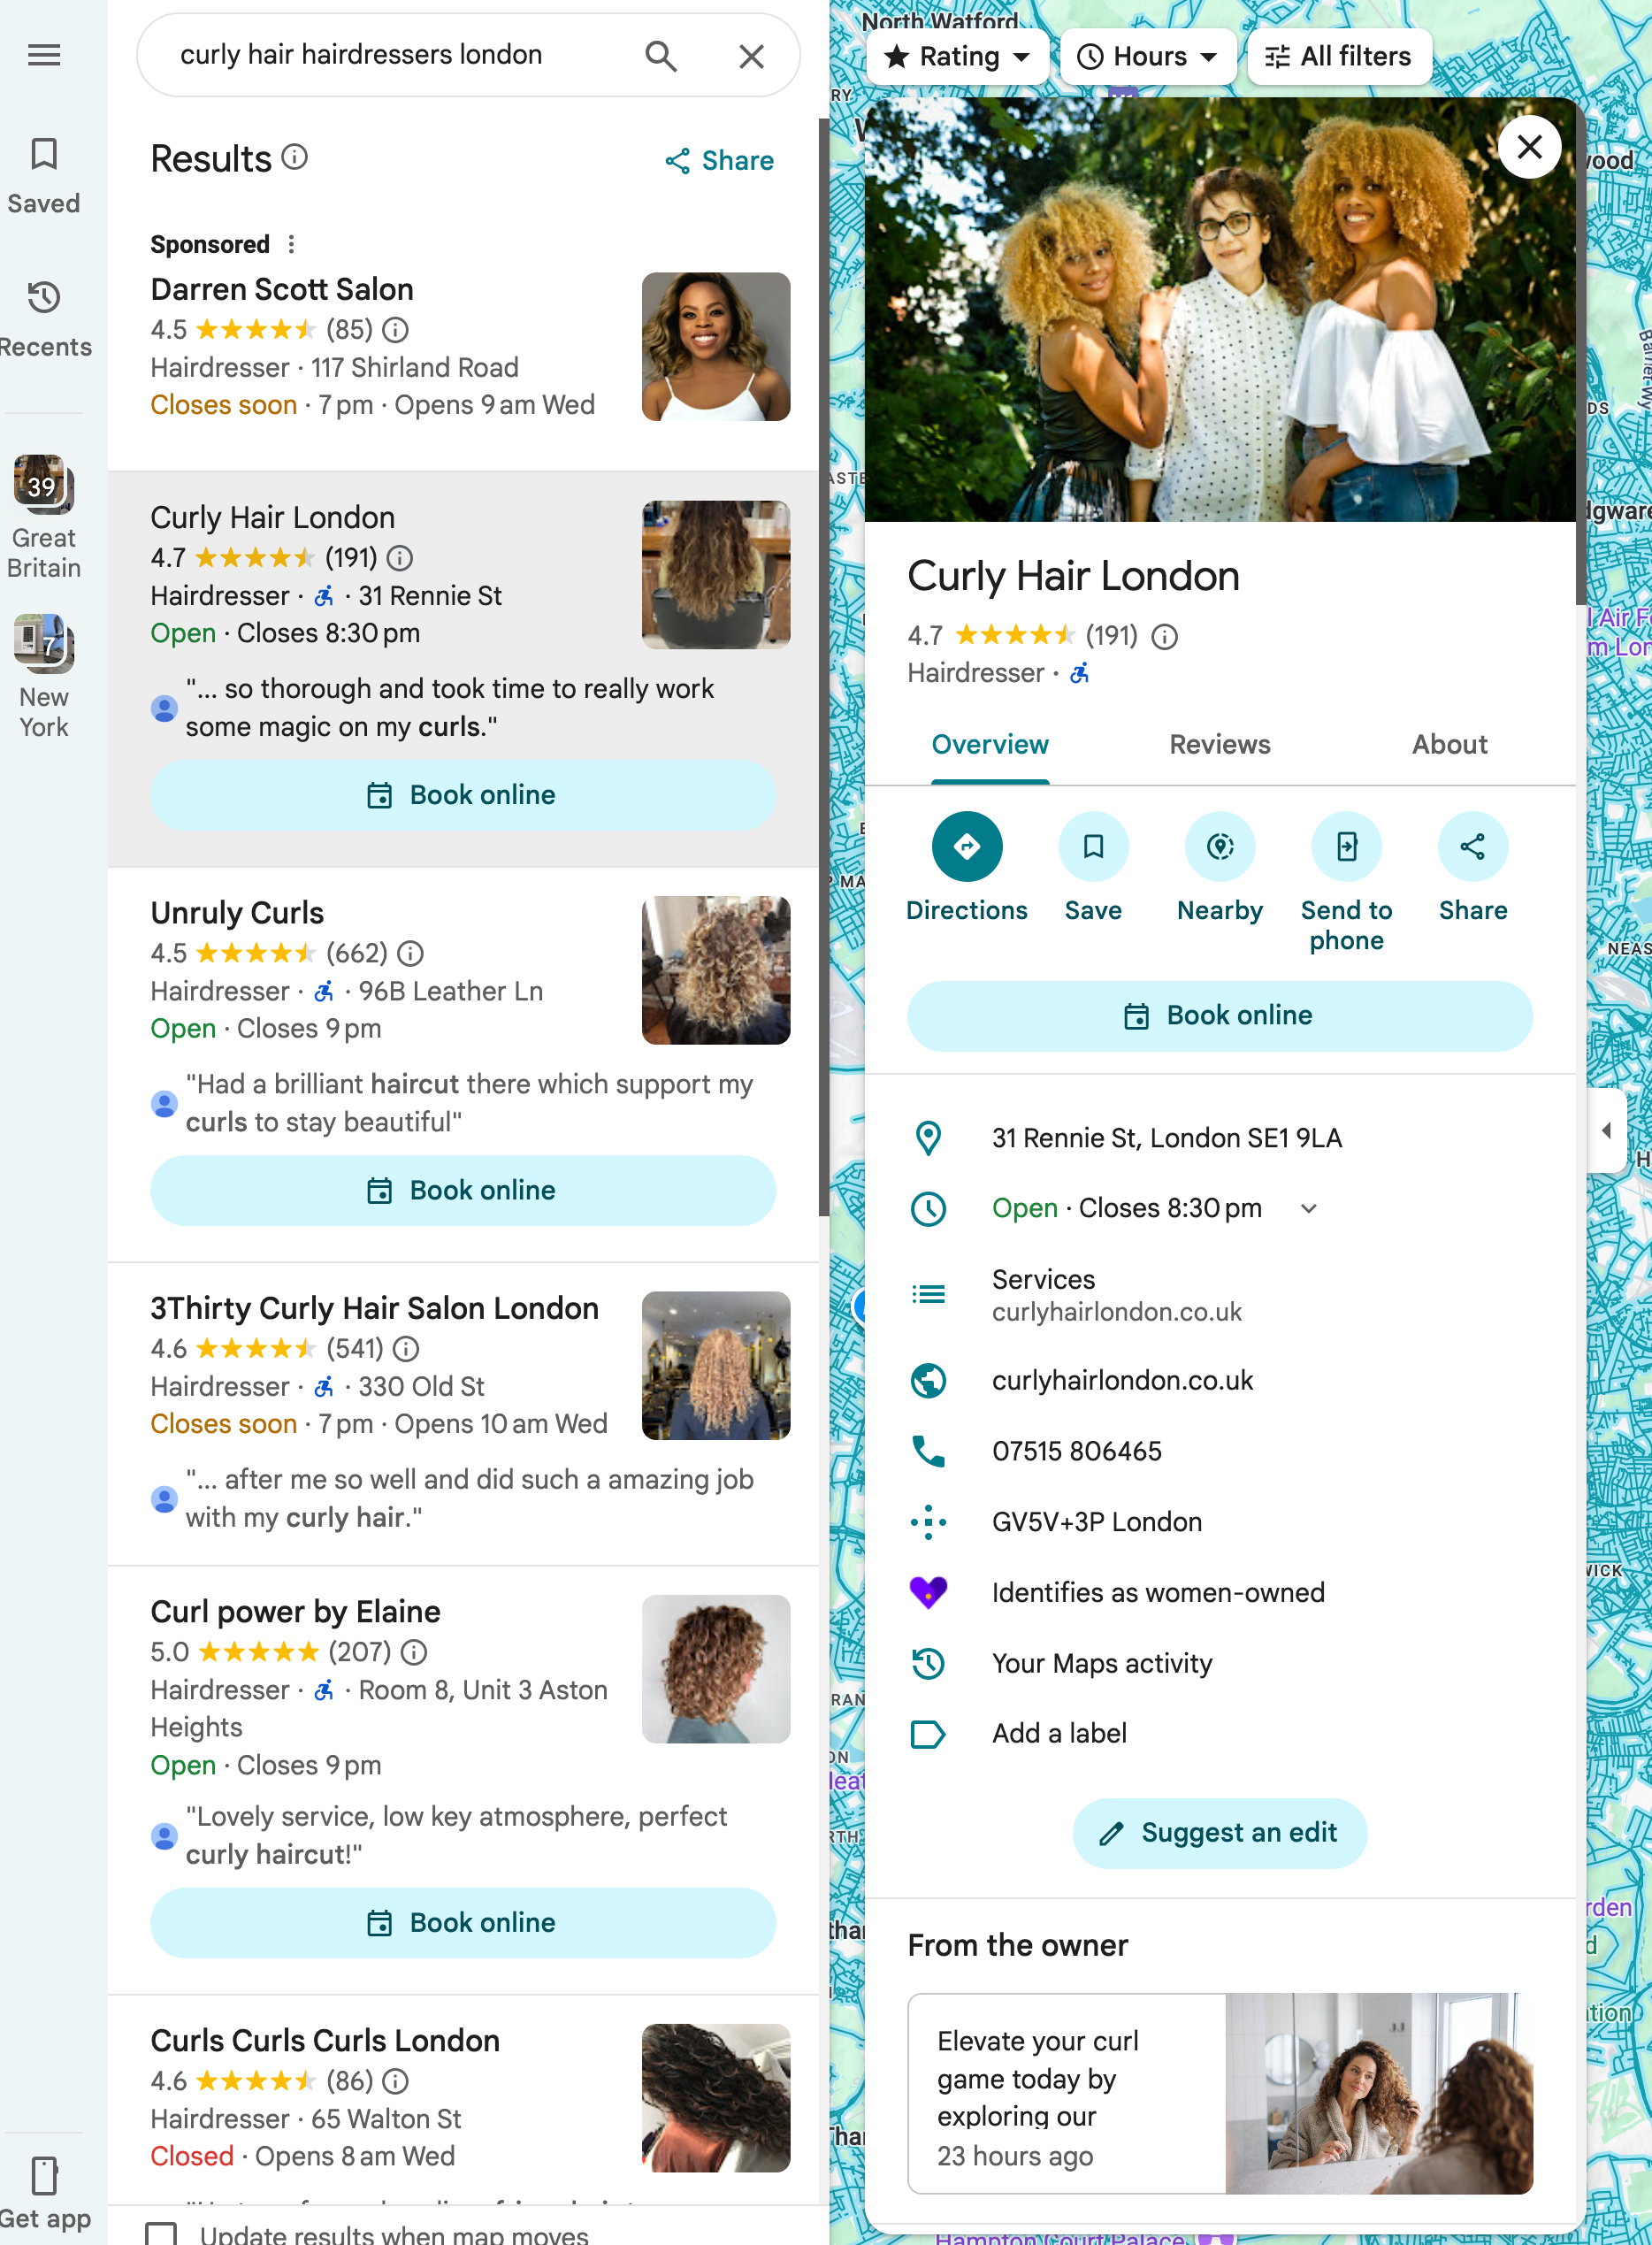
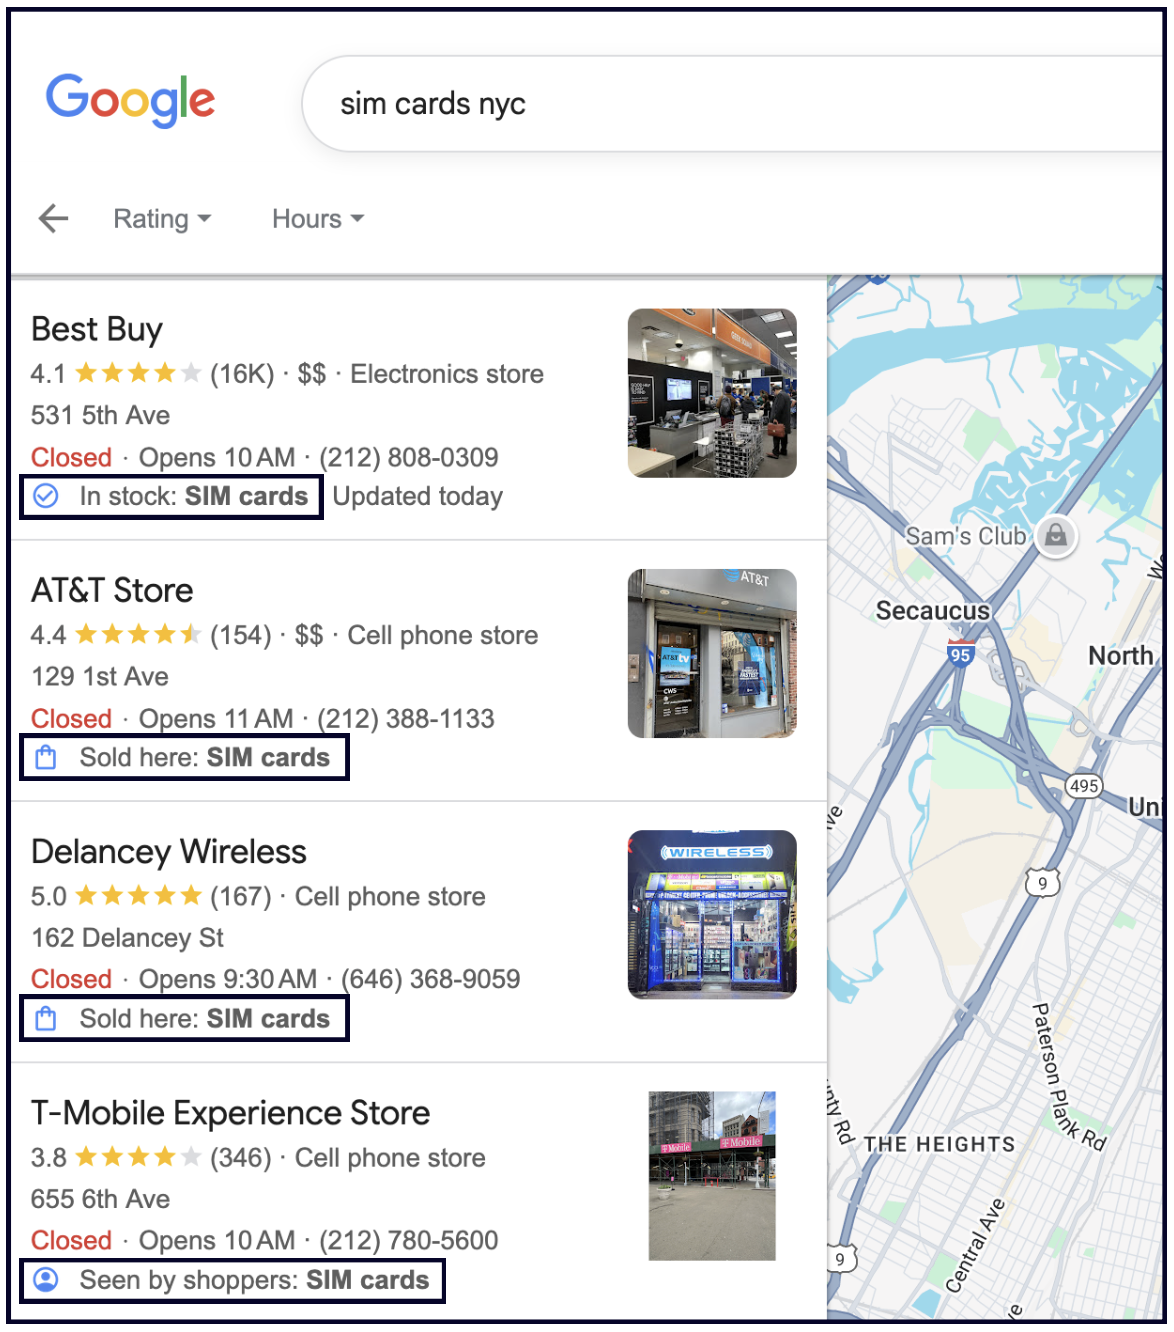
While attributes don’t affect how often you show up in general searches like “restaurants NYC”, they do affect whether you show up when someone specifically searches for that attribute (i.e. “women-owned restaurants NYC”).
You can see that, for this search, all the results have that attribute:
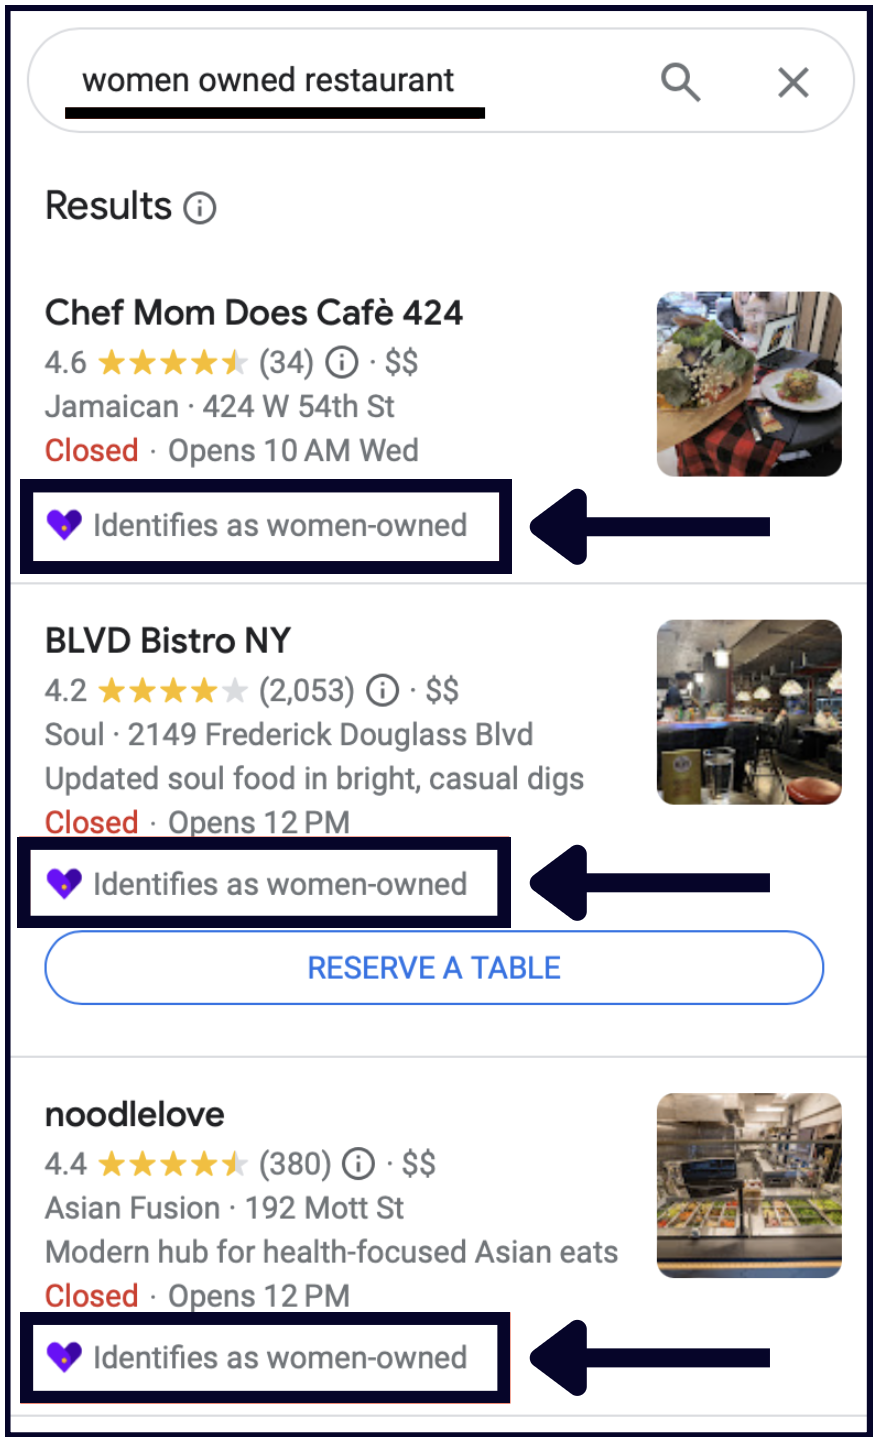
So, add any attribute that applies to your business. This will help people with specific wants/needs find you more easily.
How to add attributes to your Profile
Go to your Google Business Profile —> Edit Profile —> More.
Then, go through every section and check every attribute that applies to your business.
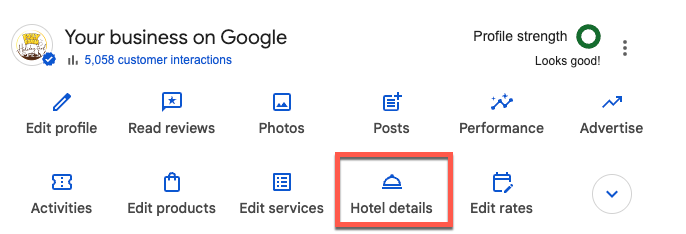
If you are a hotel or an accommodation business you’ll have an extensive section for attributes – select ‘hotel details’ in your Google Business dashboard
And in here you’ll find a gazillion sections – work through and populate them all:
✍️ Note: Attributes are niche-specific.
For example, restaurants can get a “vegan” attribute and hotels can get “beach access”. Other attributes can only be assigned to a Profile by Google. For example, when a bar is listed in a prominent article about the best bars in NYC, it might get a ‘best bars in NYC’ attribute.
🔥 Pro Tip: Just because YOU might not be seeing the attributes you added show up in Google search results or on Maps doesn’t mean that it isn’t important. Attributes help Google build a clearer picture of what your business is and what it offers – so make sure you check in on the attributes available to your business regularly, and make sure you keep this section updated.
Chapter 9: Photos & videos
Google is becoming more visual. From image search, to photo and video carousels taking over the result pages, visuals are becoming more and more important for Google Search.
This is why taking care of the Photos section on your Google Business listing is one of the easiest ways to get more visibility and more customers from Google's local results. No photos, no appeal.
Below are the best practices when it comes to making your Google Business listing's Photos section work harder for you.
Why is it important to add photos to your Google Business listing?
There are two reasons:
1. They will help you convert more visitors into customers
According to Google, businesses with photos get 42% more requests for directions and 35% more website URL clicks.
And research on what drives results from Google Maps listings confirms that photos are one of the strongest factors in turning a viewer into a customer.
2. There is evidence that photos help more people find your business on Google.
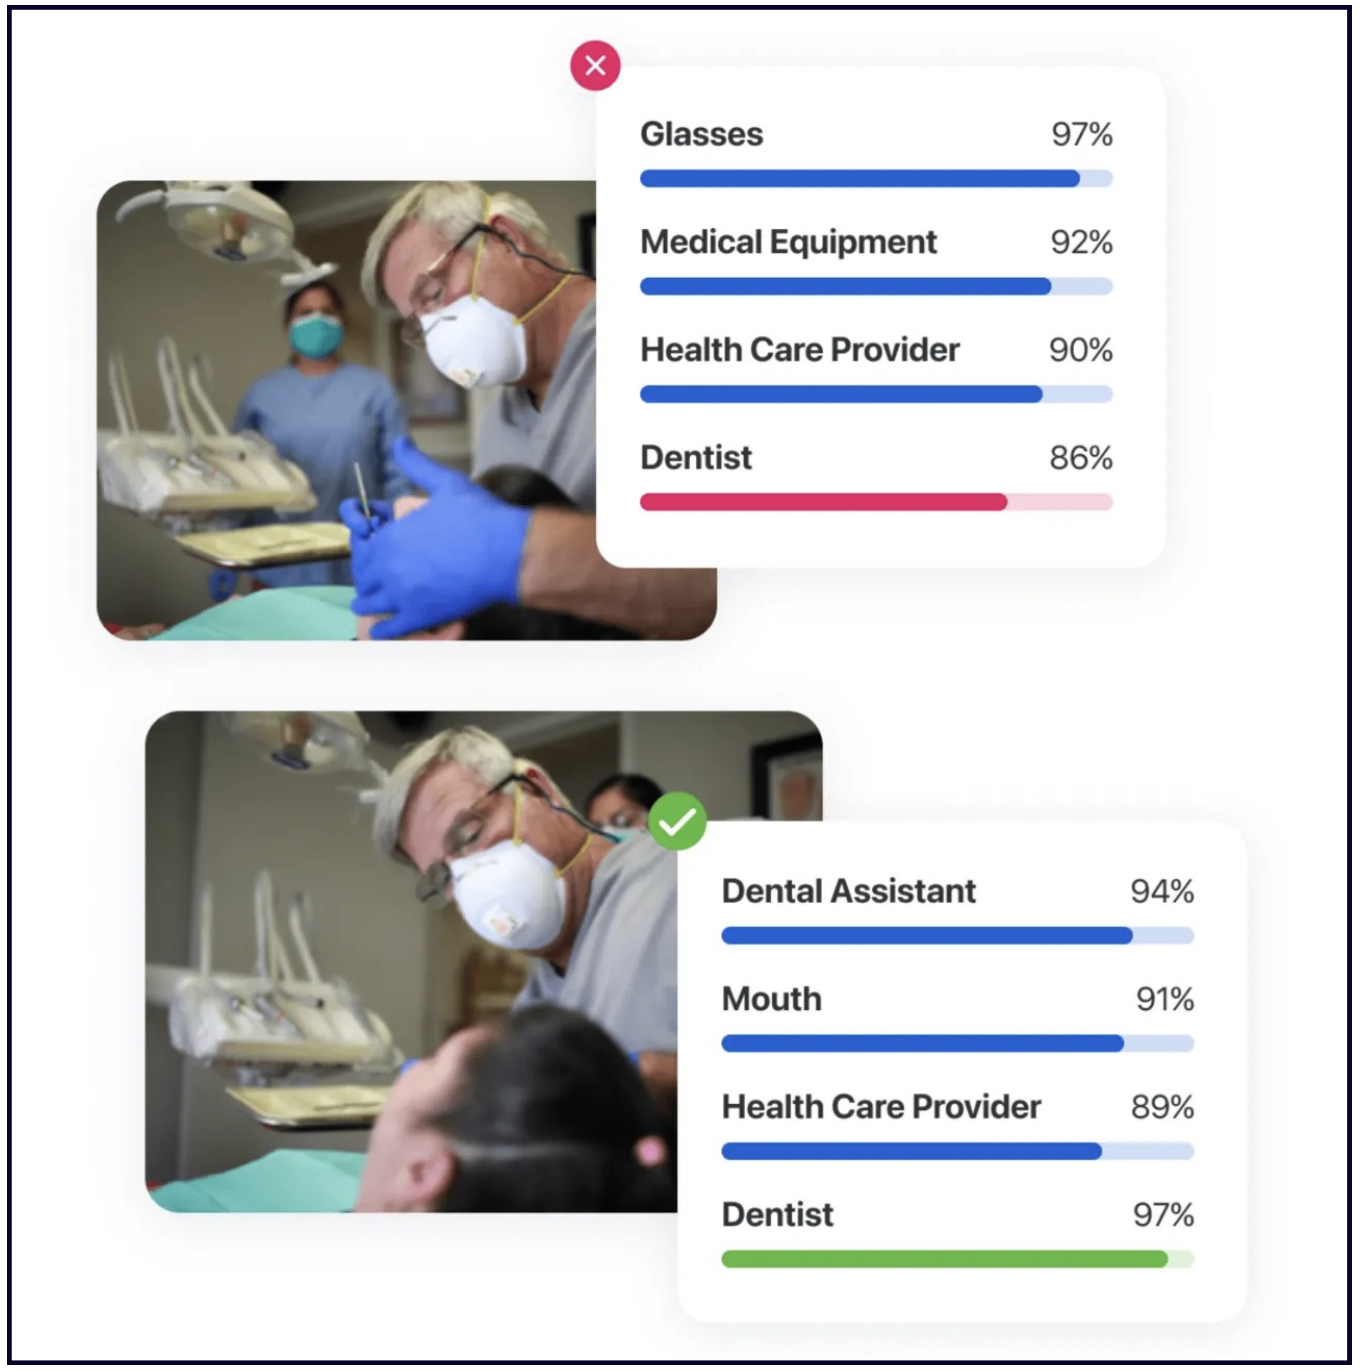
Google sees keywords in your images. They classify and analyse the images on your Google Business listing and website with their Vision AI software to better understand what your business does.
As you can see in the image below, with minor position and focus adjustments, Google can go from seeing the image as "glasses" and "medical equipment" to "dentist" and "dental assistant."
Google also confirms that images help more people find and choose your business in their official documentation.
✍️ Takeaway: Run your photos through Vision AI before uploading them to your Google Business listing or website. This helps Google understand what your business does, which means more people can find you — and most of your competitors haven't figured this out yet.
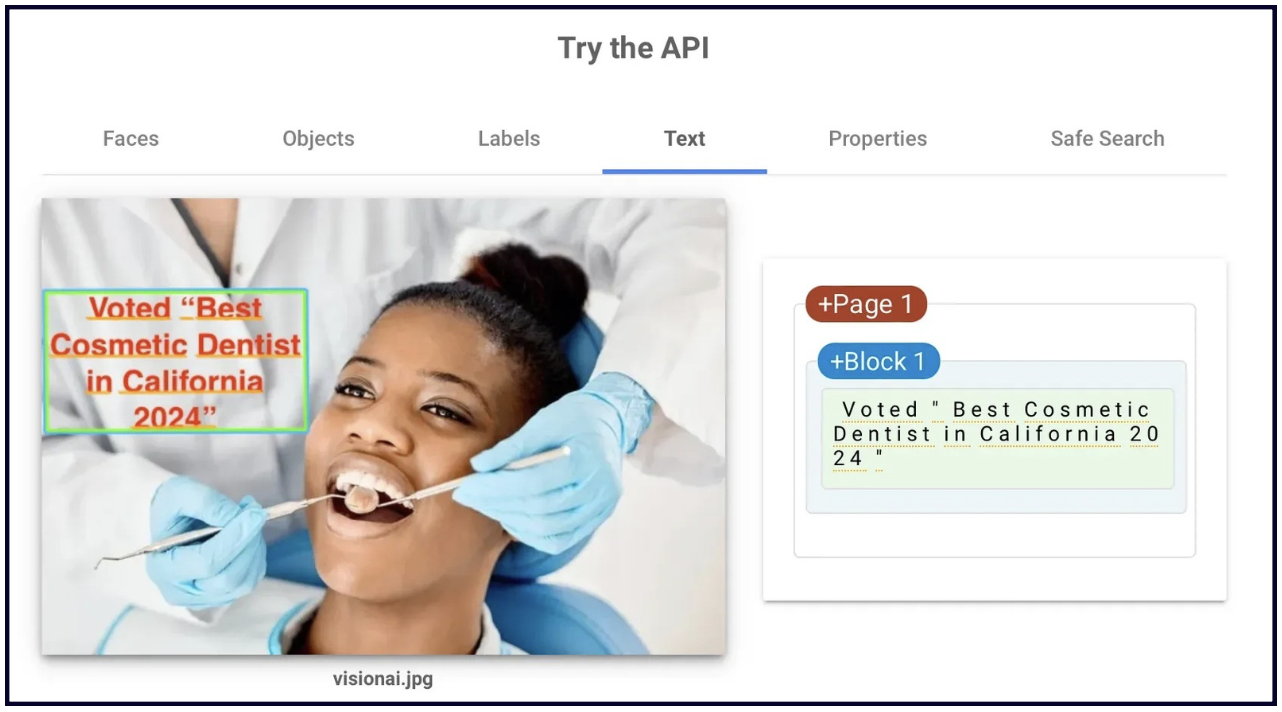
💡You can also add text to the image itself (not the file name or metadata), as we know that Vision AI can read the text on the photos, too.
How to add Photos to your Google Business listing
There are several places on your Google Business listing where you and your clients can add photos. We'll go through all of them, and we encourage you to make use of each one.
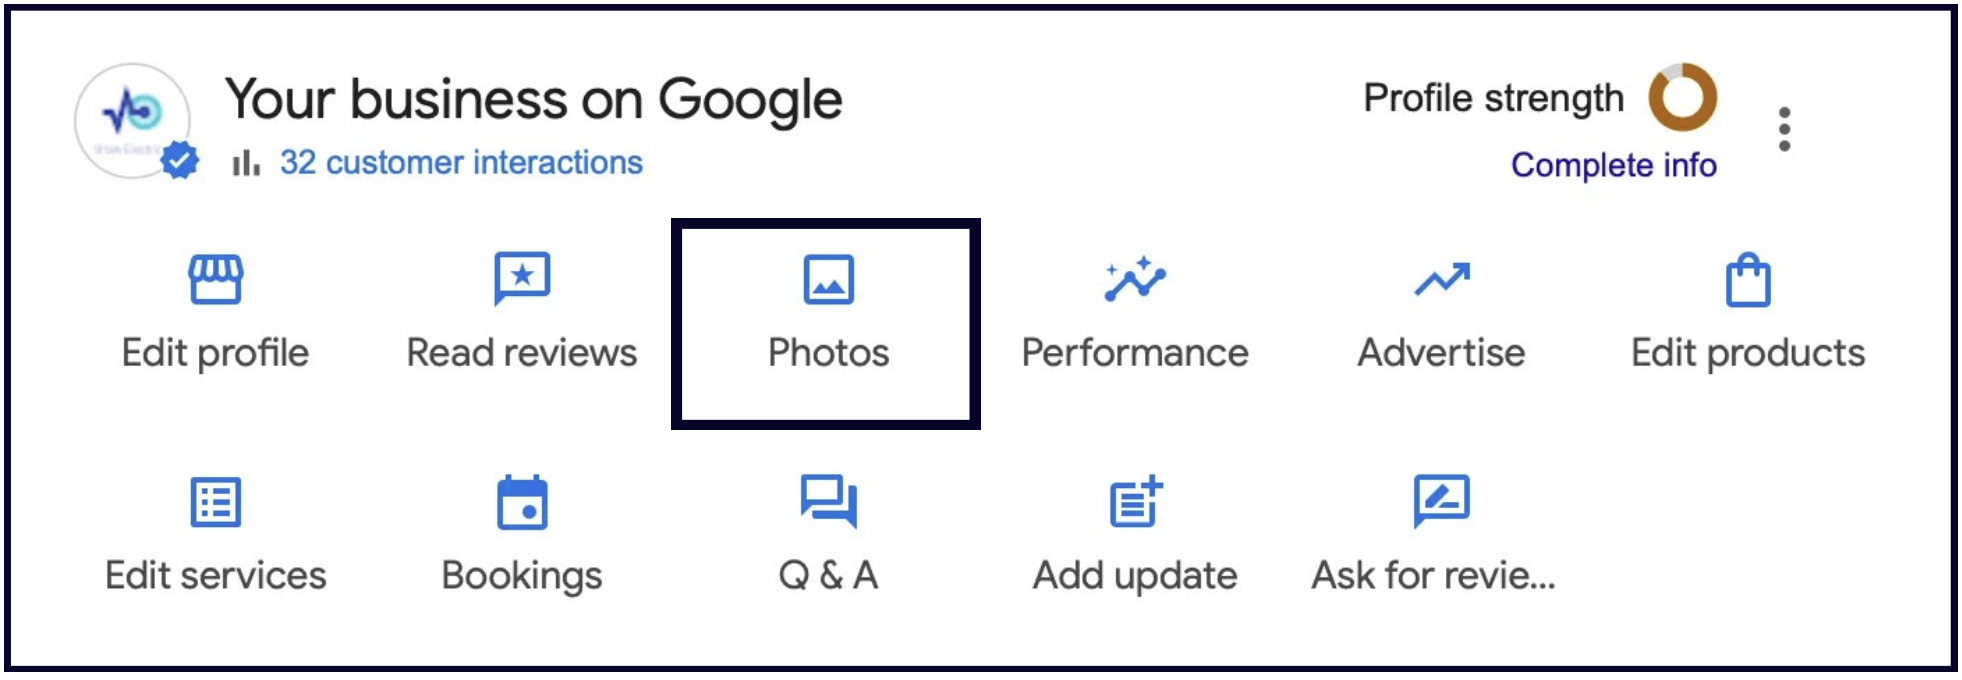
1. Owner-uploaded photos
Owners can upload photos to their listings by going to your Google Business dashboard and clicking the Photos button:
Below is a list of ideas to help you populate your Photos section.
‼️ Important note: Do not use stock photos on your Google Business listing.
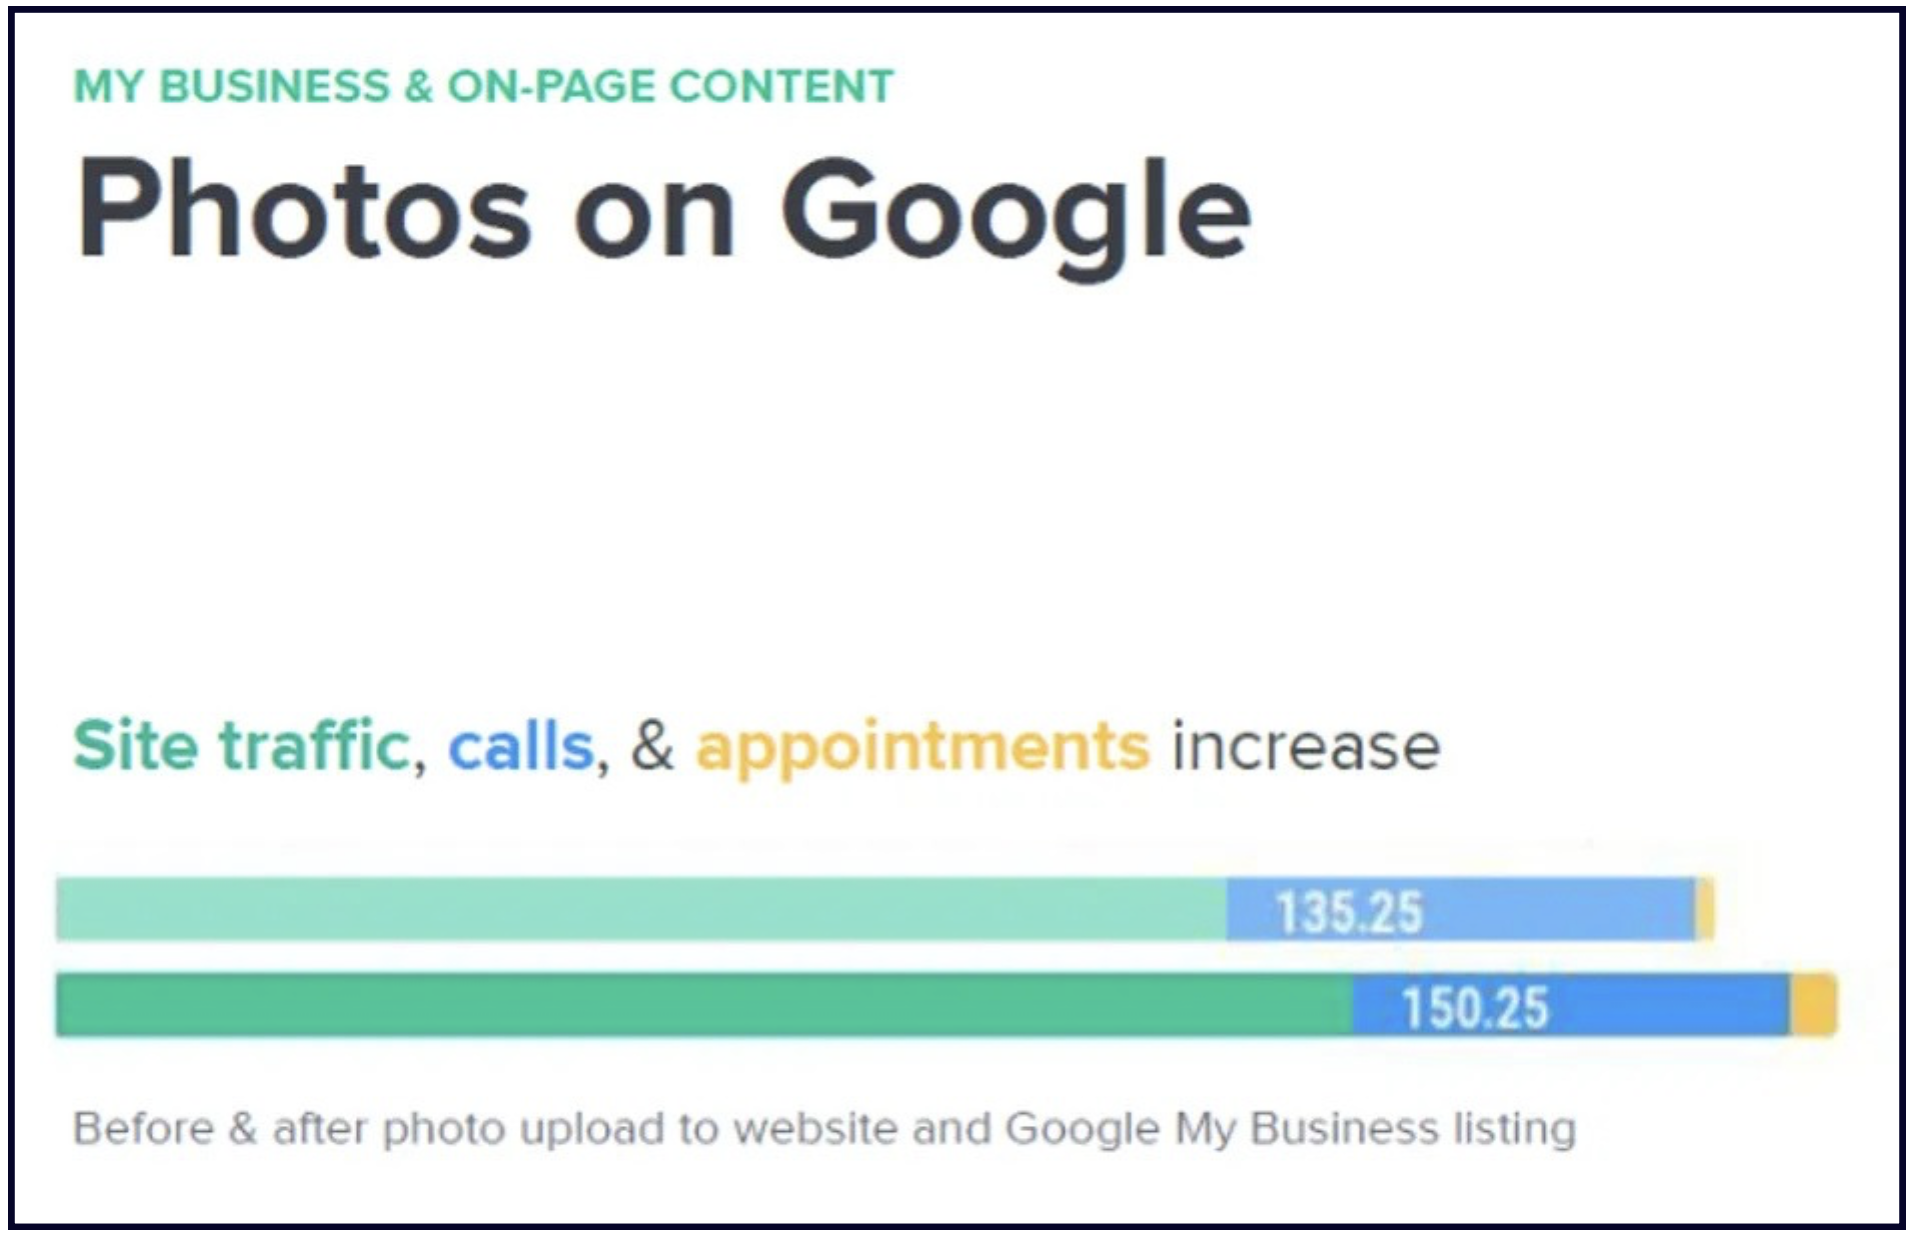
When the dentist business above replaced the stock images on their Google Business listing and website with original, relevant, thoughtful, and high quality images, they saw an increase in website traffic, calls, and appointments:
7 essential photos every listing needs
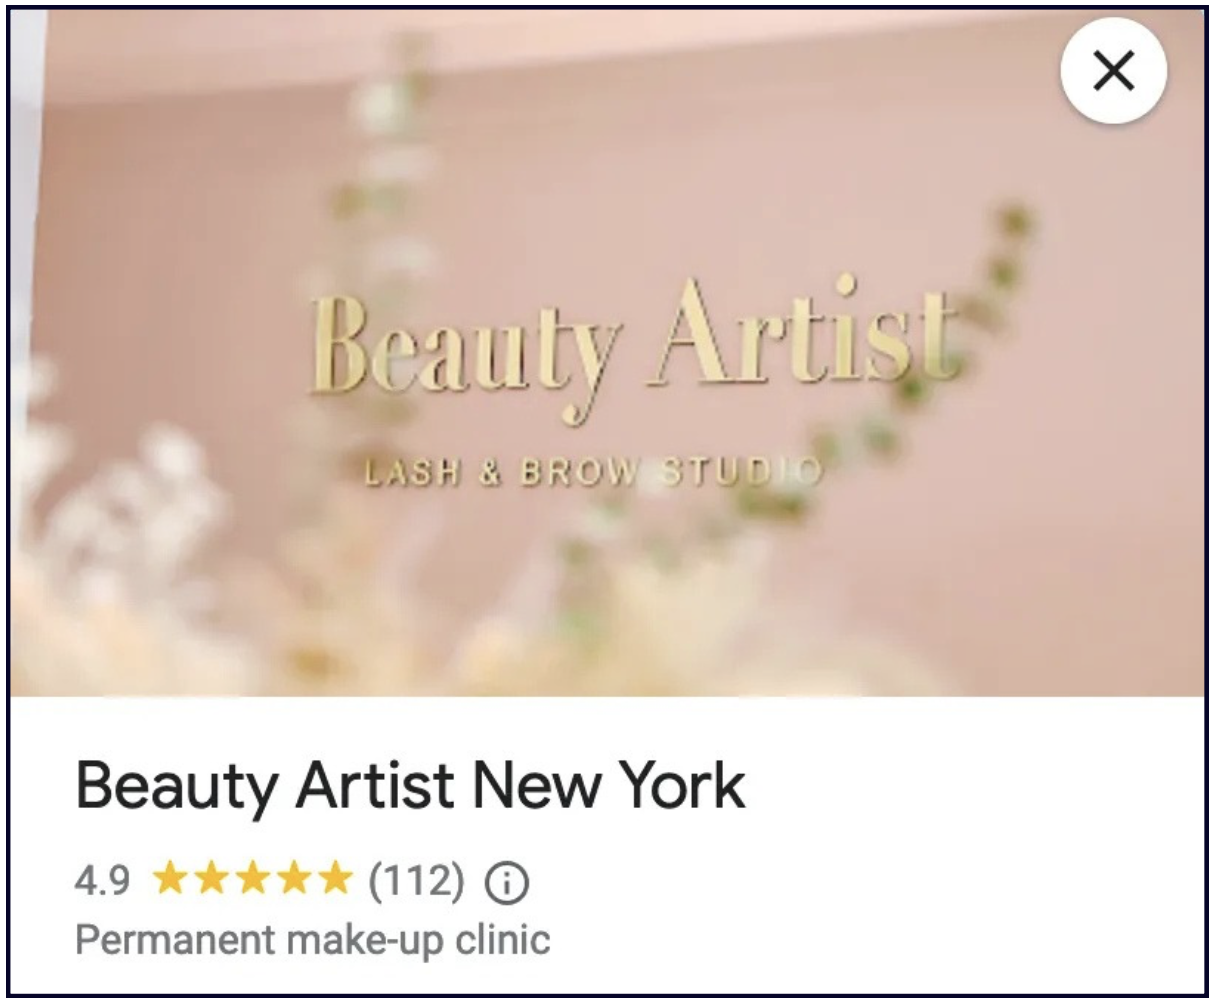
1. Brand identity images
People like familiar brands. Even if your brand is not yet recognisable, your Google Business listing is the perfect place to start building that brand identity.
Make your business stand out by using a strong cover image that represents your brand.
2. Exterior shots
Include some photos of your storefront, signage, parking, and any important views or angles that might be useful to your potential customers.

3. Interior shots
Include pics of the reception/waiting areas and any key spots inside the business. Make sure these photos look professional and inviting.
You can also add a virtual 360 tour of your entire space, which can help drive engagement and get more people through the door.

4. Team photos
They say that people don't buy from companies, they buy from people. Potential customers want to see the faces behind the business.
A group photo of the team or some action shots of them working is a great way to show your customers what kind of company you are.

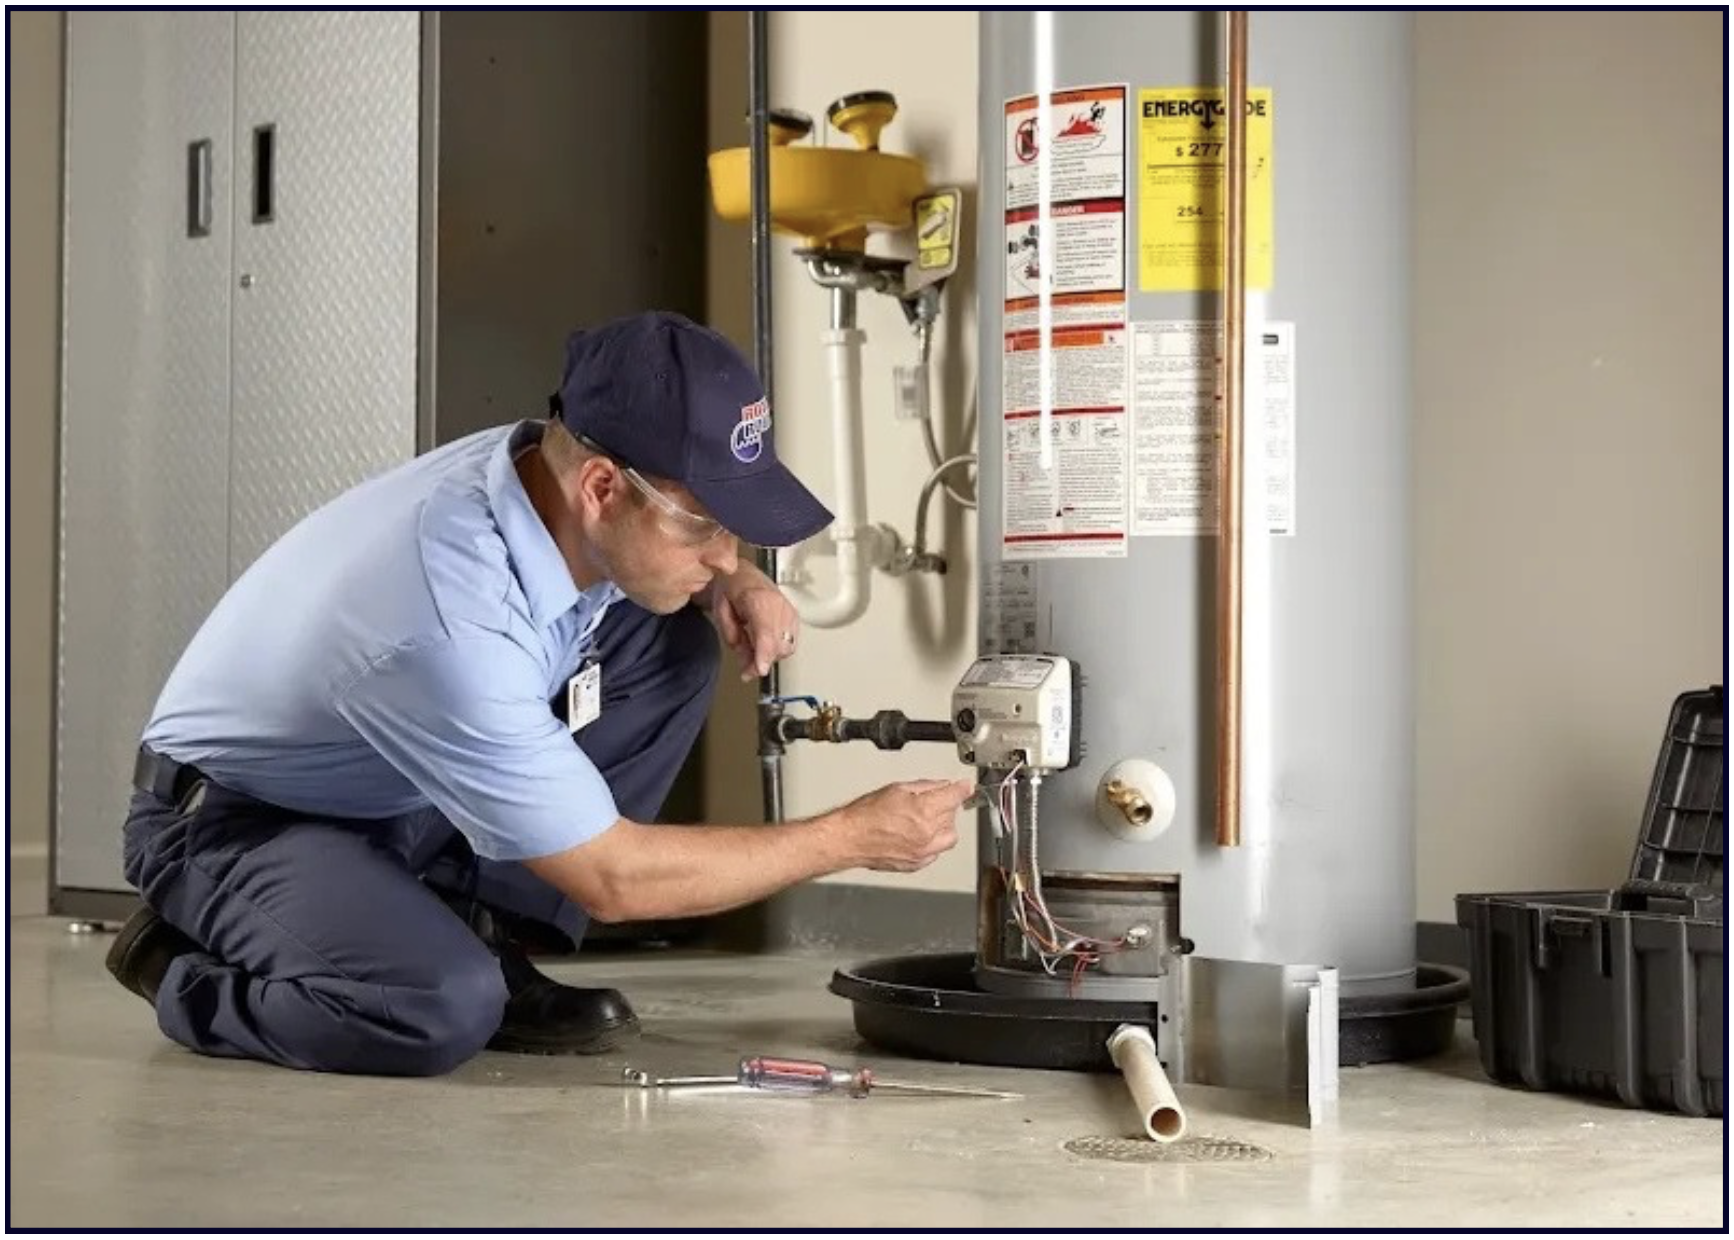
5. Services/Products
Demonstrate your service expertise through your photos, and showcase the products that you offer. Make it look good.

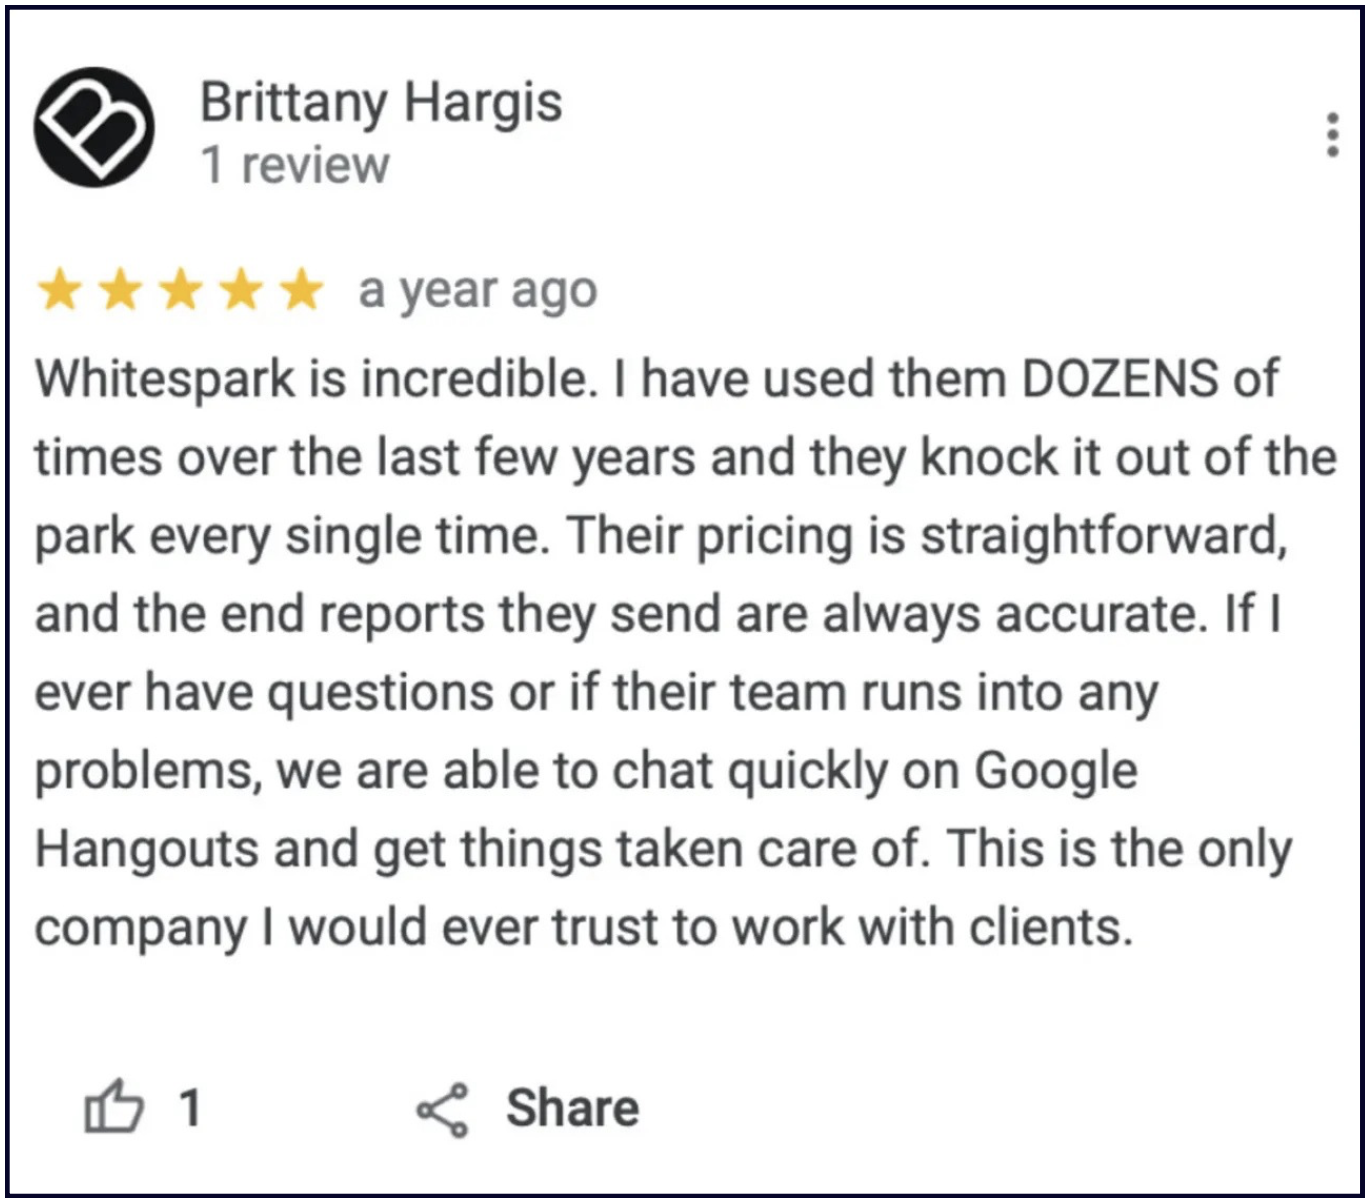
6. Rave reviews
Take screenshots of your best reviews and upload them to the Photos section. This can give visibility to your older glowing reviews, and can keep driving new customers to you.
7. Client wins and awards
Did you do an exceptional job for that one client? Did your team win an award in your industry?
Post a photo about it!

✍️Note: Geotagging photos does not help more people find your listing. Stuffing keywords into your image EXIF data is a waste of time because Google wipes that data when you upload your images.
Virtual Tour – 360° Interactive Tour
The value of a virtual tour will depend on the type of business you operate. If you're a service area business (SAB), it's going to be 0 (you won't even have the option in your dashboard), but if you're a restaurant, hotel, beauty salon, spa, or any business where being clean, cool, trendy, etc. is important, then investing in a virtual tour could help convert viewers to customers.
When you have an interactive tour, here's how it will appear in Maps for people searching:
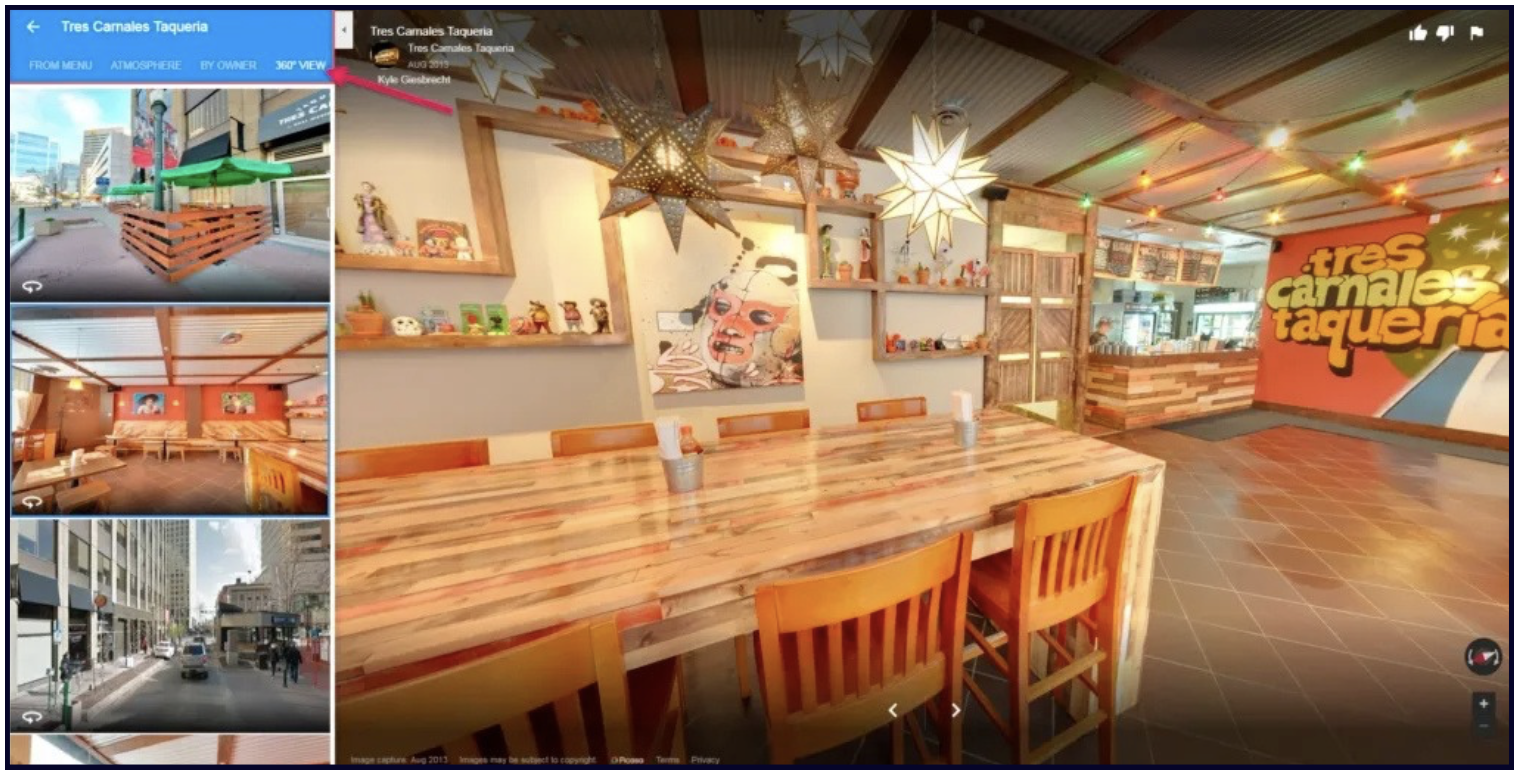
Learn more about this feature here, and if you want this for your listing, you can contribute your own content like this.
2. Photos from Customers
Google doesn't just want to see photos posted by the business. They want to see what your customers are seeing.
This is why Google allows anyone to upload photos to several places on your listing as well. Here they are:
Customer-uploaded photos
Customers can upload photos to your Photos section. This is an awesome feature because once you upload the 7 essential types of photos we listed above, visitors can basically enhance your Photos section for you.
You can verbally encourage customers to upload photos to your Google listing, or you can make your business more photo-worthy to increase the number of customer-uploaded photos to your listing.
Updates from Customers
In the Google Maps App, customers are prompted to "show others what it's like there now" by adding a photo update and caption.
If a customer adds a photo here, it will show up in the photos section of the business profile, as well as in the Updates section in the Maps app and Desktop Maps.
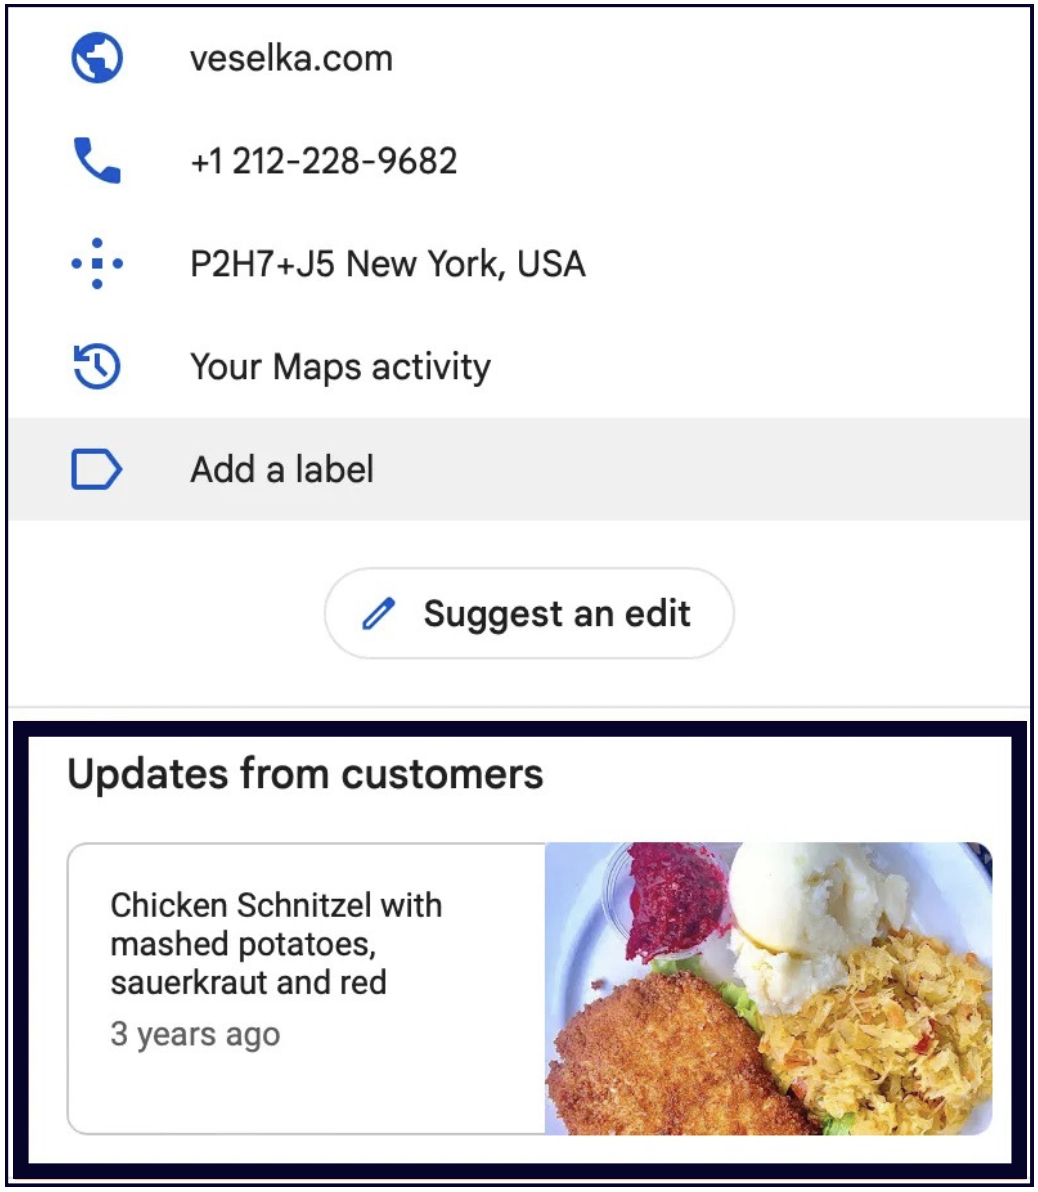
These photo updates don't expire. If a customer has added a photo update to your listing then it will remain in the "Updates from customers" until it's replaced by a newer update.
This feature can be very powerful when high quality or visually appealing photos are used, so encourage your customers to leave you an update.
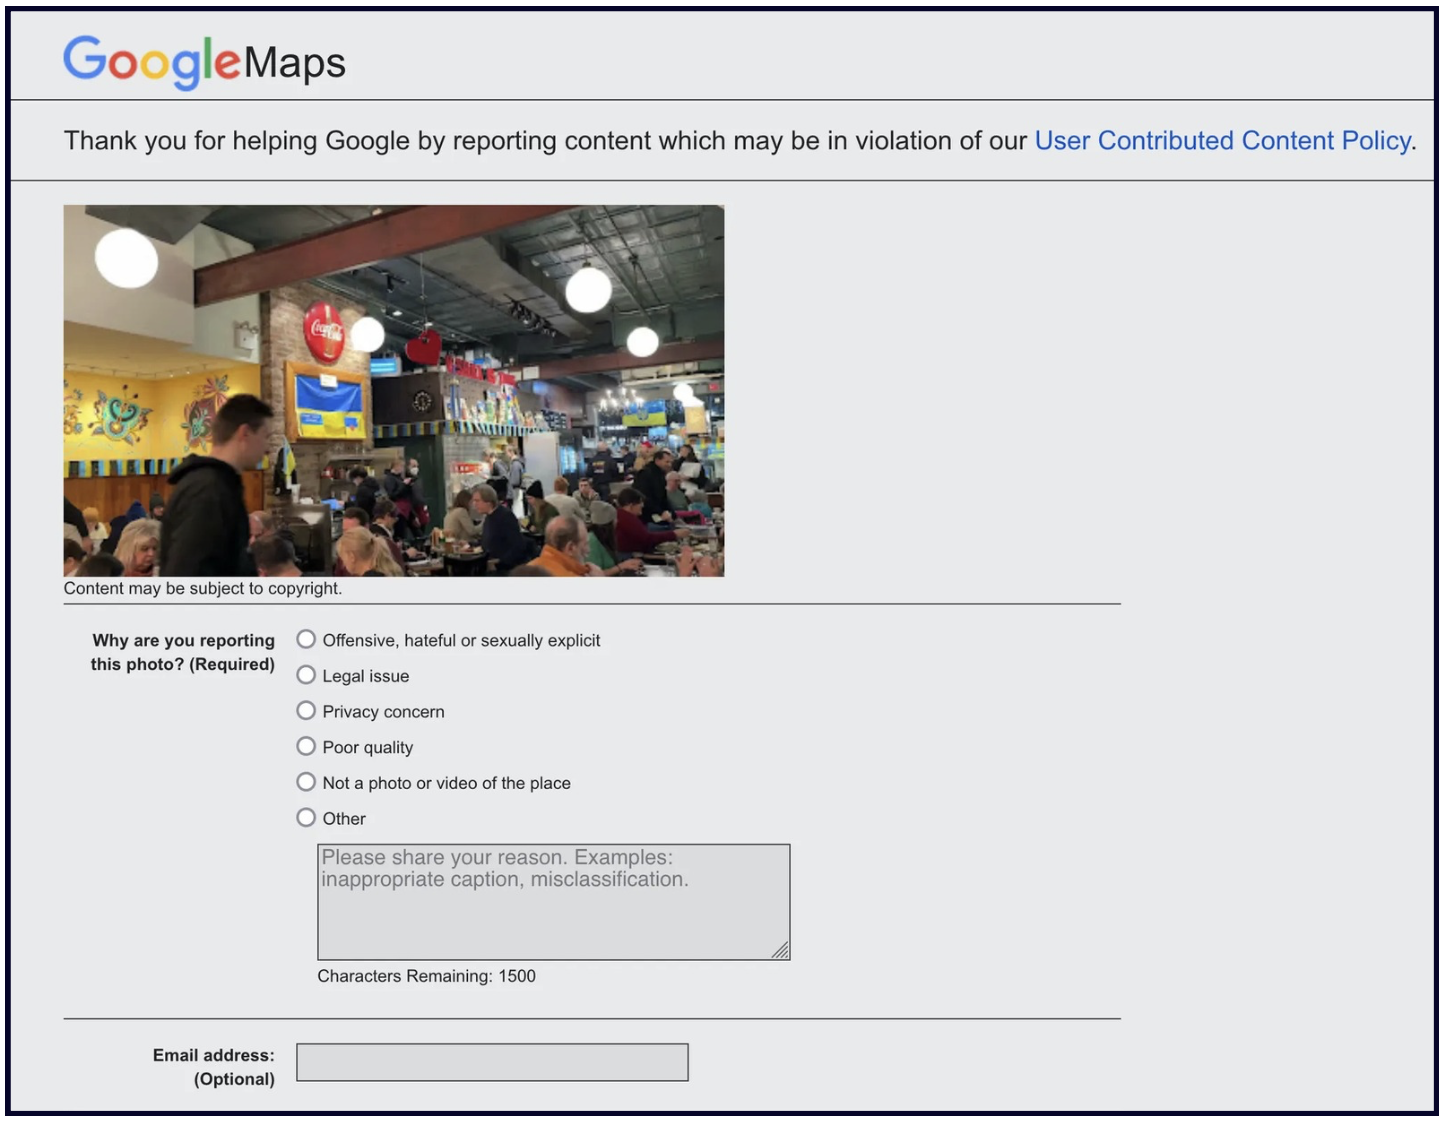
As with all crowd-sourced features, customers can sometimes upload unflattering photos in the "Updates from customers" section, so make sure to consistently monitor your Google Business listing.
If someone uploaded bad photos to your listing, you can flag them as inappropriate and report them.
Photos in Reviews
Google also prompts customers to add photos when leaving a review (both desktop and in Maps). Photos uploaded with reviews will also show up in the "Photos" section.
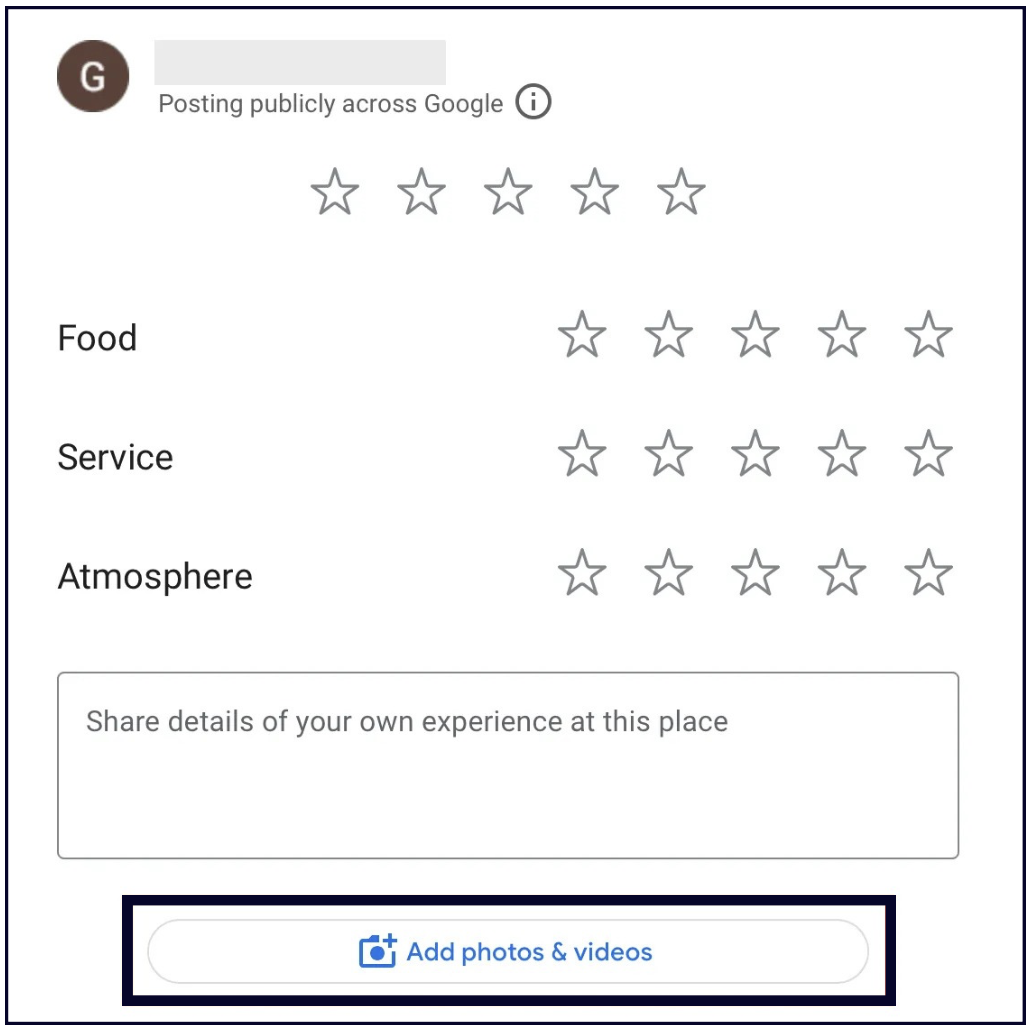
Photos in reviews serve as proof that 1) the review is legit, and 2) the business is real and represents itself accurately online.
Research by Sterling Sky also shows that reviews that contain photos stay at the top of the review section 10 times longer than reviews without photos. So, encourage your customers to upload photos with their reviews.
Videos
Businesses and customers have been able to upload videos to Google Business listings since 2018, yet they still seem to have a low adoption rate among business owners.
This feature seems to be more popular with visitors, especially when it comes to local attractions like farmer's markets, buildings, museums, etc.
According to Google's current video guidelines, videos on your Google Business listing need to be:
- Up to 30 seconds long.
- Up to 75 MB.
- 720p or higher in resolution
However, our research shows that you can exceed the 30-second limit as long as your video stays under 75 MB.
What you need to know about videos on your listing
1. Your videos need to be filmed at your place of business.
When we say videos, don't imagine expertly produced short films. Of course, if you have the time and resources to do that, go for it, but it doesn't have to be that complicated.
You can record short videos with your phone that capture the atmosphere of your space or show the interactions between your staff and your customers. You can even use Canva to create photo slideshows with some background music. Just don't use stock videos.
2. Users seem to be able to add any style of video to a listing
Check out Example 1, Example 2, and Example 3. Uploads from customers will be marked with their user name.
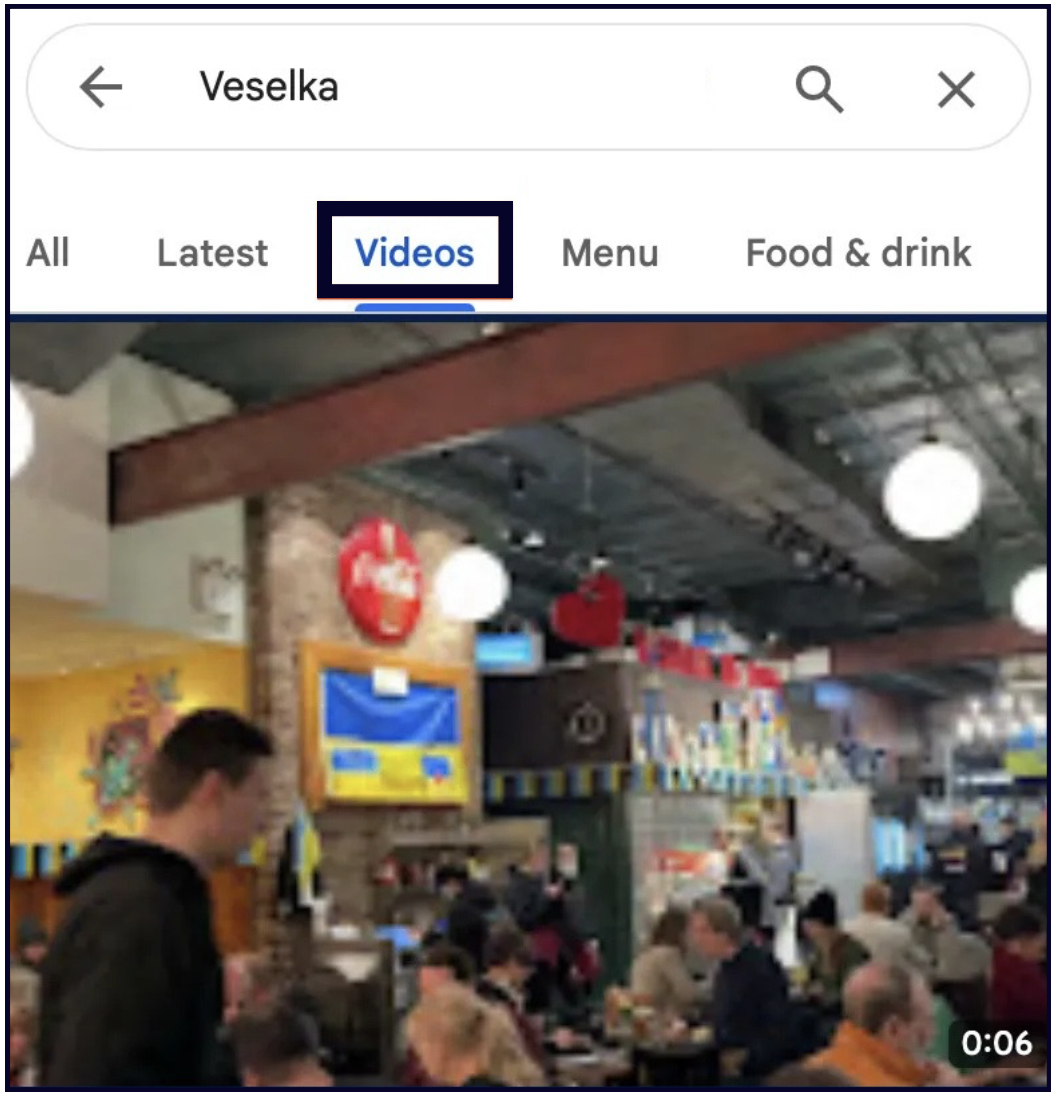
3. Videos show up in the Photos section.
If 2 or more videos are added to the listing, a Videos tab will show up within the Photos section.
Ideas for videos on your listing
If you're just starting out with videos, keep it simple. For example:
- Make a welcome video.
- Talk about why your company stands out from the competition.
- Tell people about the history of the company.
- Talk about the company's mission and goals.
- Give a location tour.
- Show your daily operations, customers ordering or getting a service done.
- Shoot customer video testimonials.
- Interview the owner, employees, or customers.
- Do quick Q&As.
Keeping an eye on your Photos section
You need to continuously monitor your listing for any customer-uploaded photos and videos that are inappropriate and/or an inaccurate representation of your business. You cannot prevent users from uploading photos to your Google Business listing, but you can flag and request the removal of customer photos if they violate Google Maps photo policies or Google's content policy.
Chapter 10: Google posts (AKA updates)
We like to think of Google Posts as free ad space on Google. Updates are visible to searchers directly in the search results and on your Profile, and utilizing them well can make your business more attractive to new customers.
✍️**Note:**Some business types on Google Business Profile do not qualify for the Posts feature (for example pharmacies or cannabis stores).
The most important thing to note here is that Google Posts are not the same as social media posts. While social media posts should not be too salesy as to not repel users, Google Posts are the complete opposite — if a searcher is looking up businesses, they are looking to buy; this is why you should use your Google Posts to convince and sell.
The second most important thing is that there are still many businesses that are not taking advantage of what this feature has to offer. This means that if you utilise them well, Google Updates can give you a great competitive advantage.
In this chapter we are covering:
- What are Google Posts?
- How to do Google Posts the RIGHT way
- Types of Google Posts
- How often to publish Posts
- Social media posts on your listing
- More pro tips on Posts
What are Google Posts?
Google Posts show up in different places, across different surfaces. Like many features in Google search results, Google changes where Posts appear on a regular basis – but here are a few different ways that Google Posts show up:
Desktop Google Search
Desktop Google Maps
Desktop Local Finder
Mobile Google Maps App
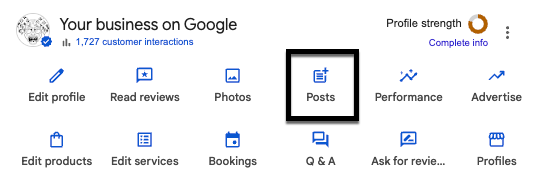
How to publish Google Posts
To publish a Google Update, go to your Google Business dashboard and click the “Posts” button:
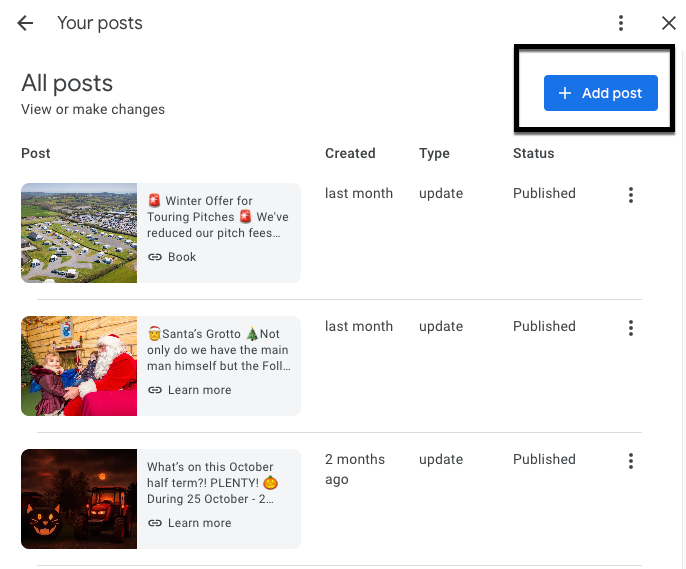
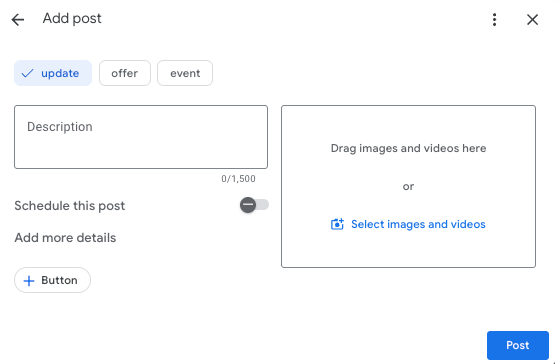
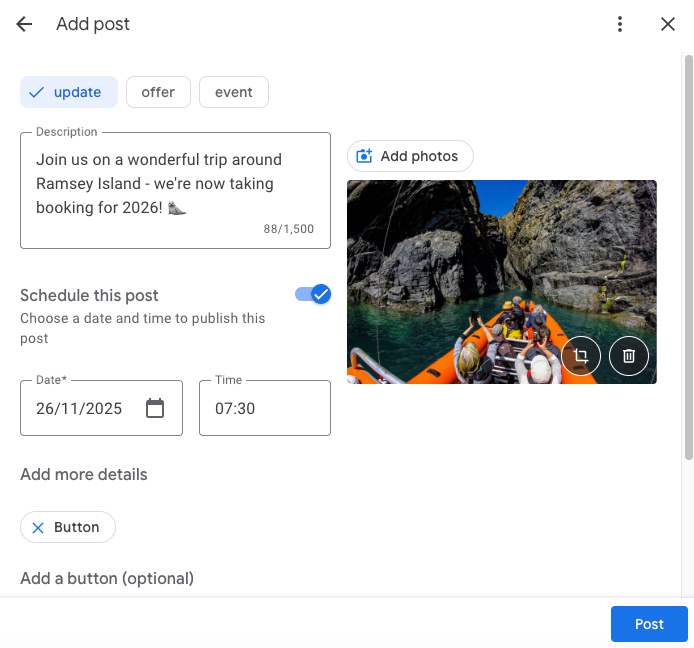
There are three post type options: Update, Offer, and Event. We explain what each of those entails in a bit. Click ‘add post’ to populate your new post.
No matter which option you choose, you’ll be asked to add a photo or video, a description, and an optional button to your post.
Photos & Videos
Photos must be at least 400 × 300 pixels, and we find that the ideal dimensions are 1200x900px. Images that don’t fit those dimensions will be shown with a black band down each side.
Our recommendation is to always test the image, check the preview, and expect that if there is an optimal size that it is likely to change frequently.
For videos, Google’s guidelines say that the maximum upload size of 75MB, 30 seconds in length, and a resolution of 720p or higher.
💡Tip: We have found that the 30 second limitation isn’t really true. You can post a longer video as long as it’s smaller than 75MB.
Videos are a great way to capture the user’s attention and provide them with more content than just text alone.
💡Tip: You can add up to 10 photos and/or videos for What’s New, Event, and Offer Updates. They will show up in a carousel format on the post:
Description
Each post can have up to 1,500 characters. However, only the first ~16-20 words (even fewer on mobile) show up in your Knowledge Panel results. So, make the first few sentences count.
Button (Call to Action)
Buttons on desktop appear as blue buttons and on mobile and in the Maps app as text links. You can add a CTA on every single post type, and your options include:
- Book
- Order online
- Buy
- Learn More
- Sign up
- Call now (uses listing’s Primary Number)
- Redeem online (for Offer posts only)
💡Tip: Don’t forget to add UTM parameters to the links in your posts to track their performance.
How to Do Google Updates the RIGHT Way
Most businesses treat Google Posts like social media posts, but you shouldn’t.
Your Google Business Profile is different from your social media accounts. People on social media want to be entertained, learn new things, or see what’s happening with their friends. They are generally not looking to buy things.
In contrast, people visiting your Google Business Profile are actively looking to buy.
Therefore, Google Updates should not be about entertaining or educating the reader, or about what happened at your firm’s holiday party. Instead, they should be about your services, products, specials, and offers.
Below is a breakdown of every type of Google Update you can use and what to use it for.
Types of Google Updates
Let’s dive into the three standard post types available and the perks they provide.
What’s New (a.k.a. a regular Update)
These are the standard Updates that you’ll use most often. Some example use cases would be:
- Promo for a new product, service, or location
- A client success story
- A great customer review or testimonial for better visibility and conversion power
- Any awards your business has received
This Update type gives you the following fields:
- An image or video
- Description
- Button with a link or phone number
💡Tip: Always tag your button links with UTM tags so you can track the clicks they get.
Offers
Offer posts allow you to promote sales, coupons, discounts, or specials that your business is currently providing. You can even create an exclusive promotion just for your Google listing if you wish (among the lines of “Mention you found this code on our Google Profile to get 10% off”).
These posts include a yellow tag on desktop and mobile search and blue tag in the Maps app, which definitely draw a searcher’s eye (see picture below).
This Update type gives you the following fields:
- Photos or videos
- Offer title
- Start date
- End date
More details (optional):
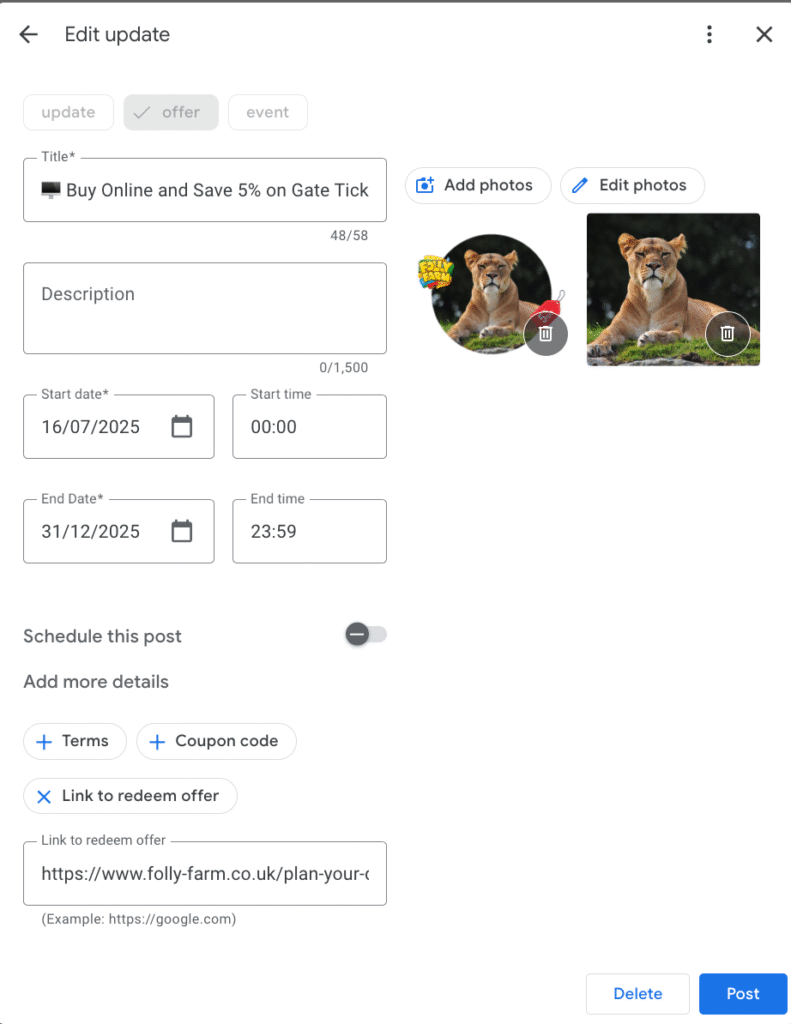
💡**Tip:**Filling out the voucher code is a fantastic way to track the exact conversions you are getting from your Google Business Profile. Having a code also enhances the look of the Offer post, while making it more enticing and exclusive.
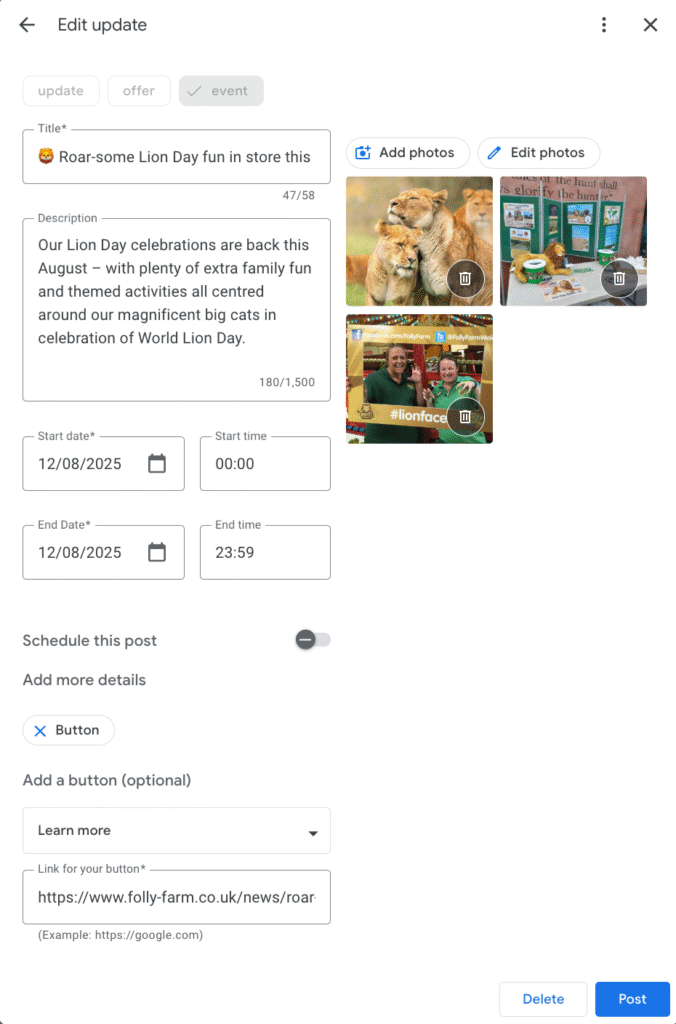
Events
Events posts can be used to promote any event you are involved in, attending, hosting, or supporting. It can be an in-store, neighborhood, or even charity event that your business may be passionate about.
This Update type gives you the following fields:
How many Updates can you post, and how often?
There is no limit to the number of Updates you can publish. We publish them once a week for our SEO Services clients, which is the cadence we generally recommend.
Google Updates used to expire after 7 days, but since January 2021, they no longer have an expiration date.
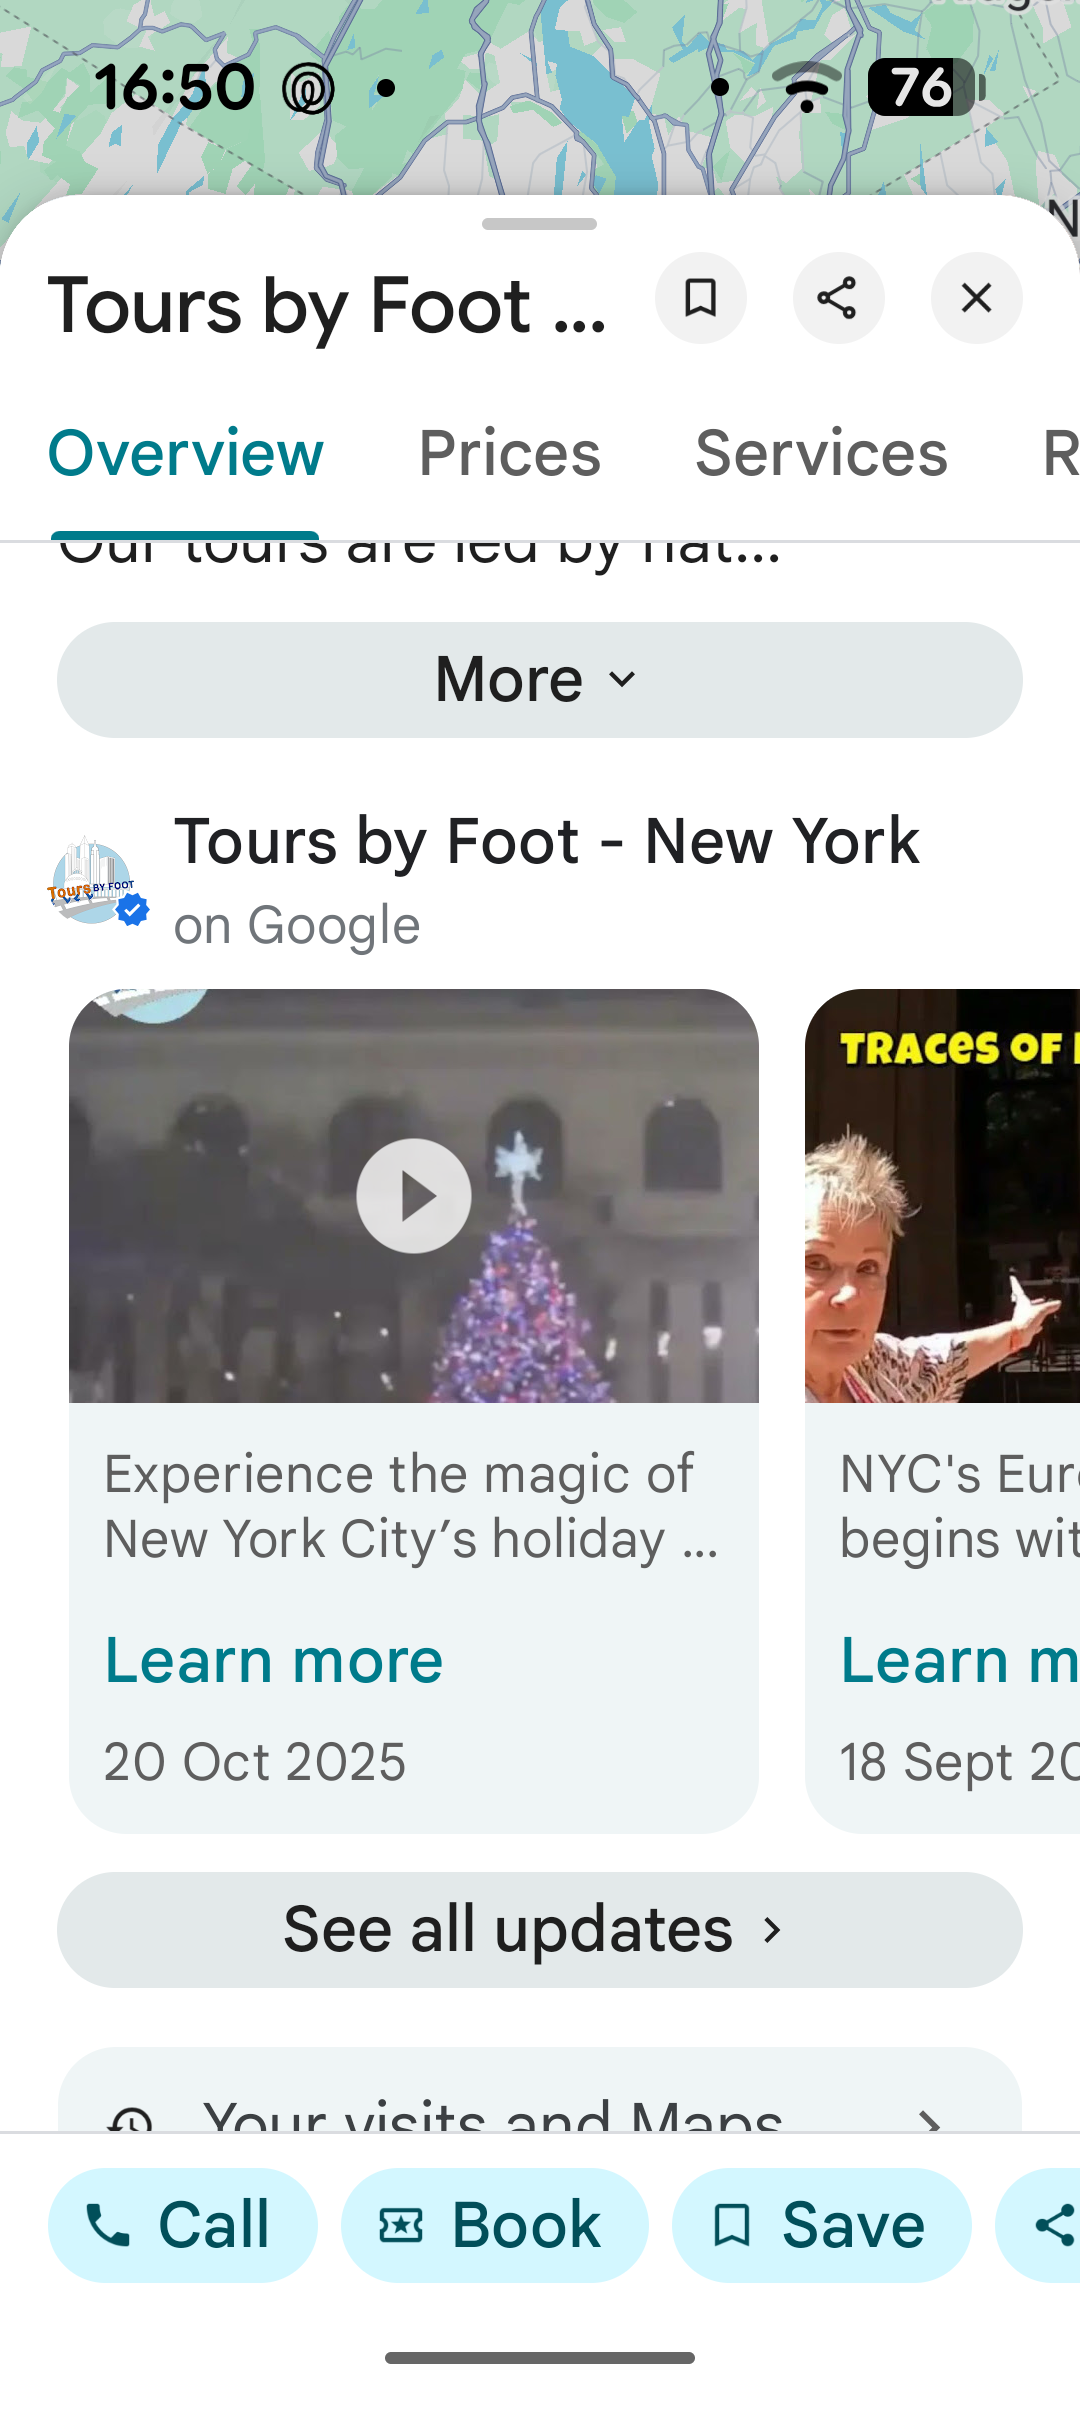
Social Media Posts on Your Google Business Profile?
There is a relatively new feature on Business Profiles where Google pulls posts from the business’s social media accounts (like Facebook, Instagram, X) and displays them on the Google Business Profile.
As of February 2025, Google only pulls your social media posts into your profile when it’s an explicit brand search on a mobile browser, but they may roll this out to desktop and other interfaces in the future.
In our opinion, this decision by Google was not ideal because, as we said earlier, your Google Business Profile serves a different purpose from your social media — Google is for being salesy, and social media is for building your brand’s character and engaging with your customers. We have a whole article written about this topic and how to balance both types of posts on your Google listing, but the bottom line is:
If you decide to link your socials to your Business Profile (or Google does it automatically for you), keep in mind that some of your social posts might show up on your Google Business listing, so write them accordingly.
Some more advice on Google Updates
UTMs
As we mentioned before, tracking link performance is really important across your entire Google Business listing, so be sure to incorporate a UTM tag in any URL you add to your Post to help increase the accuracy of your reporting. Use this template, or tweak it to match your existing tagging templates.
Hashtags
Hashtags are unnecessary and don’t work the same way they do on social platforms like Twitter or Instagram, so just save yourself the time and characters and don’t use them.
Emojis
One of our favorite pro tips when it comes to Google Updates is using emojis. They are great for adding some brand personality to your content, and, more importantly, they tend to grab viewers’ attention.
Use apps to post and manage your Google Updates
There are various tools, plugins, and apps available to help you schedule your posts (like Metricool, Publer, Vista Social, or Buffer). And you can use an app like Canva or Adobe Express to design your posts.
We use Canva to design/create posts and Publer to schedule them for our clients in our SEO Services.
Post scheduling and publishing across locations
The following functionality is now available in Google Posts:
- 𝗣𝗼𝘀𝘁 𝗦𝗰𝗵𝗲𝗱𝘂𝗹𝗶𝗻𝗴: Plan your entire week or month in advance! You can now schedule your Google Posts to go live automatically at the perfect time.
- 𝗠𝘂𝗹𝘁𝗶-𝗟𝗼𝗰𝗮𝘁𝗶𝗼𝗻 𝗣𝘂𝗯𝗹𝗶𝘀𝗵𝗶𝗻𝗴: Create a single post and apply it instantly to multiple business locations in one click.
Read the fine print
There are content policies for Posts, so certain language/words, spam, inappropriate images, anything blurry, and so on can be considered a violation, which means your Update will be rejected.
Google also does not allow you to add your business phone number to your post content. They refer to this as “phone stuffing” and they recommend that you add the “Call now” button instead.
Final thoughts
Google Updates are like free Google ads: they allow you to showcase your business, encourage appointments and bookings, highlight specials and events, and get direct conversions from your Google Business Profile.
If you’re not already taking advantage of this feature in your Google Business Profile, it’s time to make Google Posts part of your weekly routine — it’s one of the easiest ways to get more people choosing your business over the competition.
Chapter 11: Reviews
Getting found on Google is only half the battle. Your business also has to stand out and attract new customers. Reviews play a critical part in this because they are a powerful factor in both getting found and getting chosen.
How Reviews Help More People Find and Choose You
Reviews can help your listing in a couple of ways:
-
Directly. According to research on what Google looks at, 4 of the top 20 things Google considers when deciding who to show involve reviews.
More specifically:
- Having a high numerical rating (i.e. 4-5 stars)
- Having a high number of reviews
- Having a sustained influx of reviews (i.e. getting reviews consistently over time)
- And having recent reviews
-
Indirectly. Google has confirmed that they measure how much people engage with your listing when deciding who to show.
So, while reviews directly affect how often you appear, they also provide additional indirect benefits, making them absolutely critical to getting found by people nearby.
When you run a search for local businesses, which results do you click on first? The ones with the most reviews and 5-star ratings? Yeah, us too. Those clicks send a signal to Google that people like your listing.
Also, the more reviews you have (and the better their quality), the more time people will spend scrolling through them. When Google sees that people are spending a lot of time on your listing, it takes that as a sign your business is worth showing to more people.
So, how can you apply this knowledge to:
- Get more reviews, consistently,
- and improve the quality of your reviews?
Ask every customer to leave you a review.
But no incentivising. Google's guidelines say you cannot give discounts, rewards, or monetary compensation in return for customer reviews.
💡 That being said, you can incentivise your employees. Reward them for requesting reviews from your customers.
And if you can't find the time to:
- send personalised review requests
- follow up with every customer
- respond to all your reviews
- and monitor your reviews on multiple websites
… you might like Whitespark's Reputation Builder tool. The Reputation Builder handles the repetitive legwork — sending requests and reminders on a schedule you control — so you stay consistent even during your busiest weeks. It also helps you get more reviews, lets you publish them on your website and socials, and gives you a clear picture of your review progress.
When we started using Reputation Builder at Whitespark, we got 50 reviews in just one month. We set up our templates, imported our client list, and let it handle the scheduling and follow-ups.
How Reviews Impact Conversions
5 of the top 10 factors that turn visitors into customers in the 2026 Local Search Ranking Factors Survey are review-related:
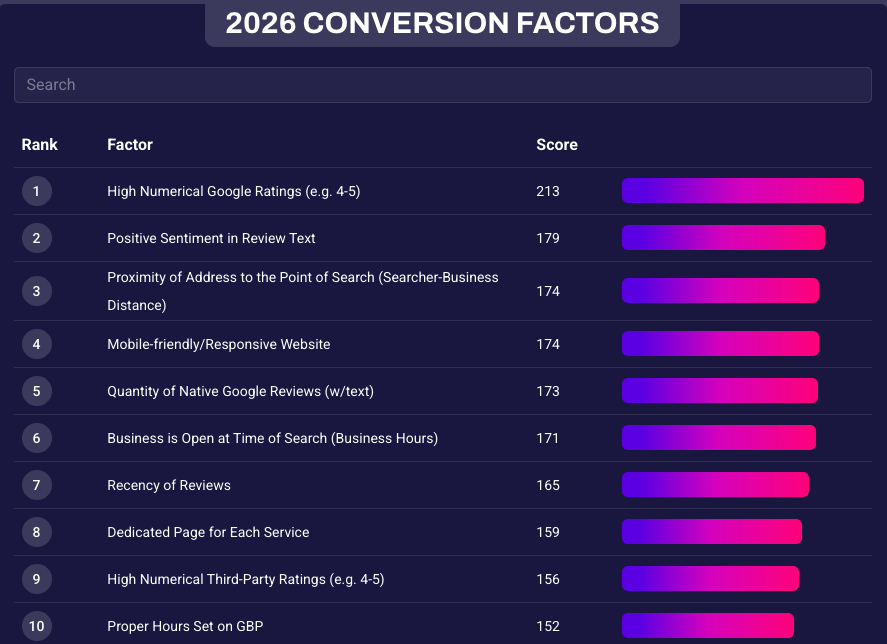
1. Factors #1 and #5.
Listings with high ratings and a high number of reviews draw people in.
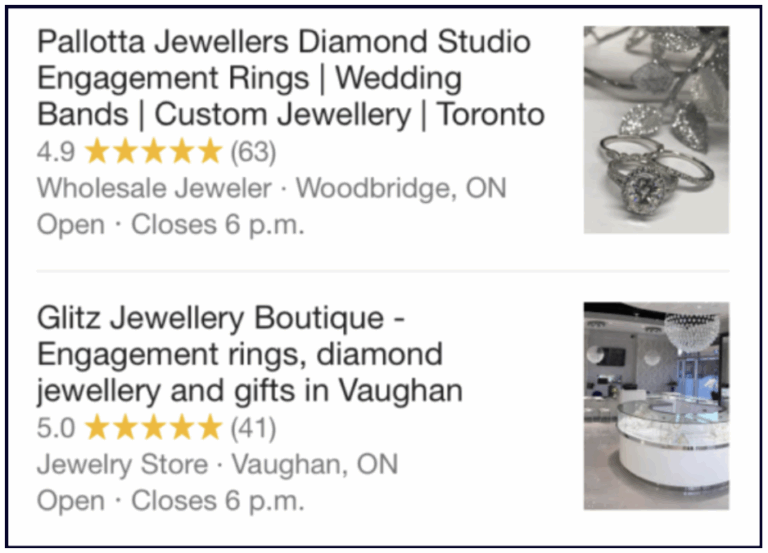
Which business would you pick: One that has a 4.8 star rating and 315 reviews, or one that has a 4.6 star rating and 41 reviews?
Chances are, you're going to pick the first one because:
- People like it more (it has a higher star rating).
- More people like it (it has more reviews).
So, you need to ask every single customer for a review, and remind them with follow-up emails, calls or messages.
2. Factor #2.
Listings with positive sentiment in their reviews get more customers. This needs no explanation: if a customer reads good things about the business, they will choose to go there.
The more genuine, positive reviews you have, the more confidence new customers will have in choosing you.
Two simple tips to increase your reviews' conversion power
1. Ask your customers to mention the service/product they received
Keywords in reviews help Google understand what services you offer, which means more people searching for those services can find you. They will also improve your conversion rates by:
- showing prospective customers that you have what they're looking for
- triggering eye-catching review highlights in the search results
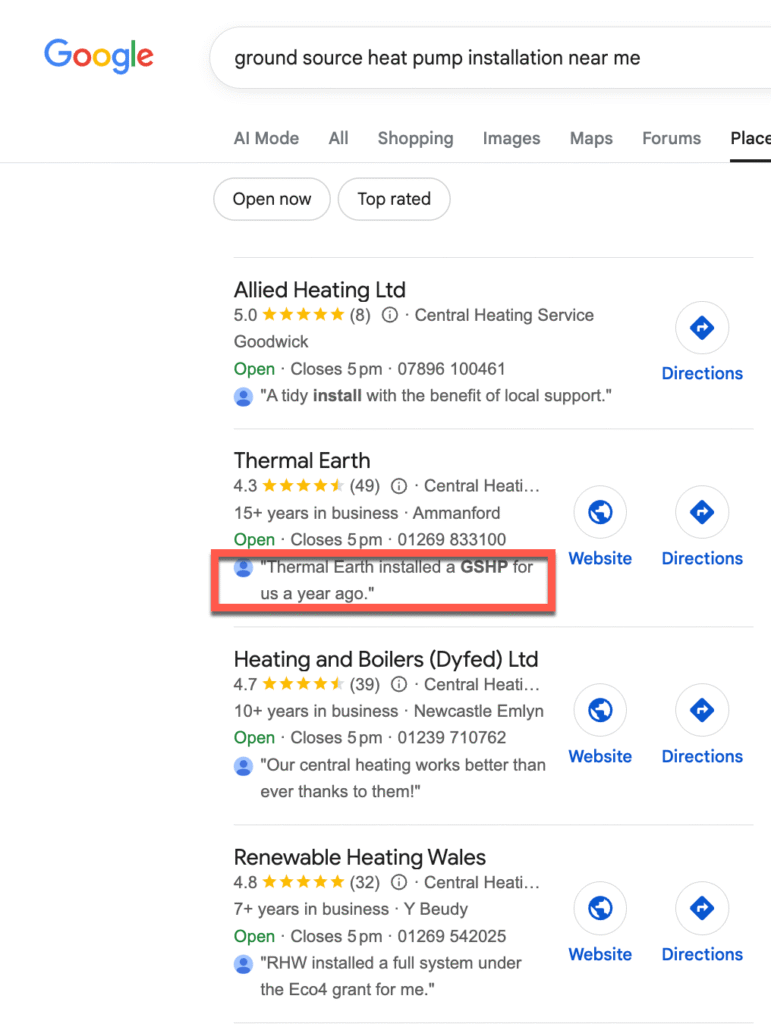
In order to get keywords in your reviews, you need to make your review requests specific. Reach out to your customers after their visit and give them a keyword-rich 'prompt' to follow:
Subject: How is your new furnace? Hey Darren,
Just checking in to see how things are going with the new furnace. If you have any questions or comments, please let me know!
Also, we would really appreciate a review on Google. It has a huge impact on our business. Would you mind giving us feedback on how you like your new furnace by leaving us a review on Google?
Here's a link: https://reviewthis.biz/furnacepros
Thank you!
Darren
2. Ask customers to include photos and/or videos in their review
Photos and videos serve as additional proof that the review is legit and the product/service is as good (or bad) as the reviewer says.
Additionally, research by Sterling Sky shows that reviews with photos stay prominently visible for much longer than reviews without photos.
Make sure your positive reviews stay front and centre by asking customers to include a photo or video in their feedback.
To make this process easier, you can take the photo for your customers during their visit, then send it together with your review request, like this:
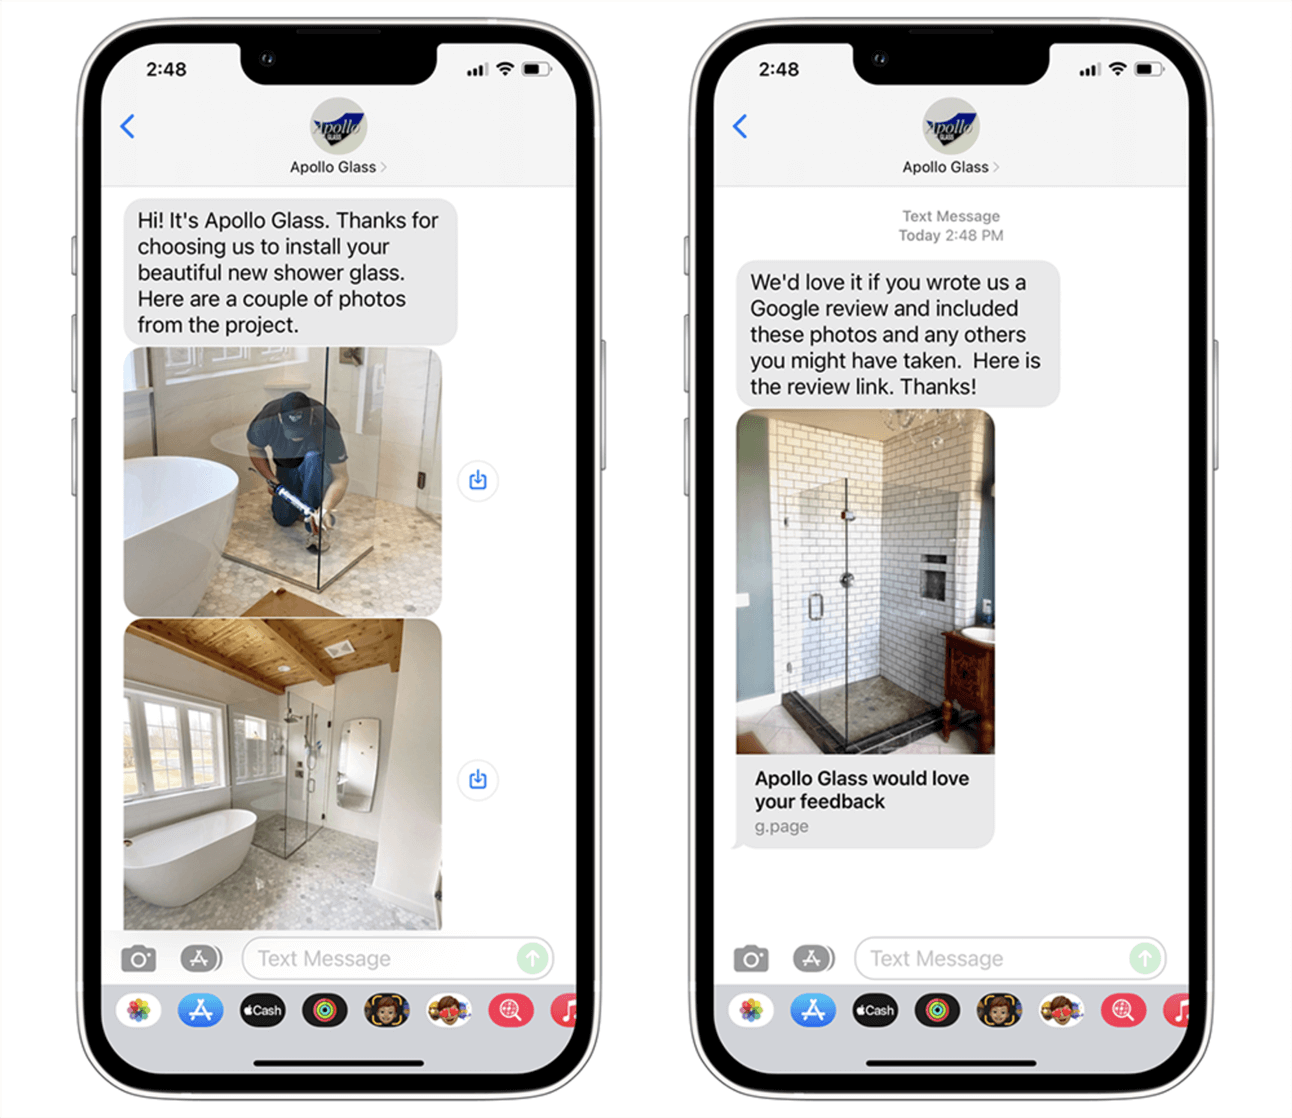
If this sounds like a lot of work, the Reputation Builder software can help. It handles your review requests and reminders on a schedule you control, helps you craft review responses, and much, much more.
Google's Review Policies
Here are Google's most important review policies, summarised:
- You cannot incentivise, pay or bribe a customer to leave a review.
- You cannot review gate – "review gating" is when you ask your customers how their experience was first, then you send the unhappy customers to a feedback form and the happy customers to Google to leave you a review. Google has made this explicitly against the guidelines.
- You cannot review your own business.
- You cannot leave a review as an employee.
- You cannot post a negative review about an ex-employer.
- You cannot post a harmful review about a competitor.
You can find the full list of review guidelines here.
How to Ask for Reviews
Here are a few suggestions to help you grow your Google reviews.
Get a review link
To get your review link, go to your Google Business dashboard and click "Ask for reviews". You will see this window pop up, with a link to share with customers:
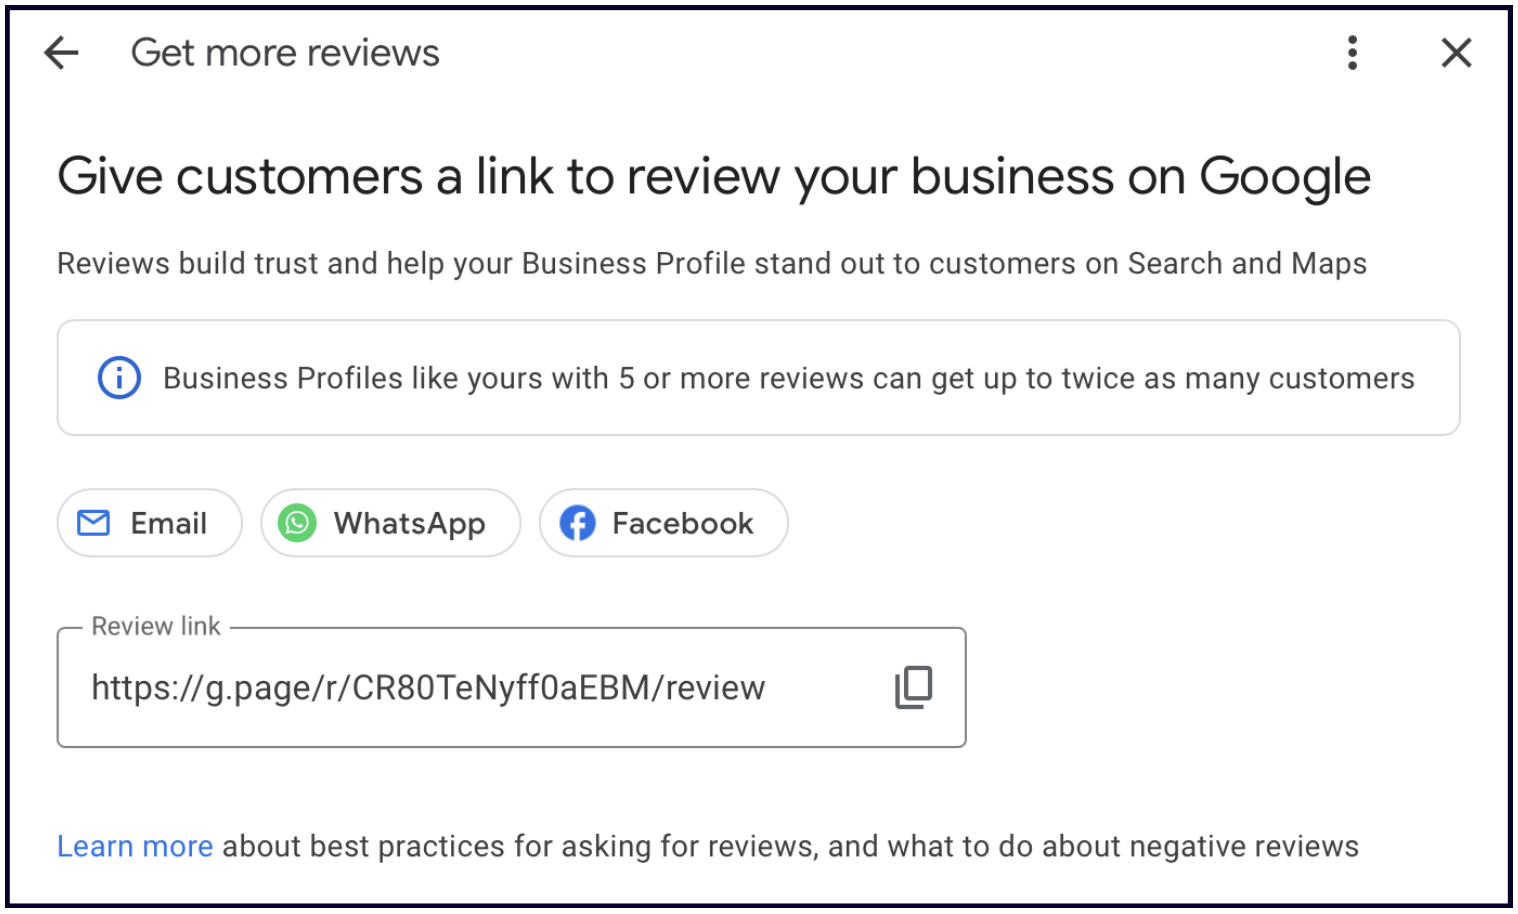
Alternatively, you can use our free Google Review Link Generator to get a review link and QR code that you can share in emails, text messages, signs, packaging, uniforms, etc.
Below, we've outlined a few effective ways to ask for reviews.
Ask via text or email
Create a review request template containing your Google review link.
Things to consider when asking for a review via email or text:
- Include a question in your subject — "Hey Bob, could you please leave us a review?"
- Personalise the email template (incorporate the customer name, mention any details about their visit, etc.).
- Encourage the customer to mention specifics and encourage keywords in their reviews.
- If you don't receive a review, send a follow-up request a few days later.
Here's an example of a template you could use as a starting point:
Hello [Customer Name]
It was a pleasure working with you on [project]. Thank you for your business!
Online reviews from great customers like you really help our business. Could you take 60 seconds to leave us a review on [review site]? Here's a [direct link].
Wondering what to write about? Here are some questions to help you:
– What service did we complete for you? – Which location did you have this service at? – How did we do? – What do you like about working with us? – Have you tried any other products or services? – Did you work with any specific people you'd like to mention? – How do we compare to other companies you've tried?
These are just suggestions, so feel free to write whatever you want! Thank you in advance for helping us out!
[Your Name] [Email Signature]
Other spots to place your review link and/or QR code
- Your website
- Receipts
- Business cards
- Review cards (near the register)
- Review signs in your place of business
- Employee t-shirts
- Packaging
Use a Review Platform
Depending on your business model, asking your customers directly may be the best option, but if you want to scale your review request system and track your review performance, a review management tool like Reputation Builder can be very helpful.
It lets you monitor and manage your reviews on Google, Facebook, and 100+ other review sites. It also sends review requests to your customers via email and text on a schedule you control, embeds your reviews on your site, and posts them on social media.
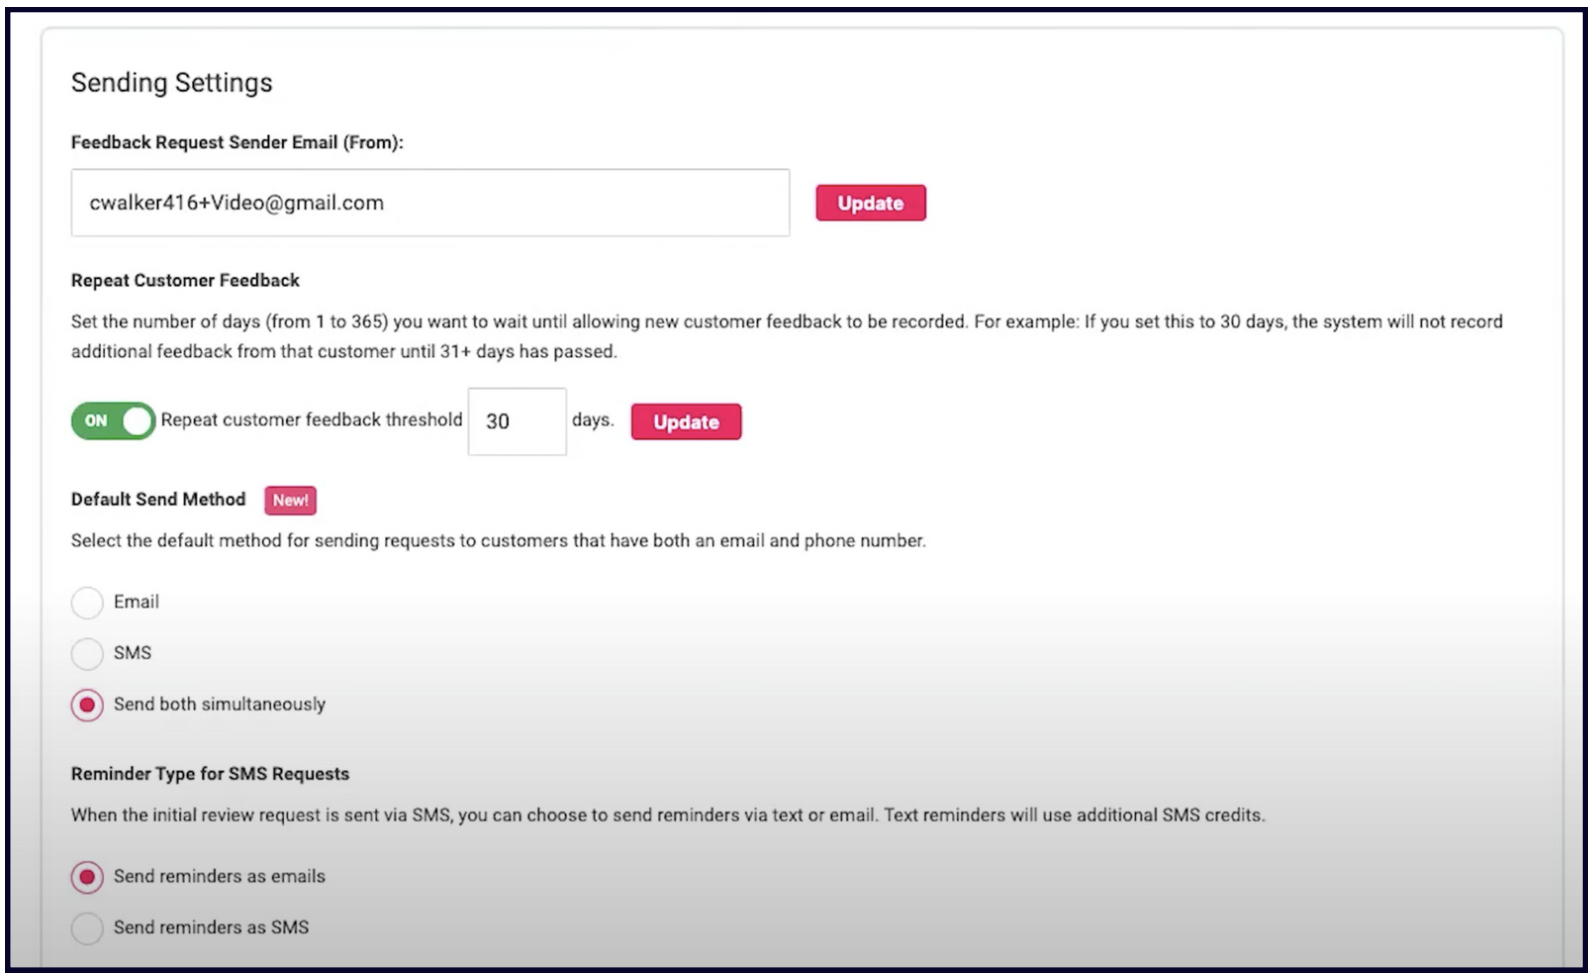
You can get a free 14-day trial here.
Managing Your Reviews
Respond to All Reviews
Review responses don't affect how many people find your listing, but they are an opportunity to solidify your relationship with the reviewer, show prospective customers how good you are, and even change an angry reviewer's mind.
You can respond to reviews via your Google Business dashboard or directly on the listing, both on desktop and mobile. Just make sure you are signed into the Google account that you use to manage the listing.
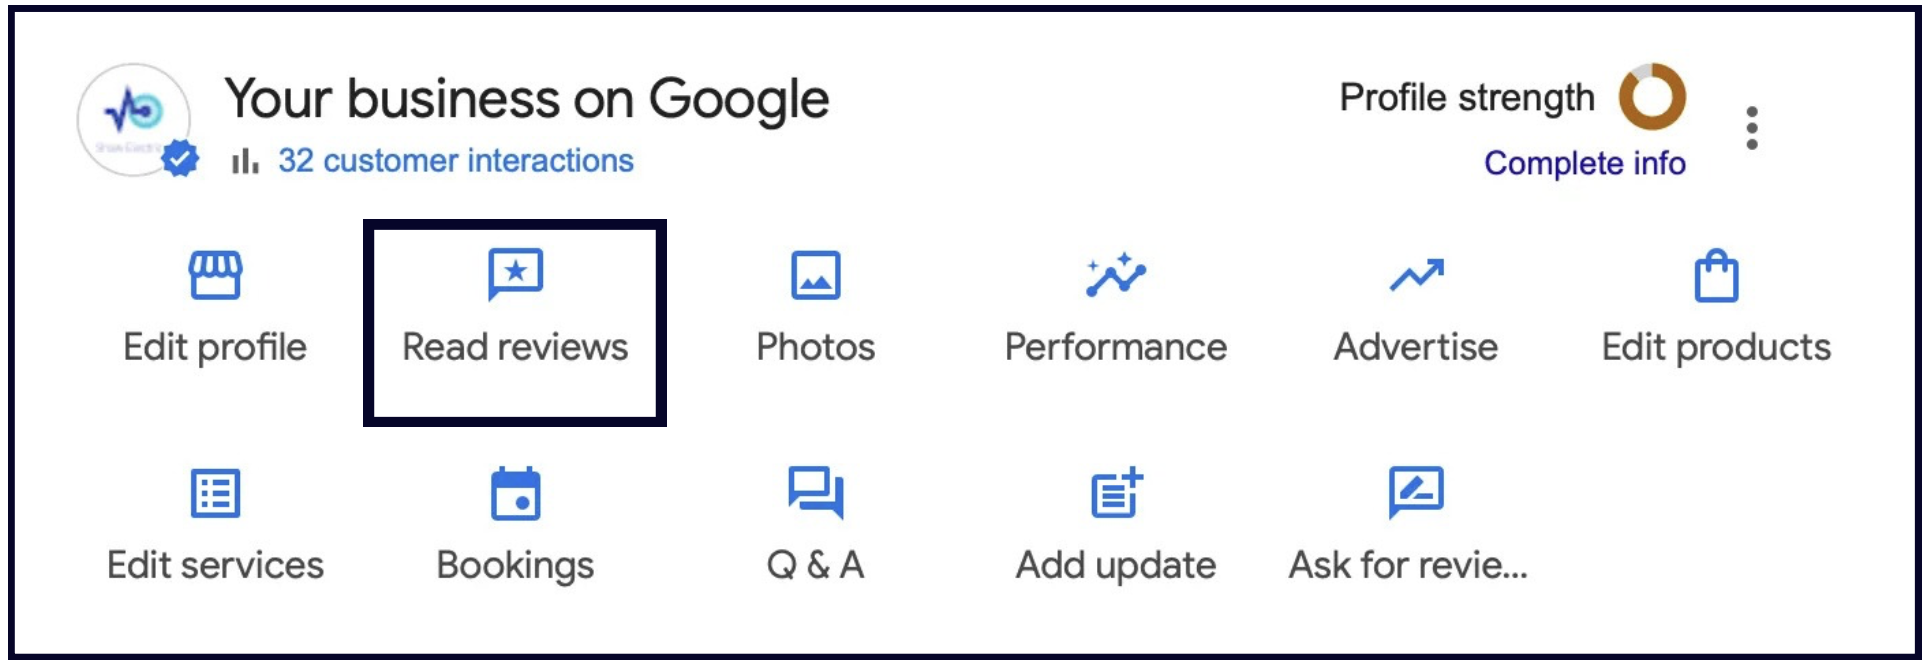
We've outlined below how to respond to positive reviews, and how to approach the negative ones.
How to respond to a positive review
- Start with gratitude — Thank your customers for taking the time to write a review. This shows them you value their feedback and reveals to potential prospects that you care about your customers. Consider a review response an extra step toward building stronger relationships with your customers.
- Personalise your response — Mentioning details about each specific customer interaction can add more value and credibility to your reviews.
- Invite your customers to return — Remember that you're also writing these responses for your FUTURE customers. When you remind the reviewer that you're eager to work with them again, you're extending the same invitation to potential customers who are reading your reviews.
Here's an example of a great response to a positive review:
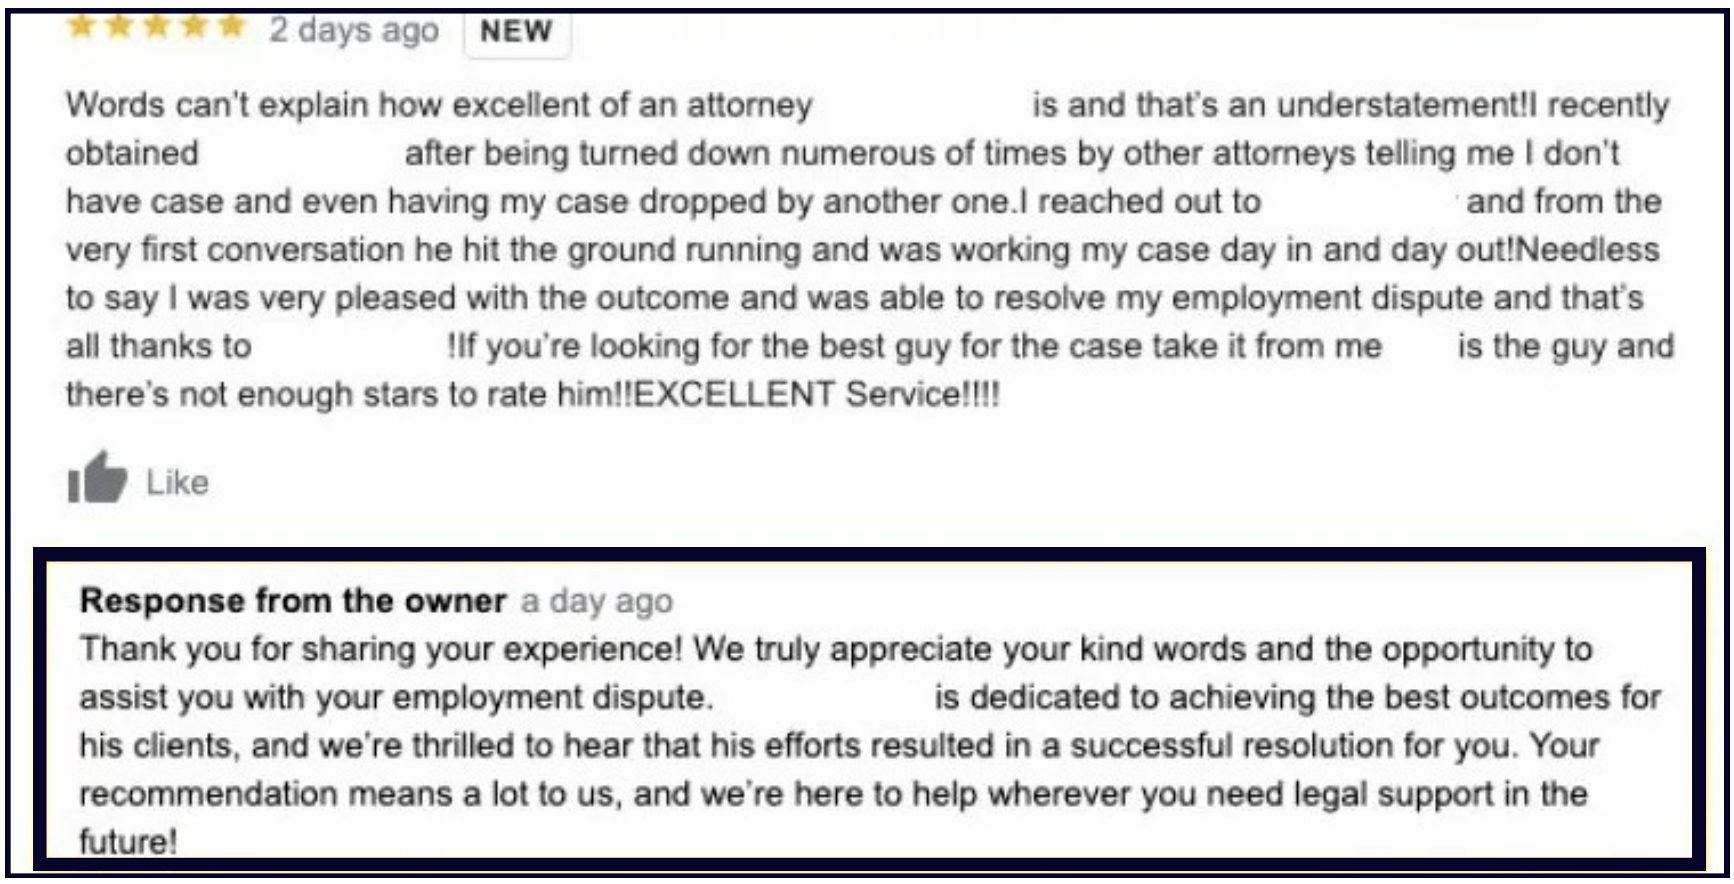
How to respond to a negative review
- Empathise with the customer — Take a moment to say sorry. It is important to let your customers know that you genuinely care about their experiences. Remember, you're not only writing this response for the person that left the review, but also for potential customers reading your reviews.
- Say thank you — Sincerely thank your customers for taking the time to write a review. This is a great way to establish a sense of trust and rapport with them.
- Take the conversation offline & offer a solution — Don't get into the details in your response. Discuss their problem and try to find a solution away from the public platform. That's why including your contact information in your review response is important.
Negative reviews can be opportunities to build a closer relationship with customers and turn them into brand advocates. When you take the time to understand and respond to an unhappy customer's concerns, you can often turn a 1-star review into a 5-star review:
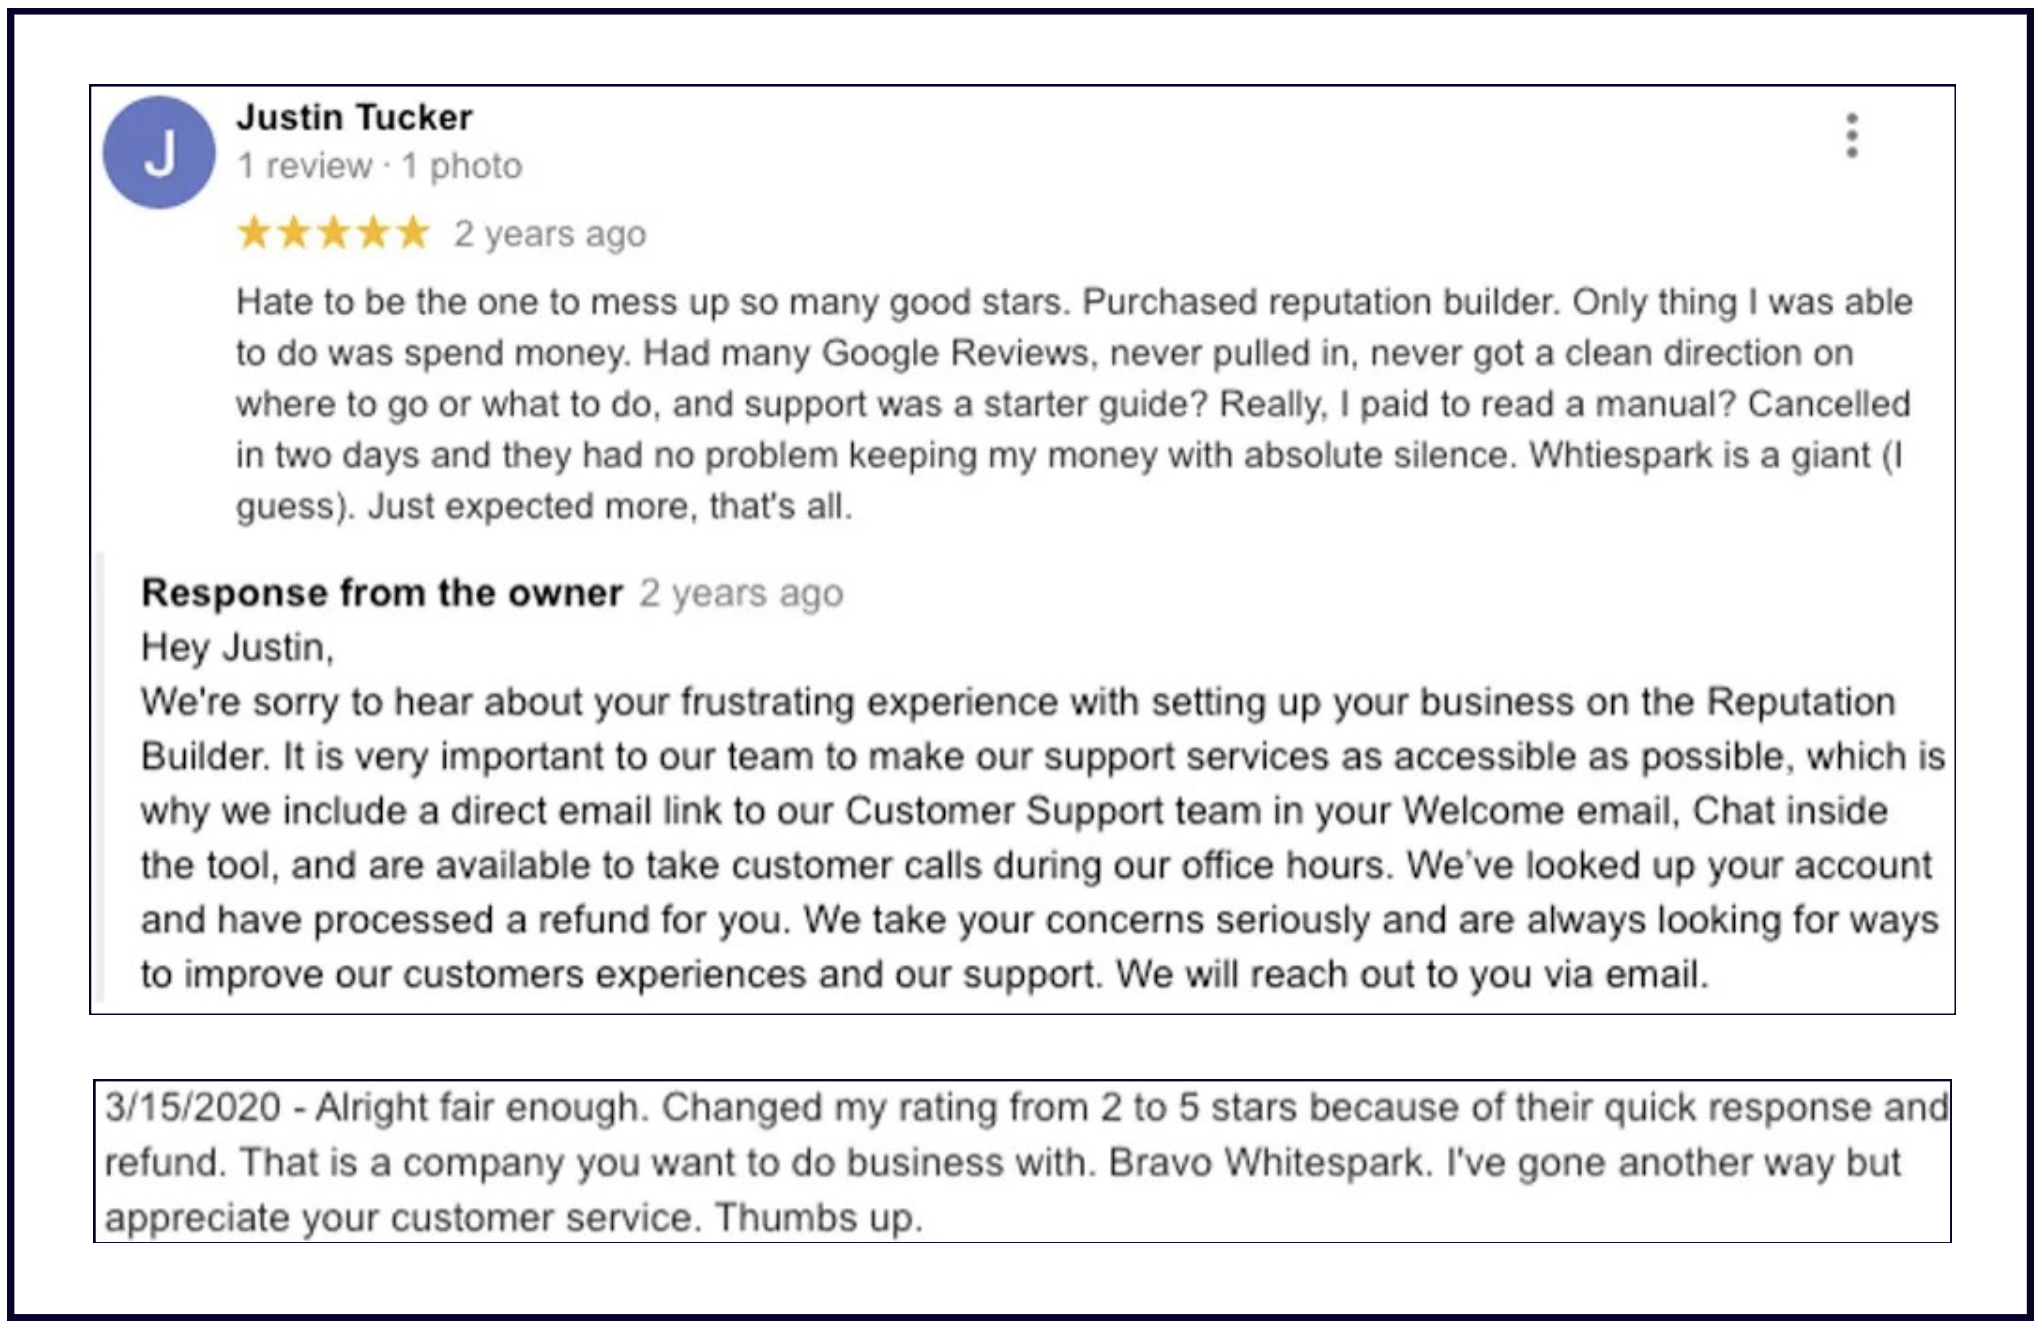
Report fake reviews
Unfortunately, some industries are riddled with Google review spam. If you get a bad review from a person who's never visited your business — or even worse, if your review section gets flooded with 1-star reviews all of a sudden — you should report them.
Follow these steps for requesting the removal of a review. Be sure to have the necessary proof and not a "he said/she said/they said" argument to back up your claim.
Google also has a tool called "Manage your reviews" designed specifically for businesses to report reviews and check the status of any previously escalated reviews. This is a great way to stay organised, especially if you manage many locations or are dealing with a lot of negative reviews.
Don't aim for a perfect 5-star rating
Researchers at Northwestern's Medill Spiegel Research Center found that customers are most likely to convert around the 4.2-4.5 star range, and purchase likelihood drops as the rating approaches 5 stars.
This may sound surprising, but negative reviews help establish trust and authenticity. So, don't stress if you get a bad review here and there. If anything, a couple of bad reviews will strengthen the credibility of your 5-star reviews!
Google Review Features to Know About
Review Attributes
Some listings prompt users to give their feedback on specific aspects of the business when leaving a review (such as what kind of product or service they got, how much they spent, etc.). Review attributes look like this for the reviewer:
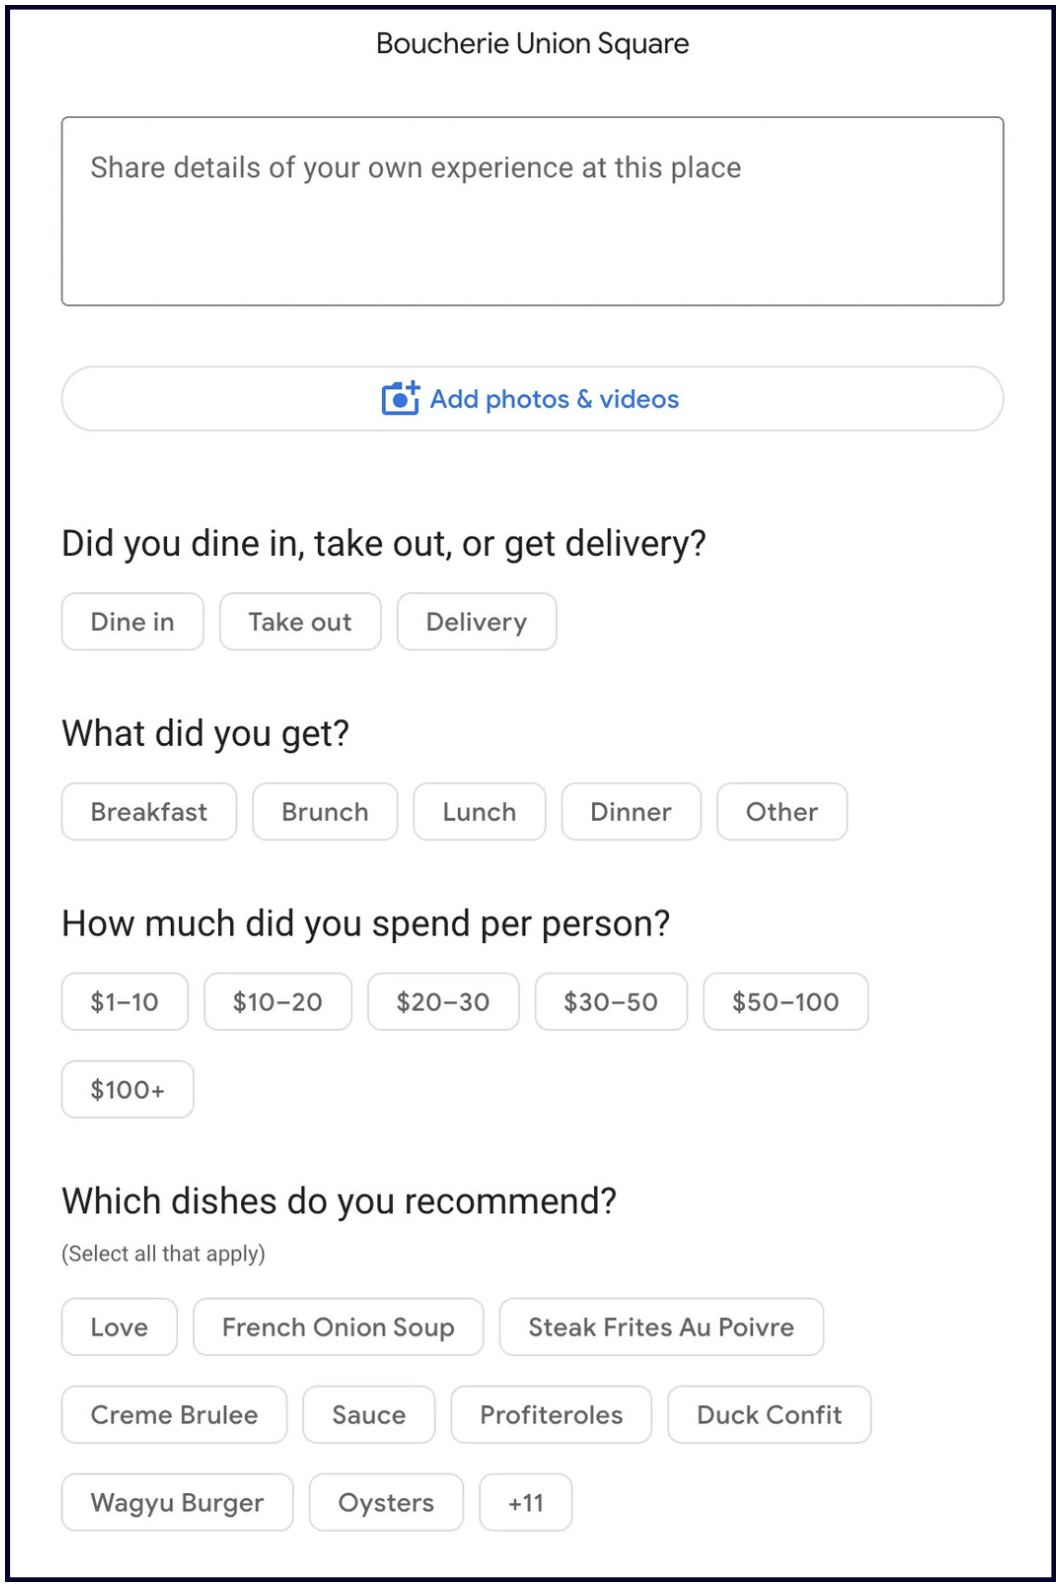
And like this to the person looking at the published review:
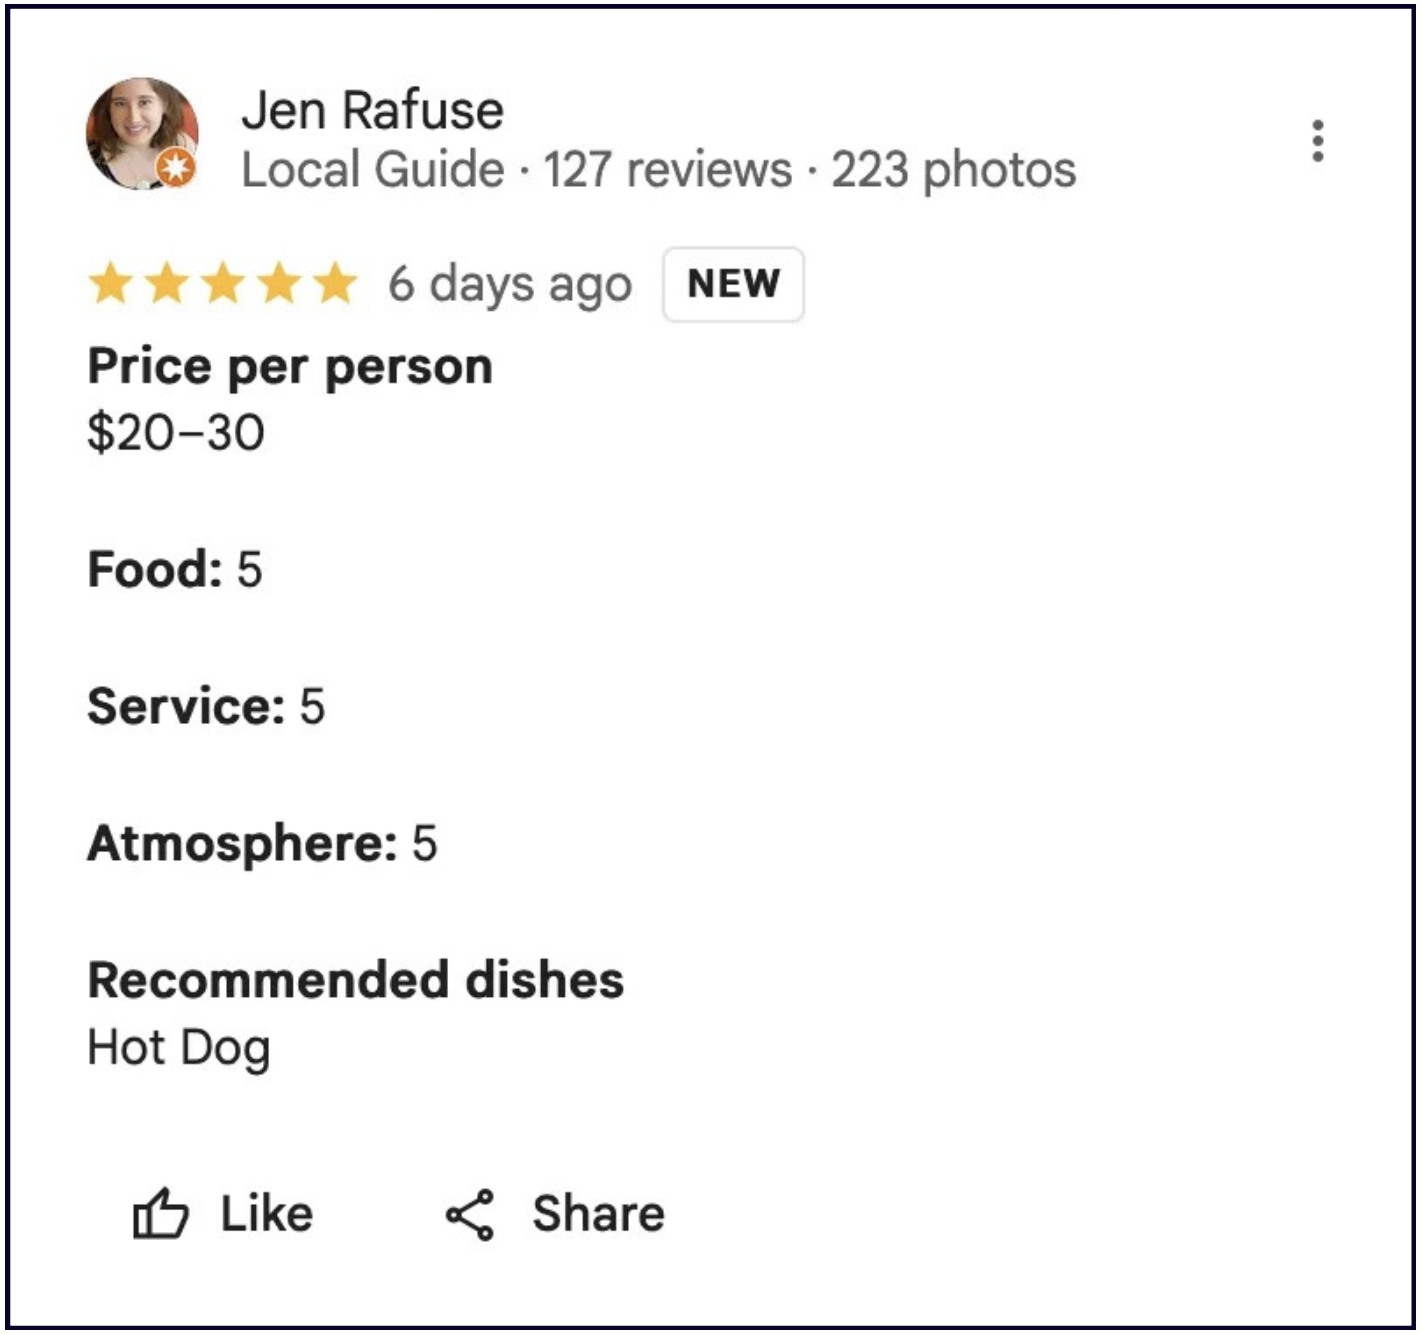
This feature is not available to all Google Business listings. See a full list of categories here.
Place Topics
Place Topics are the clickable buttons in the "People often mention" section of your Google Business listing, right below your star rating.
They display the most-mentioned words in your reviews:
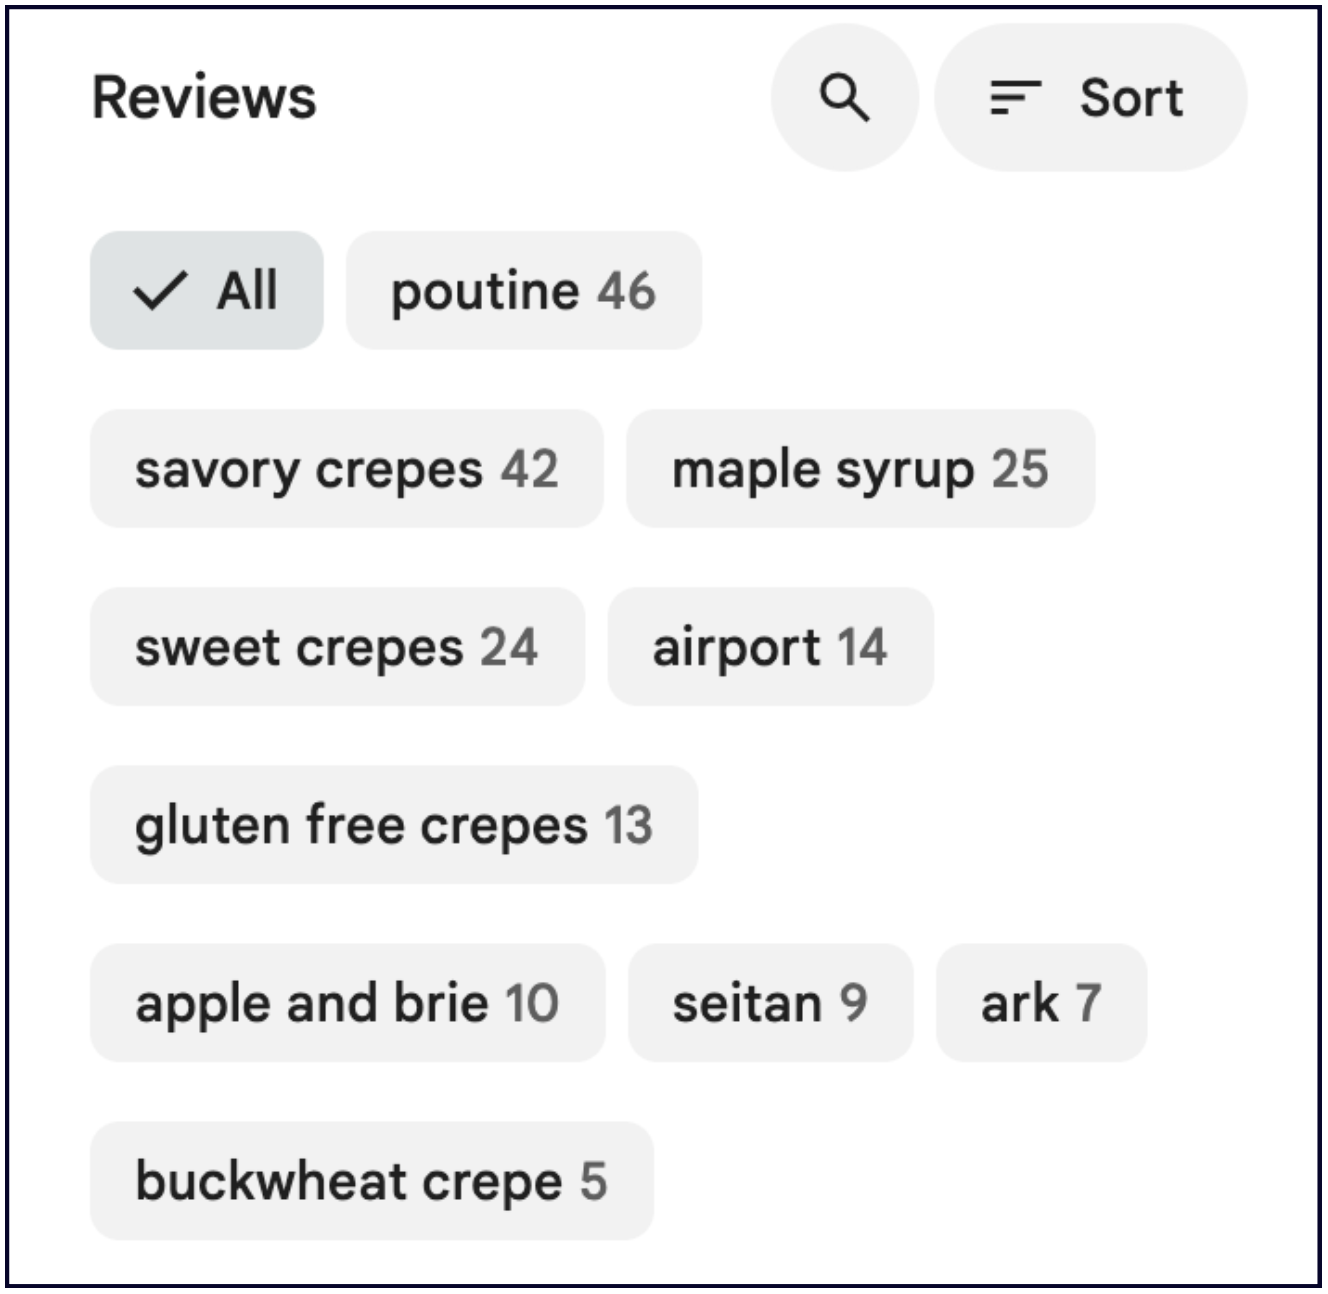
It's useful to keep an eye on your Place Topics, as they can have both positive and negative sentiments. No restaurant wants to have "cold food" as one of their place topics, for example. So, make sure you deal with recurring negative review topics and correct your business practices accordingly.
Photos
Google encourages reviewers to add photos and videos to their review:
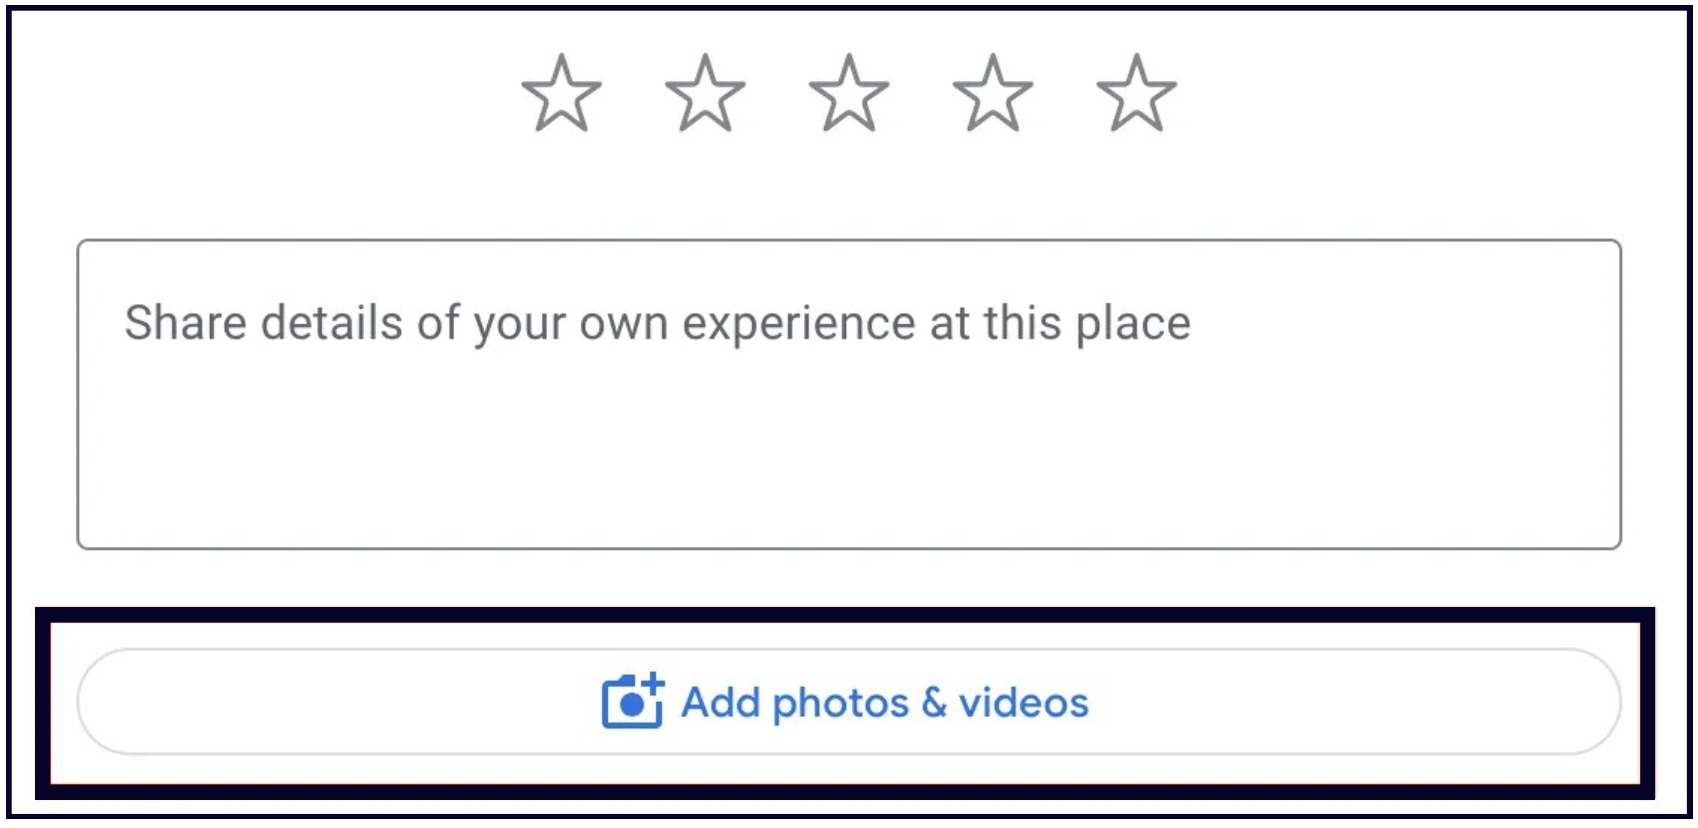
We strongly encourage you to remind your customers to add photos and videos to their reviews. Research shows that reviews containing visuals tend to stay at the top of the Review section for longer than solely text-based reviews.
Show off your reviews
Displaying your reviews and testimonials outside of Google can help your business get more customers and encourage existing customers to leave you a review, too.
Share your best reviews as photos on your Google listing so that they don't get buried in the review section. Embed your reviews on your website, share them on social media, use them in your marketing materials… The possibilities are endless.
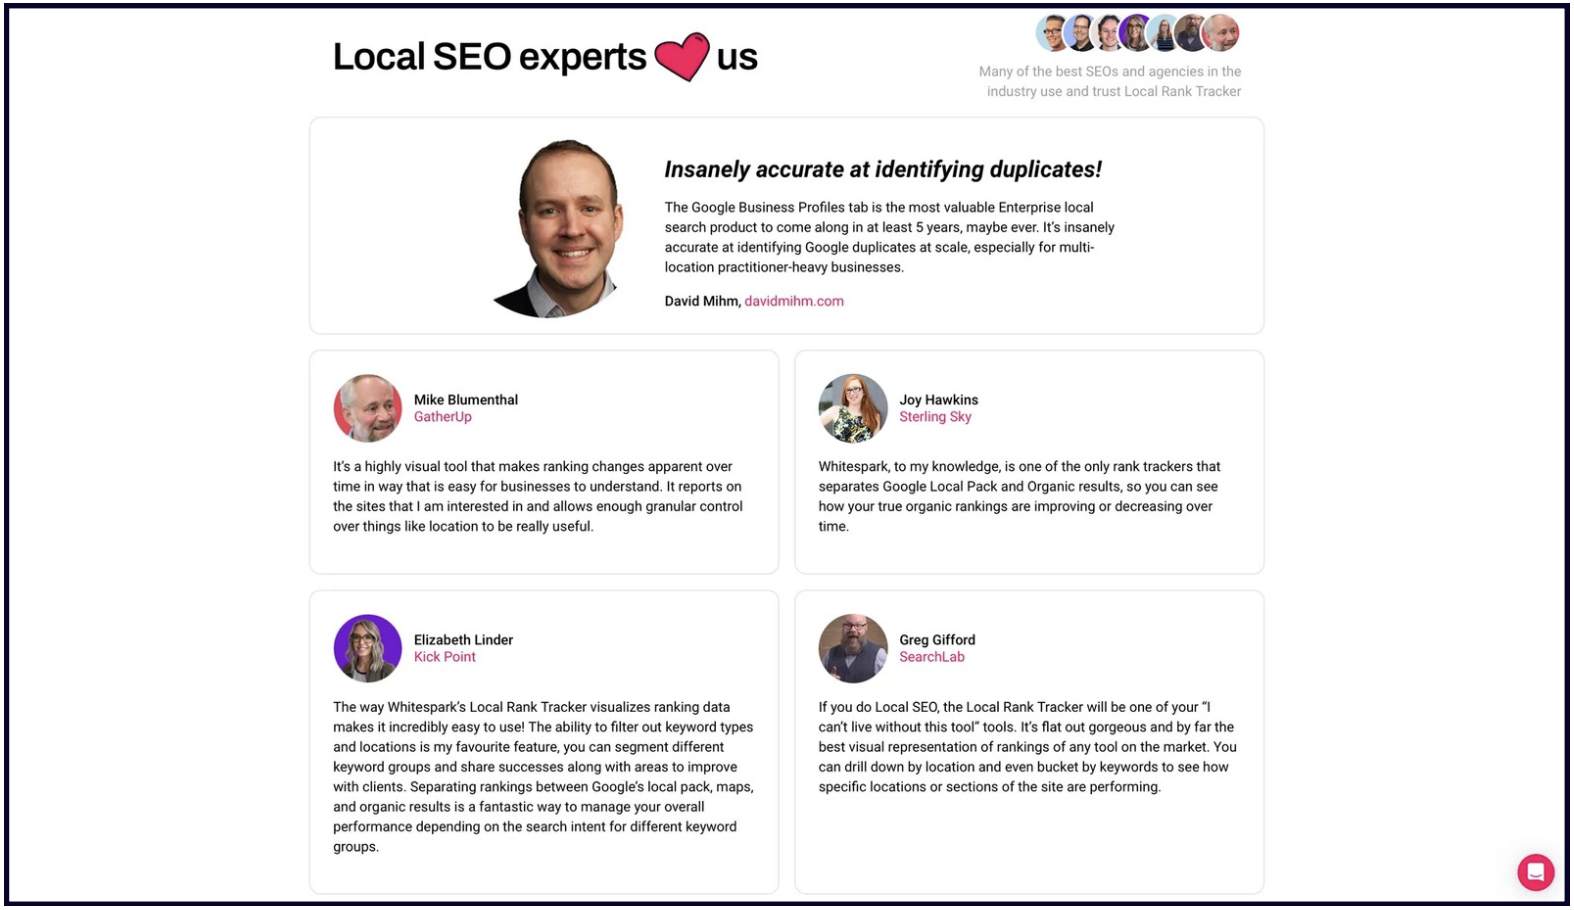
Chapter 12: Q&A
Note: Google has deprecated the Q&A API for Business Profiles and phasing out the Q&A feature. The API was officially discontinued on November 3, 2025, meaning programmatic access is no longer possible, but manual management is still available for now. This shift suggests Google is updating the Q&A functionality, possibly to integrate it with AI or other features, and businesses should focus on other ways to keep their profile accurate and provide answers.
The Q&A section has a very prominent place on the Google Business Profile. It is one of the first things a visitor sees when they look at a business’s Profile, yet barely anyone uses it. This is why having a well-maintained Q&A section can make all the difference to your business.
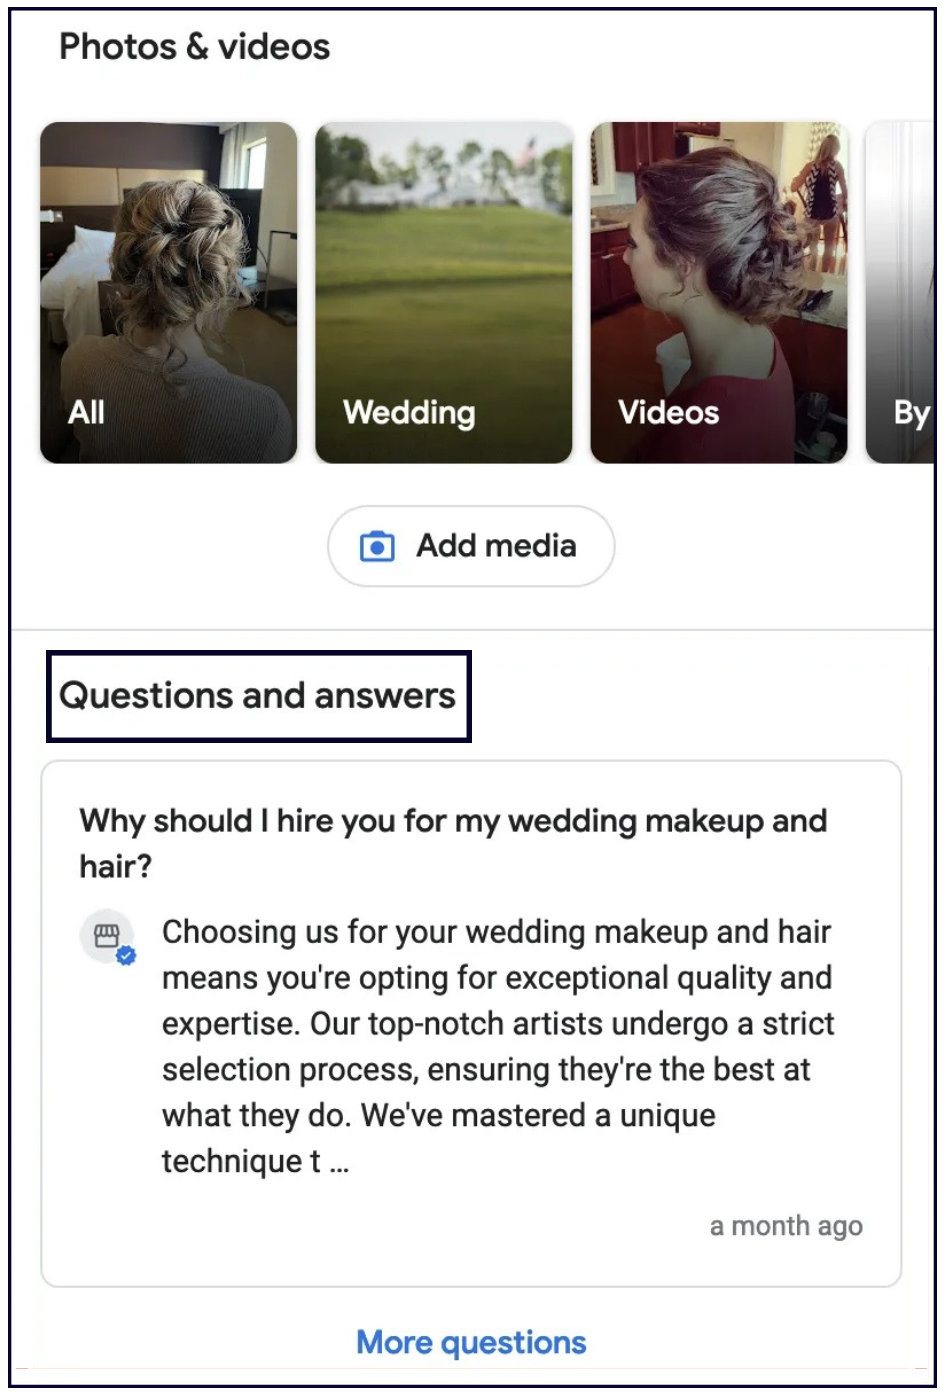
How to create and maintain a great Q&A section
You can find and edit your Q&A in your Google Business dashboard:
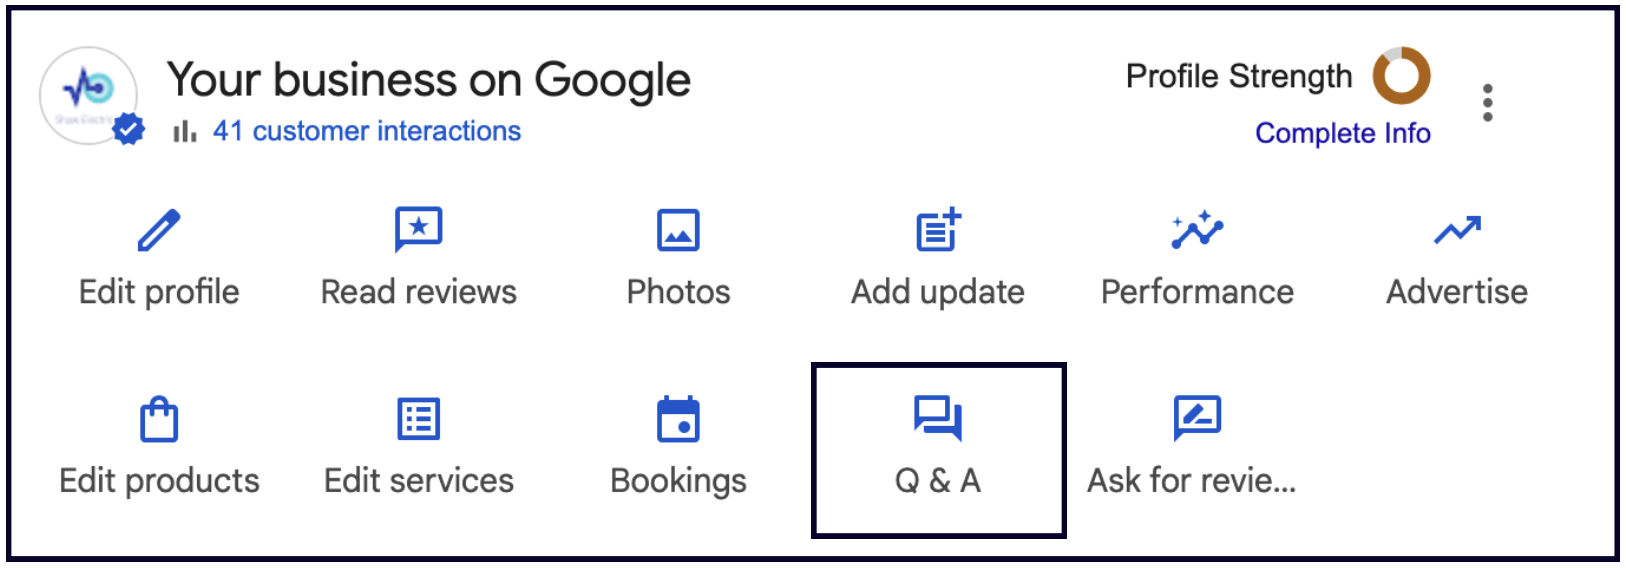
When you click on the Q&A button, you will see that you can ask and answer questions as the business, or you can answer any questions left by users. Which leads us to our first tip:
1. Add questions and answers yourself.
As a searcher, few things are more persuasive than seeing the answers to your questions before you even ask them.
This is why I recommend entering the most frequently asked questions about your business in this section, and then answering them yourself.
One question that should be present in every business’s Q&A section is, “Why should I choose this business?”
The answer to this question is an opportunity to sell yourself, your business, your products, and your services. Convince your potential customers that you provide exactly what they need, and they will come to you.
2. Monitor your Q&A.
The Q&A is a crowd-sourced feature, meaning that anyone can ask and answer questions on your Profile.
This is why it is important to:
- Answer every question you get. It’s better for you to expertly answer these questions, rather than a random person who doesn’t know as much about your business.
- Report spam or bad reviews in the Q&A section. If you leave this section unmonitored, you risk bad feedback or competitor promotion front and center on your Profile.
💡Tip: If a question gets 3 upvotes/likes, it will get featured in the Google Business Profile knowledge panel.
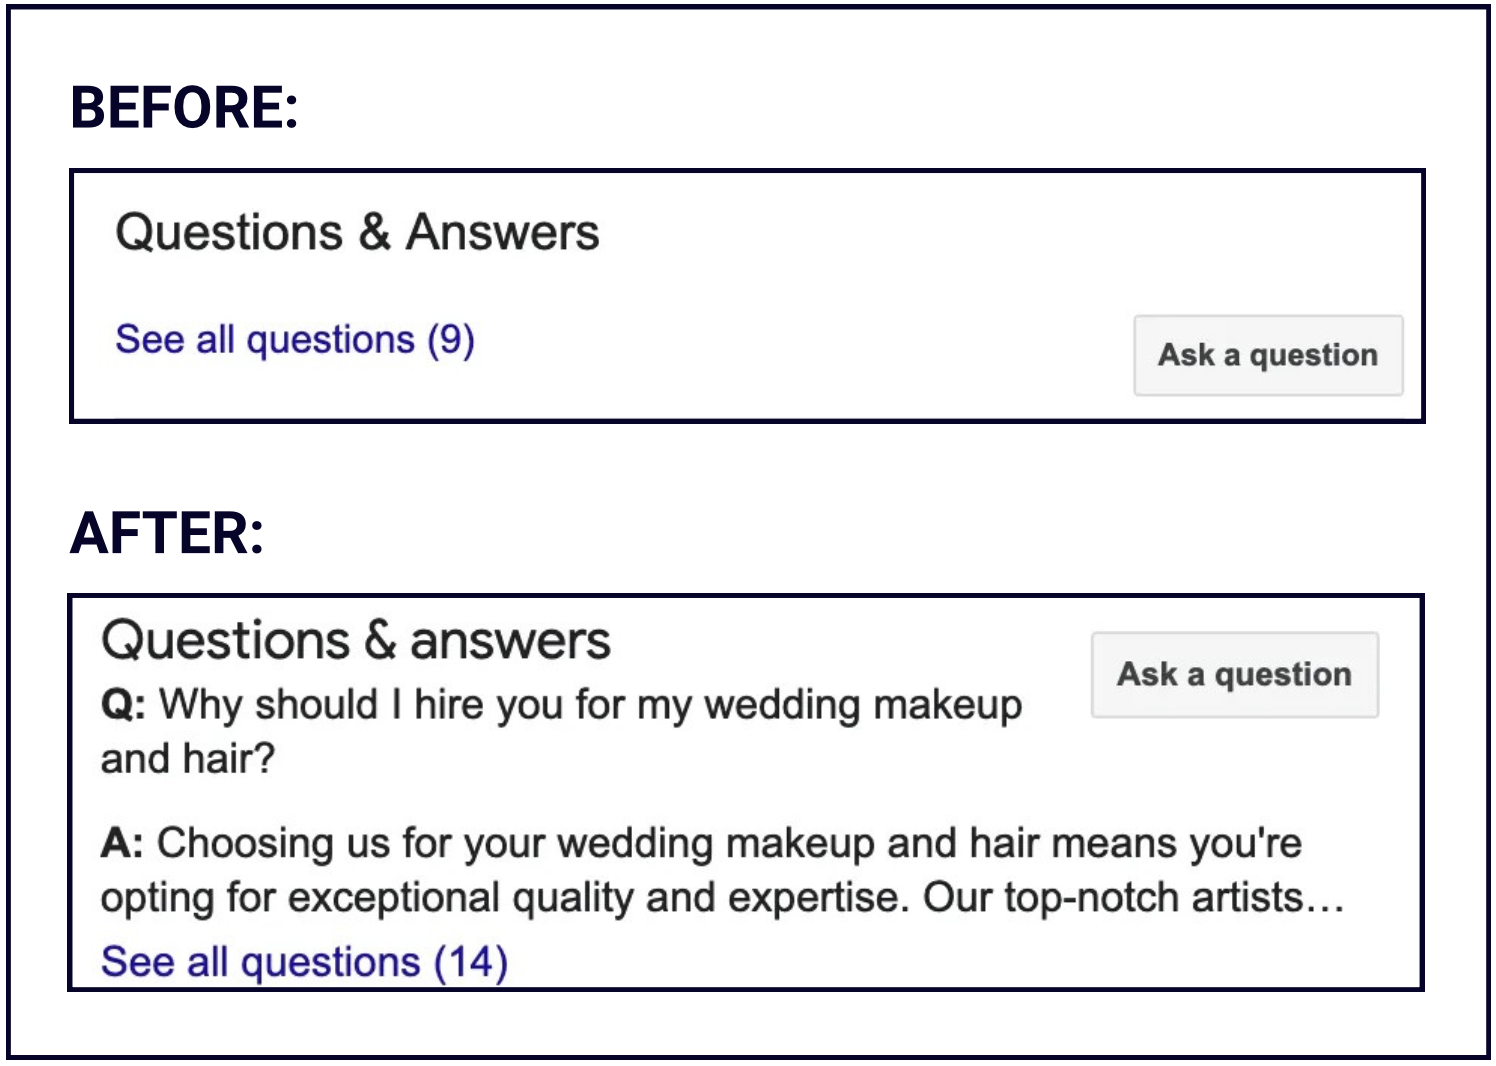
Chapter 13: How your Google listing is performing
The Performance section lives in your Google Business dashboard, and while there's much to be wanted from it, it can give you a general idea of how your business is doing on Google.
This is what Google has to say about Google Business Profile Performance (previously known as 'insights')
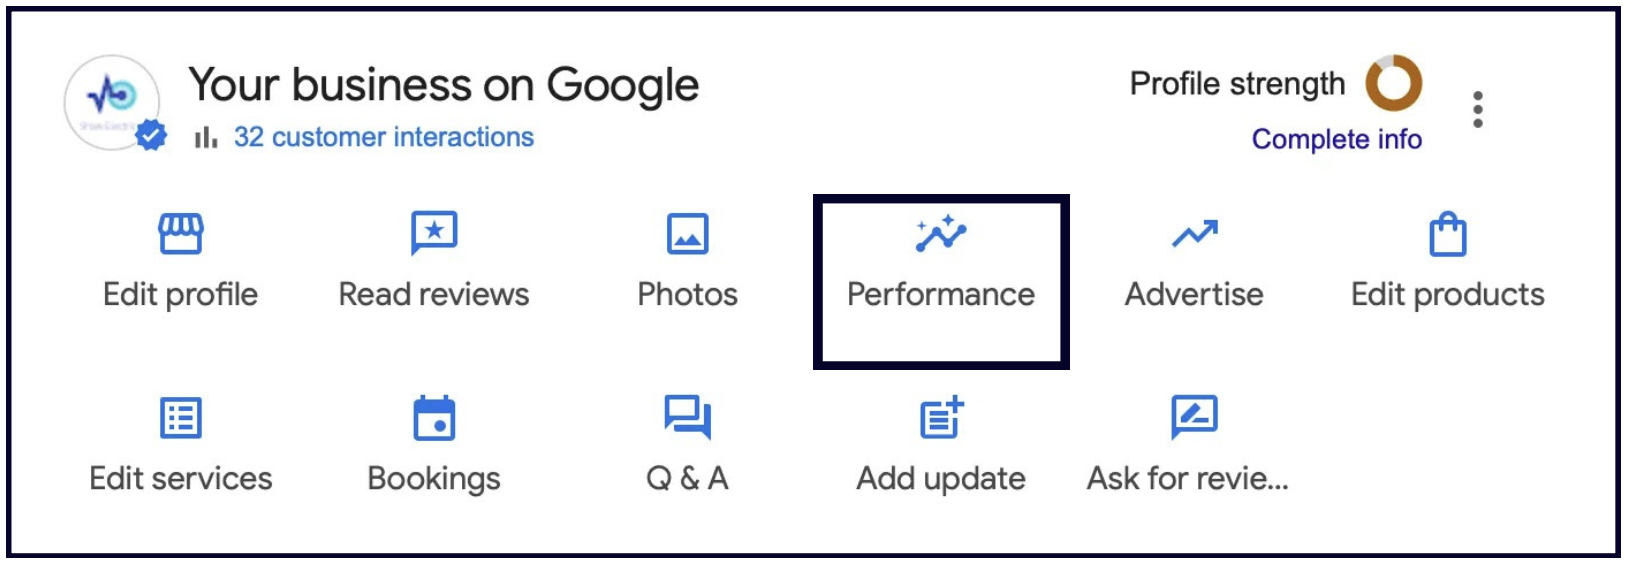
What the Performance section offers
1. An overview of all your Profile interactions
In the Overview section you will find a chart that tells you how many total interactions users had with your listing. You can adjust the time period from the drop-down menu at the top:
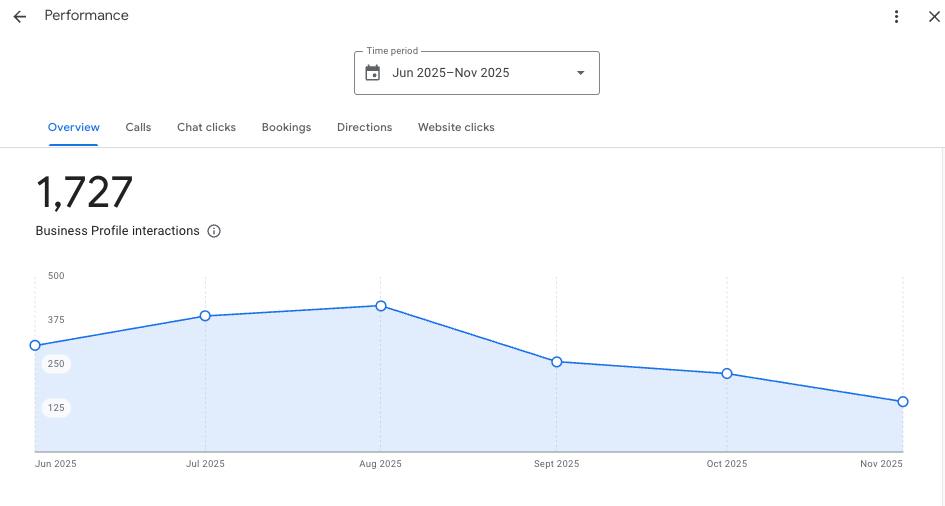
If you scroll down, you will also find a breakdown of how people found your listing (Google Search, Google Maps, desktop, or mobile), as well as the search terms that brought people to you:
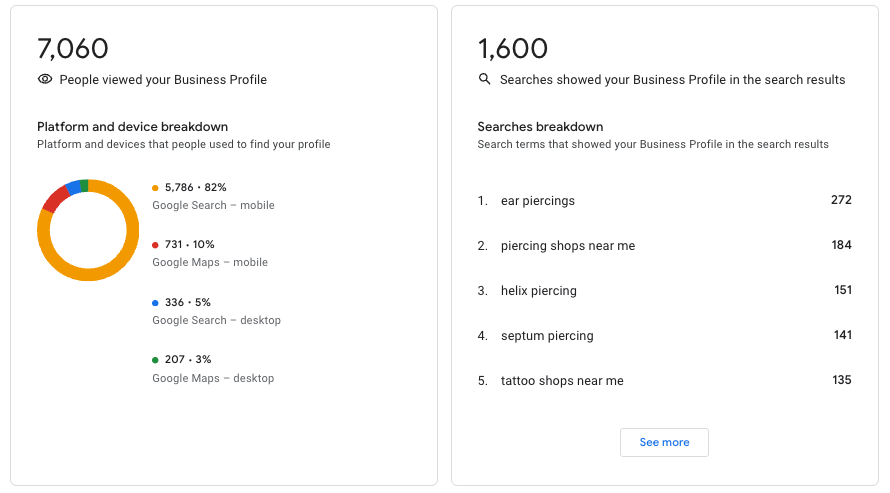
💡Tip: If you click the "See more" button in the Searches Breakdown section on the right, it will show you all the search terms people used to find your listing, including how often your listing appeared for each one.
This section can be really valuable for spotting where your listing could do more work for you, and for generating content ideas:
- Take the terms you find in the Searches Breakdown section and create new service pages around them.
- Update your location pages on your website to include these terms.
- Ask your web person to add these terms to your page titles.
- Create new questions in your listing's Q&A section based on this data.
- Make new Google Posts or add new Services/Products related to these topics.
☝️🤓 Cool trick: You can export all this data into a spreadsheet. Watch this video to learn how.
2. Separate tabs for Calls, Chat Clicks, Bookings, Directions and Website clicks
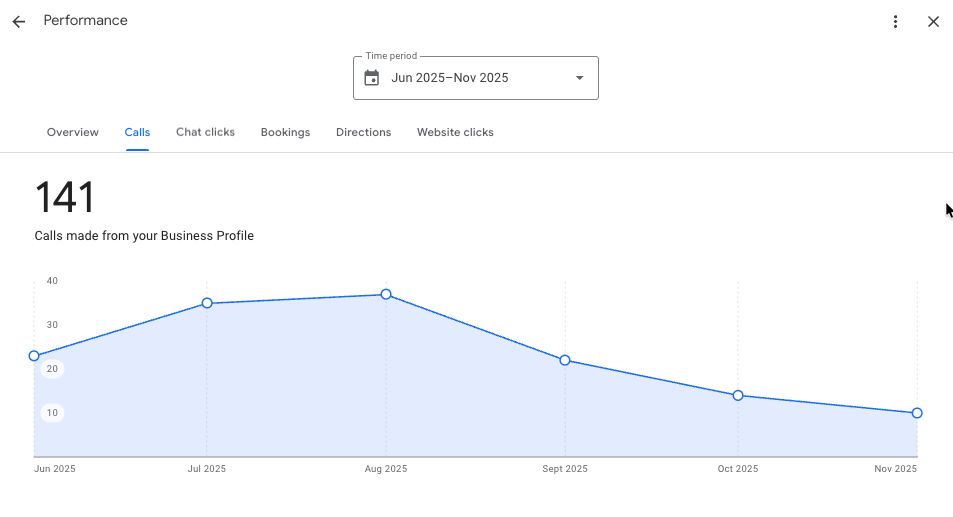
These tabs contain charts showing the total number of calls, chat clicks, bookings, driving directions or website clicks your listing got during the selected period.
✍️ Note: The number of calls shown in your Performance section only represents the number of people who clicked the "Call" icon on mobile. This makes Google's call data largely inaccurate because it doesn't account for all the people who saw your listing on desktop, copied your number and called you.
A much more accurate way to track calls from your Google listing is to use a call tracking number. A call tracking number is a unique phone number that you can use on your listing (or in any marketing campaigns). It lets you track every call that comes from your listing and see various useful details, such as:
- where the call came from (your Google listing, an ad, your website, etc.)
- the caller's location
- time of the call
- duration of the call
Here's how to use a call tracking number on your Google listing:
- Get one. We use CallRail at Whitespark, but CallTrackingMetrics is also good.
- Go to your Google listing's "Contact information" section and set the tracking number as your primary number.
- Leave your real business number as an additional number.
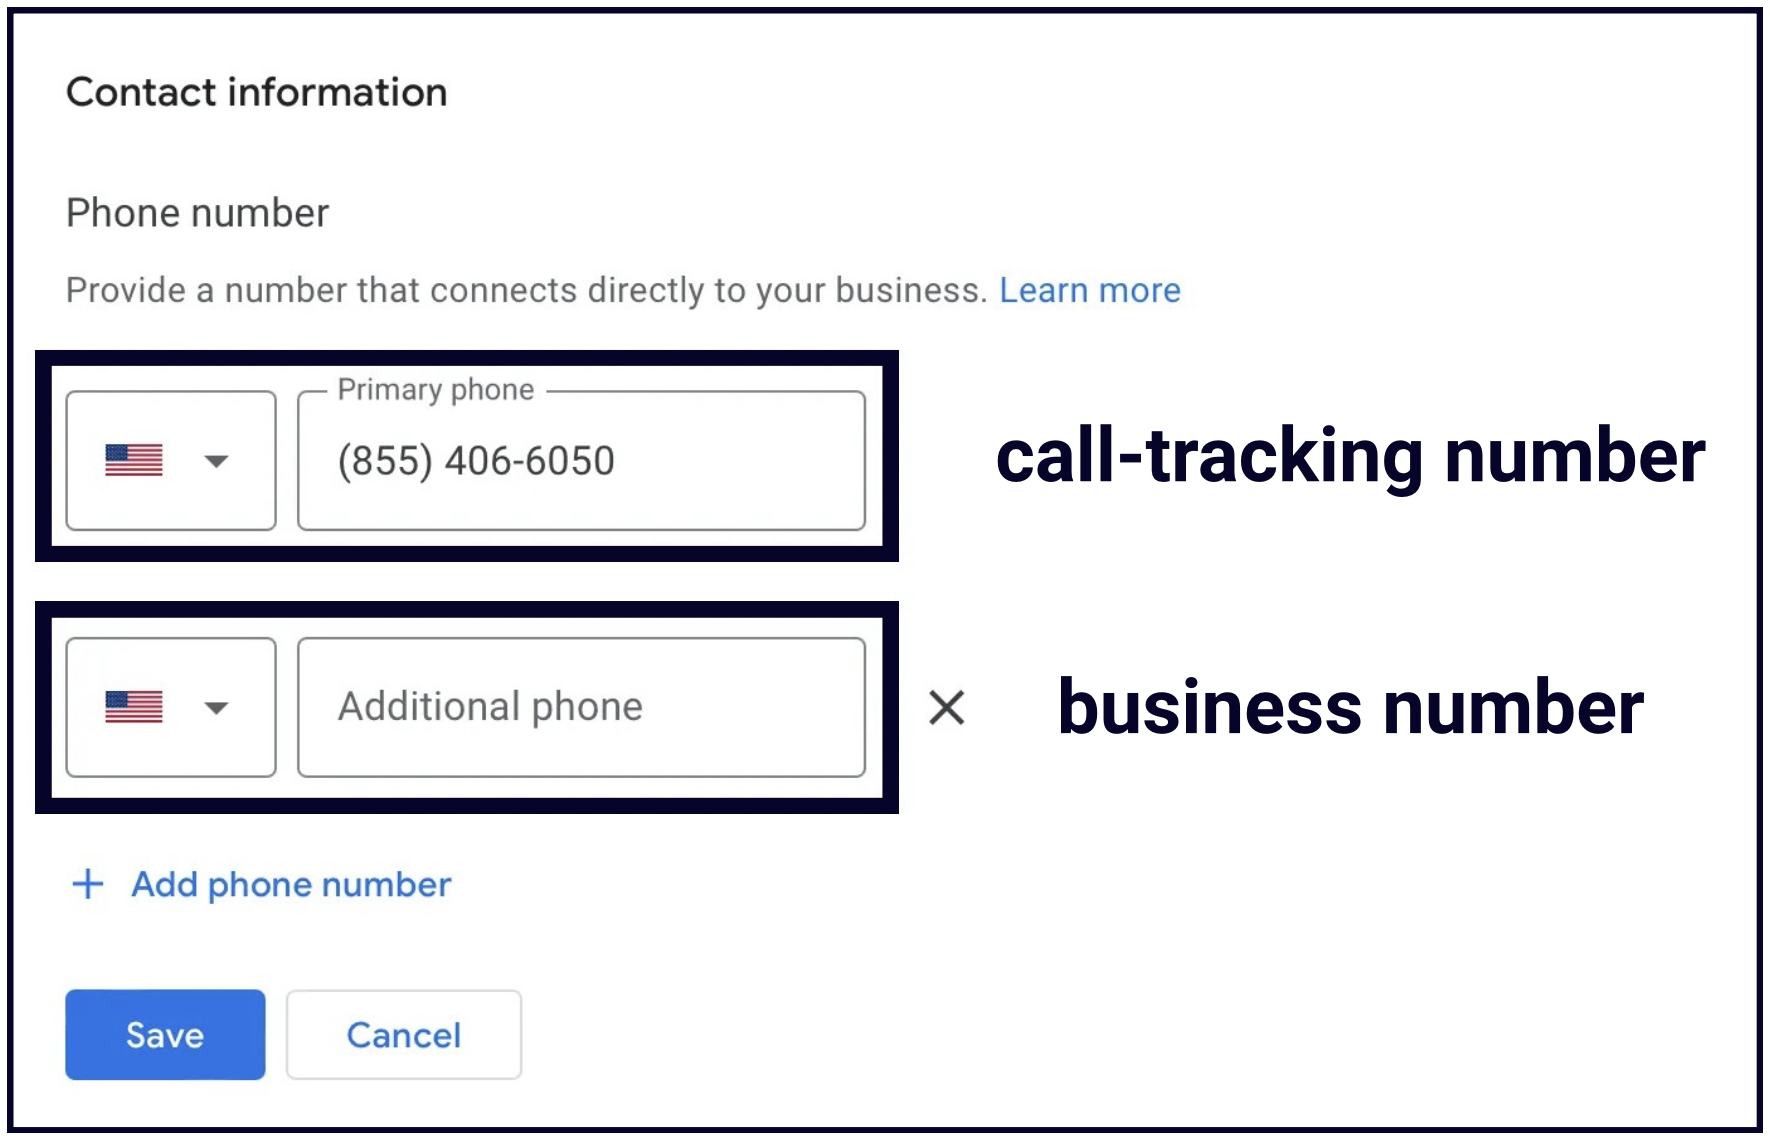
Only the primary number is shown on your listing, so now you can track all your calls, not just the ones made on mobile.
If you're worried that this will mess up your consistency across other directories, don't be. Since you've put your business number as an additional number, all the other places your business appears online will stay connected correctly, and Google will have no problem linking them to your listing.
Chapter 14: Business settings
To access the settings for your Business Profile, click the three dots in the top right corner of your Google Business dashboard:
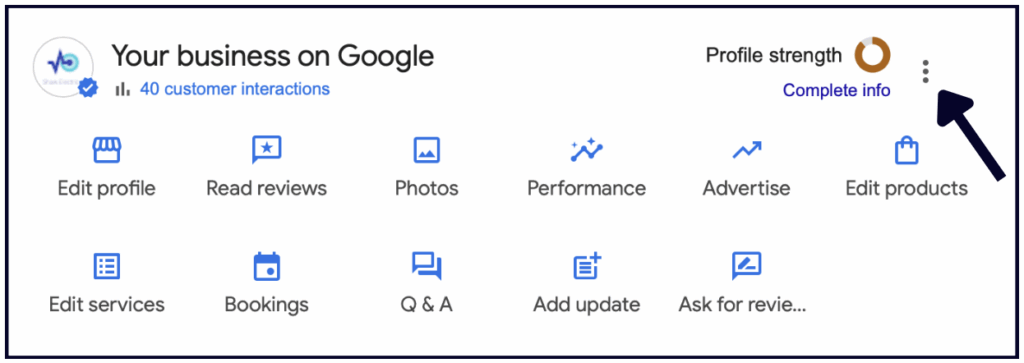
From here, you can view your Business Profile settings, Notification settings, and other Business Profiles you may own, you can add a new Business Profile, and more.
To edit your settings, click “Business Profile Settings”.
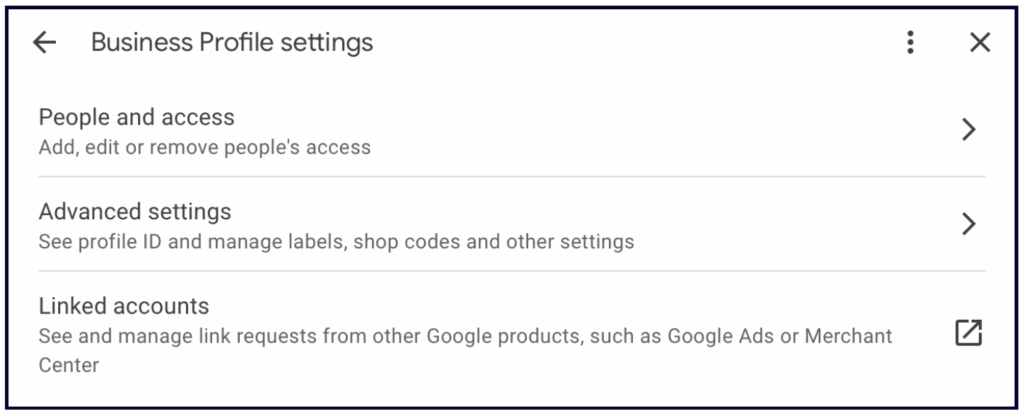
People & access
It’s important to monitor this section regularly and remove any users who aren’t actively managing your Business Profile. Having additional Owners or Managers on your Business Profile puts you at risk of accidental suspensions, inaccurate changes to your business information, or worse — someone claiming ownership who doesn’t actually own your business.
To remove a user from your Business Profile, click People and access, select the person you’d like to remove, and click “Remove person”:
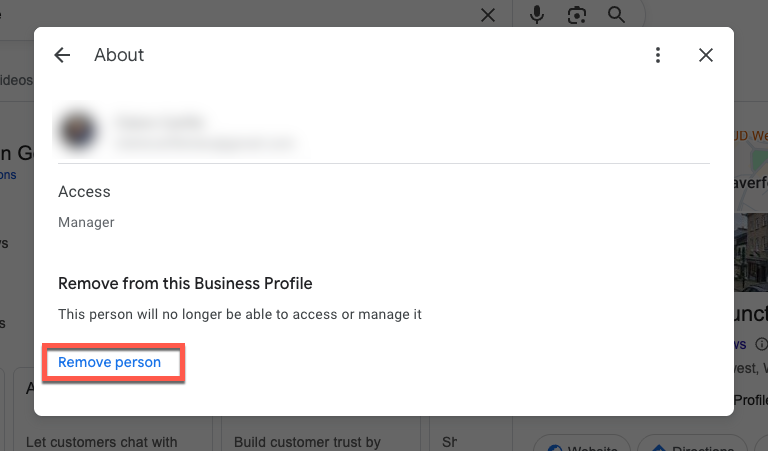
If you’ve granted access to the Google Business Profile via a Location Group (often used by agencies or organisations managing multiple profiles) you’ll do the same as above – except this time you’ll click ‘Remove location’ rather than ‘Remove person’.
Management Roles
To be an owner or a manager of a Google Business Profile you’ll need a Google Account. If you don’t have one this post explains how to set one up.
When you grant access you’ll need to choose a management role and level of access that you’d like that person to have:
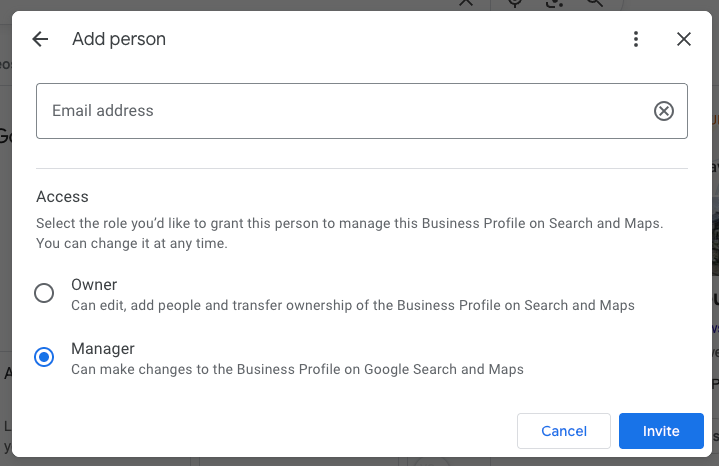
Different management roles have varying levels of access, whether you are added as an individual user or manage the profile through a Location Group:
| Role | Key Permissions | Important Limitations |
|---|---|---|
| Primary Owner | The highest level of access. Can do everything, including: | There can only be one Primary Owner per profile. |
| * Add/remove all other users (Owners, Managers). | ||
| * Transfer Primary Ownership to another Owner. | ||
| * Delete the Business Profile. | ||
| Owner | The same permissions as the Primary Owner, except: | Cannot remove the Primary Owner. |
| * Add/remove other users (except the Primary Owner). | Cannot delete the profile if there is a Primary Owner. | |
| * Full editing rights to the profile. | ||
| Manager | Full management rights for the profile’s content: | Cannot add or remove users. |
| * Edit all business information (name, address, hours, etc.). | Cannot delete the Business Profile. | |
| * Create and manage Posts. | ||
| * Respond to reviews and Q&As. |
Key Considerations for allocating access:
- Primary Ownership: It is highly recommended that the actual business (or an individual within the business) holds Primary Owner access, using a company domain email address if possible.
- Transfer of Ownership: Only the Primary Owner can transfer that status to another Owner on the profile.
- Location Groups: When managing a profile through a Location Group, users are assigned one of the roles (Owner, Manager, or Site Manager) for the group itself, and those permissions apply to all profiles contained within that group.
Read more about what Google has to say on managing your Google Business profile owners and managers
When you become a profile owner or manager, you have to wait seven days before you can manage some profile features. During that time, you’ll get an error if you try to:
- Delete or undelete a profile
- Remove other owners or managers
- Transfer primary ownership
Advanced settings
Now that your listing is in proper shape, let’s go one step further by adding advanced info to stay organized.
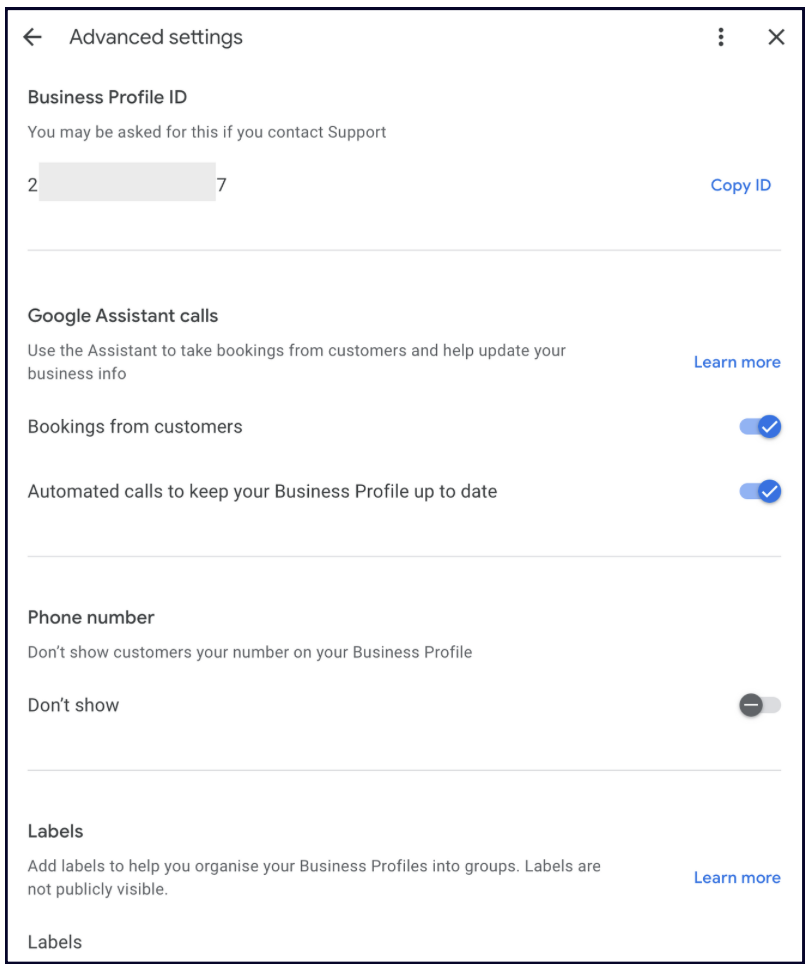
We recommend you review this section to ensure it’s set up according to your preferences, and keep a record of things like your Business Profile ID and store code. If you ever run into a problem with your listing (like it getting suspended), Google's support team will ask for your Business Profile ID — so keep it somewhere handy.
Google Assistant calls
Google Assistant makes phone calls on behalf of customers to book a reservation, confirm your hours, or check other business details — it calls your business on their behalf.
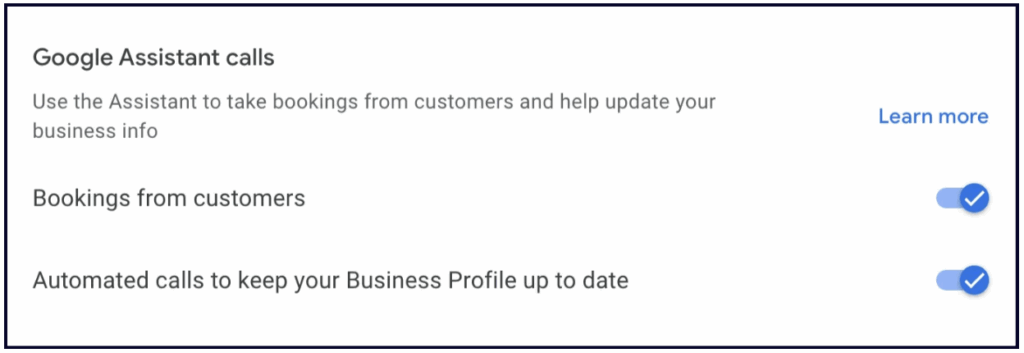
Google Assistant also calls your business using an automated voice-calling technology and asks questions and confirms information based on the customer’s request.
Google Assistant Calls are turned on for all businesses by default. If you do not want this feature, you can turn it off. You’ll also have the option to opt out during any Google assistant call.
Phone number
You have the option to hide your phone number if you’d rather encourage customers to reach out via your website or direct messaging. While this can help streamline your communications, use it with caution: many users find “Call” to be the most convenient way to engage with a local business. Don’t overlook the potential leads a direct line can provide.
Labels (optional)
If you’re using Ads and running local ads alongside your other marketing, this label will be a major help in keeping you organized in Ads. It allows you to easily link your Google listing to an Ads campaign and show your business address and location directly inside your ads. It’s meant to help multi-location businesses and agencies to seamlessly manage PPC campaigns linked to Google Business Profile.
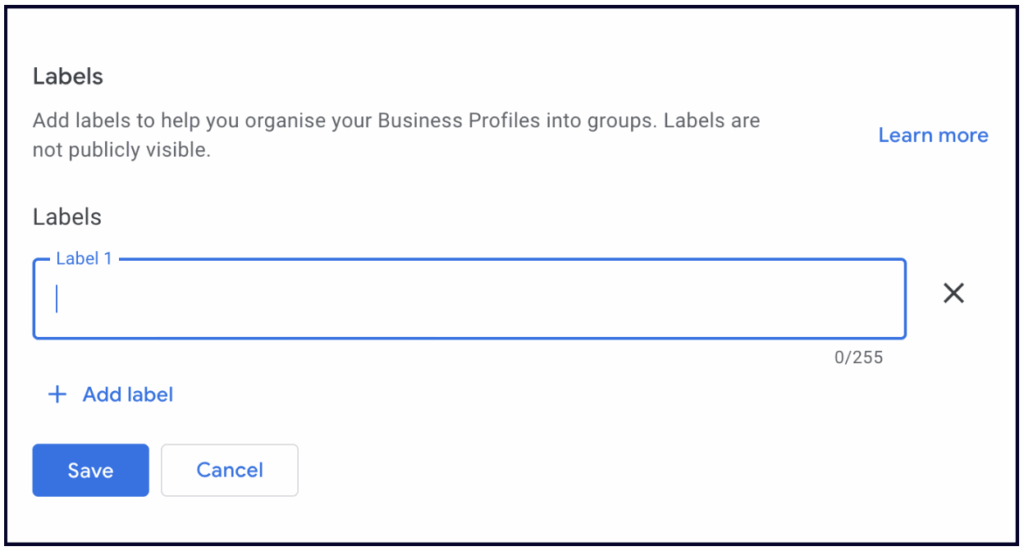
Shop Code (optional)
If you are a multi-location business, the store codes you create will help you stay organized and keep on top of your locations. You control how you want the code to appear. For instance, if Whitespark had 3 locations in Edmonton, we could label them:
- WS-1, WS-2, WS-3, or
- WS-Glenora, WS-Whyte, WS-Oliver, or
- WS-T5J, WS-T6E, WS-T6G
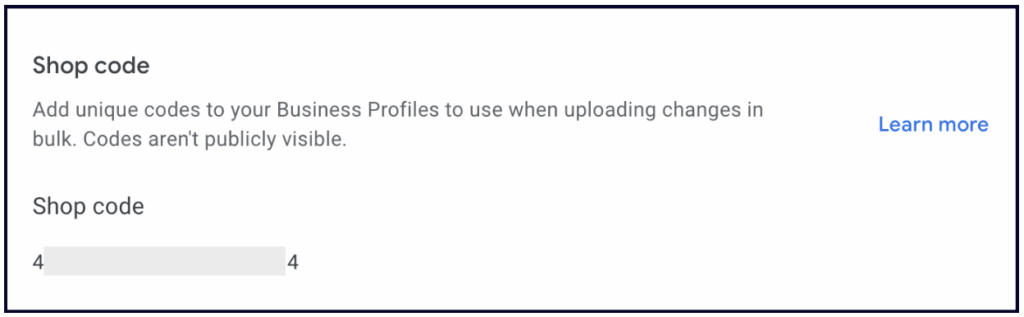
You get the picture. Decide how you want to uniquely identify your locations for ease of management. Adding keywords doesn’t do anything here; this is strictly a feature to organize all your locations.
💡Tip: Google best practices suggest that if your business moves locations, you should give it a new store code and delete the old one. Don’t recycle codes.
Google Ads phone number
If you’re investing your money in Ads, then you should ensure you are tracking their success properly.
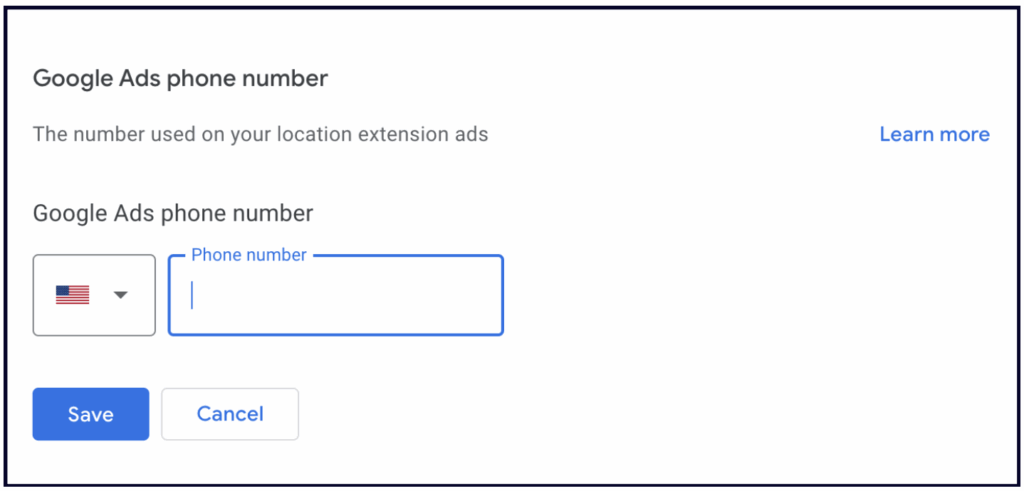
If you add a call tracking number in this field, you will know how many users contact you from your ad and be able to measure how successful your ad really is.
If you choose to leave this field empty, then Google will use your listing’s primary phone number.
Notifications
Select the three dots and click on ‘Notifications’
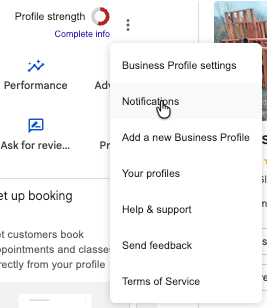
This section manages your preferences for email notifications from Google. You can toggle the following notifications to on or off:
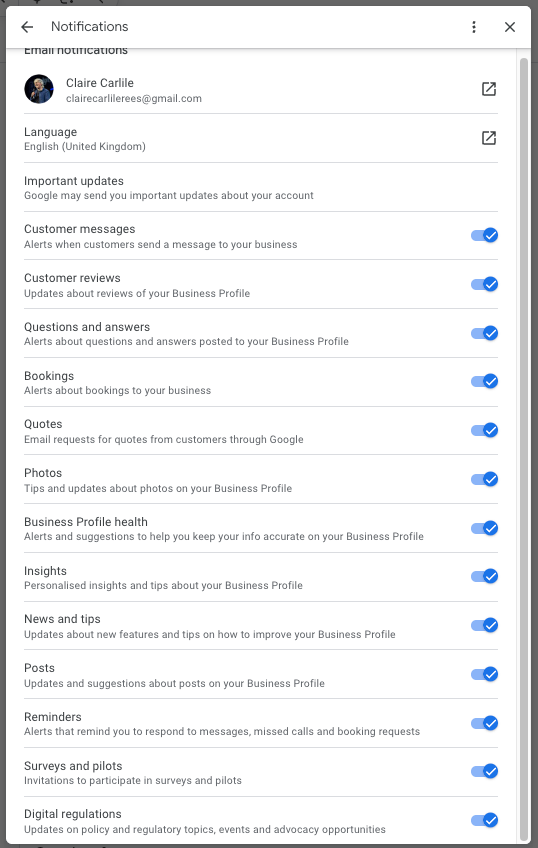
Keep in mind that these settings aren’t profile-specific. When you toggle notifications on or off, it affects all the profiles linked to your account.
Chapter 15: Maintaining & protecting your Google Business Profile
Some parts on your Google Business Profile only need to be set up once, but other sections need to be continuously monitored and updated so that your Google Business listing stays accurate and keeps getting found by the right people, represents your business properly, and make a good impression to potential customers.
This is particularly important for the parts of your Profile that are available for the public to contribute to:
- Photos & Videos: Report any unflattering or inaccurate user-uploaded content.
- **Q&A:**Respond to other people’s questions as soon as they come in and flag/report any guidelines-violating questions.
- **Reviews:**Respond to all reviews and reach out to unhappy reviewers in private to resolve issues – and possibly turn the bad review into a good one.
- **Updates by Customers:**Report any Updates that violate the guidelines or don’t make your business look good.
More importantly, though, watch out for people editing your business information (yes, they can do that to any Profile via the “Suggest an edit” button). More on this below.
Consistency is key
Keep in mind that one of the best ways to make it crystal clear to Google (and the rest of the world) of the details of your business name, address, opening hours, contact details and offering is to make sure that these details are consistent across your real world and your digital footprint. Make sure that your real world signage, your website, your social channels and any directory listings all contain the correct information.
Suggest an Edit
All Business Profiles have a Suggest an Edit button that looks like this:
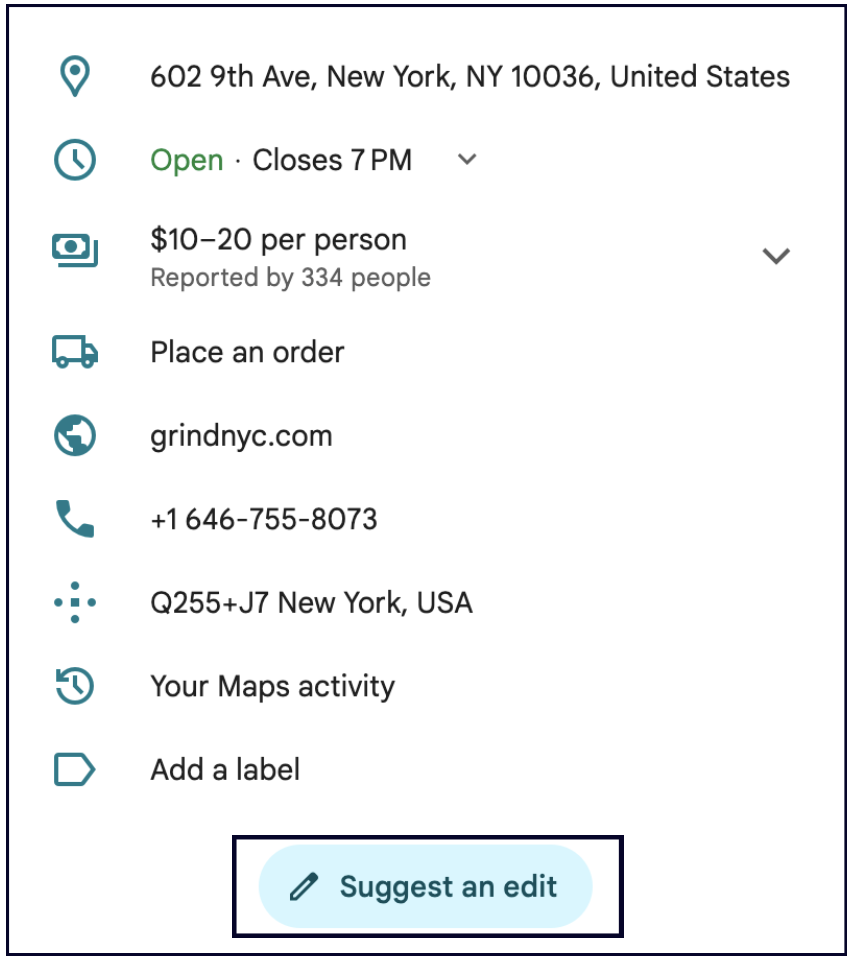
This button is available to any searcher who wishes to report, update, or change information about a business (such as their business name, categories, hours of operation, etc). The thing is, this feature makes it dead easy for bad actors to change your information, which can stop your listing from being found.
Having a claimed and verified Google Business Profile helps your business combat this to some extent because you can regularly review your information to make sure everything stays correct, and Google is supposed to notify you via email about any changes made to your Profile.
Unfortunately, in reality, Google doesn’t always let you know when they accept searchers’ changes to your Profile, so you can go months without noticing and wonder why fewer people are calling or finding you.
This is why we developed a software tool that monitors your Profile for changes and alerts you immediately. You can then accept or reject the suggested changes with a simple click.
Whitespark Local Platform
Local Platform is super cool because it lets you:
1. Get notified whenever something changes on your Profiles
You will receive email alerts about updates as they happen — or on a daily, weekly, or monthly basis if you choose.

2. Reject unwanted Google updates with a single click
With the click of a button, the software puts your listing information back to how it was. You can also bulk-reject updates and save even more time!
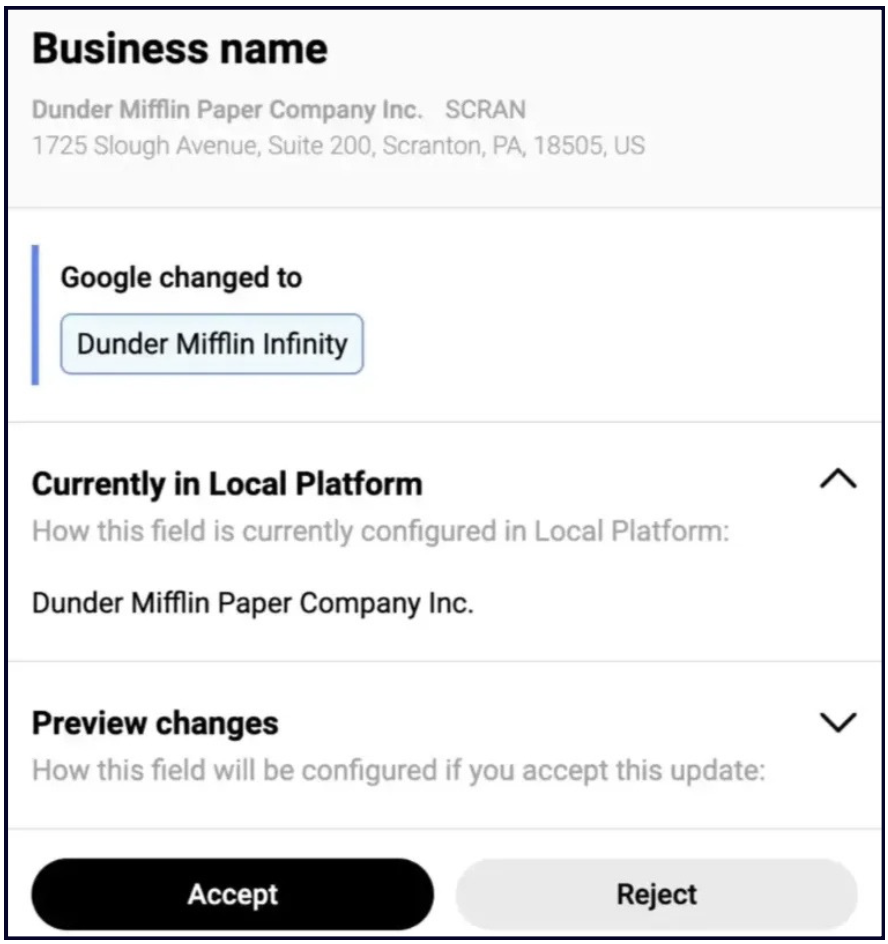
It’s important to note that these changes are already live on your profile at this point. ‘Rejecting’ an update will push your previous status of that field back to Google and will ‘un-do’ the edits that Google made to your profile.
3. Keep a record of all changes to your Profiles
From the moment you import your location to the Local Platform, we’ll keep track of all the changes made to your Google Business listings — whether they’re made by you, Google, or someone on your team.
4. Edit all your locations in bulk
No need to wrestle with Google’s clunky bulk tools anymore. Local Platform is the easiest place to keep all your Google Business listings, group them, and even tag and label them to stay organized:
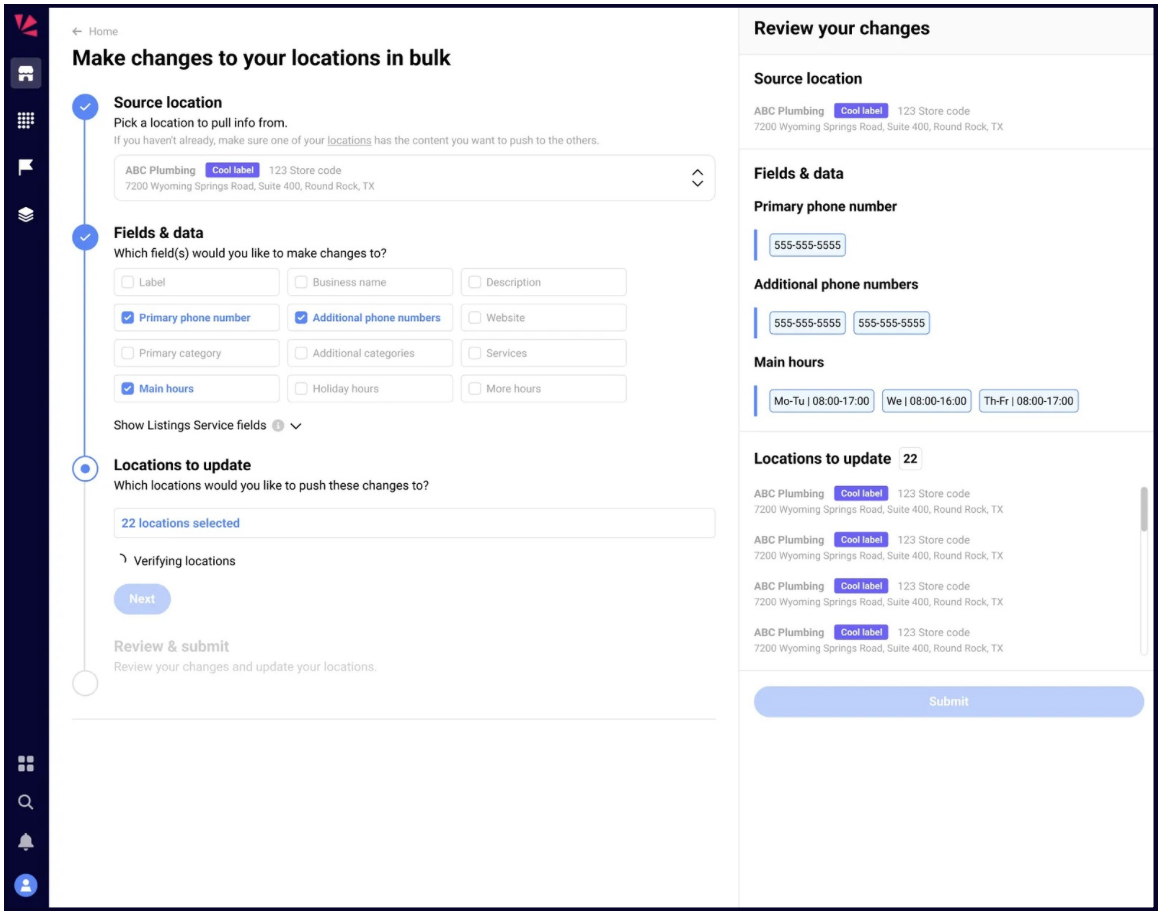
5. Build a Google listing Website
Some businesses can’t afford a professional website yet, which is why Google’s free listing website feature was so great. Unfortunately, like many great things, Google discontinued it and millions of small businesses were about to lose their websites – which is why we stepped up and recreated this feature in our Local Platform:
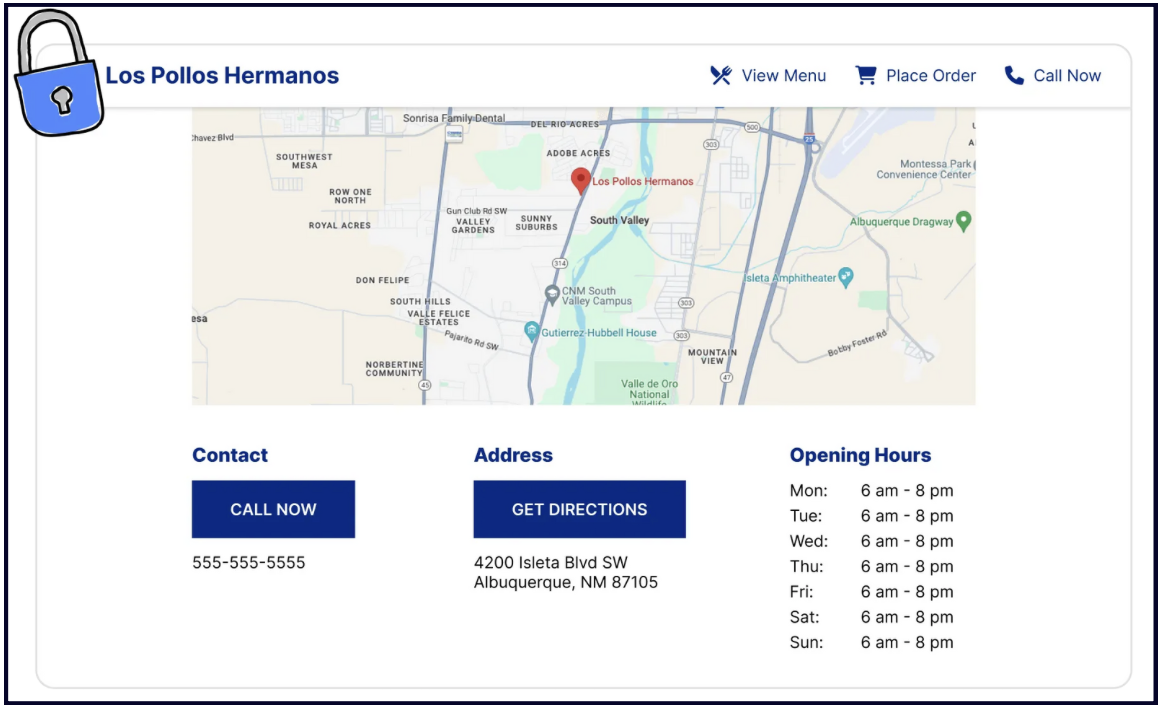
6. Take care of your Service Area business, too
Yes, Google discriminates against local businesses that don’t show their location publicly, but we don’t. Manage your SAB easily from our Local Platform!
And we have even more exciting features coming soon:
- Schedule Google Updates
- Manage and reply to your Google reviews
- Audit your Google Business Profile and find out what to improve
- Get data-rich reports on your Profile’s performance
Get all this for $1/mo and make managing your Google listing easier
Chapter 16: Bulk management of Google Business Profiles
When you’re managing multiple Google Business Profiles you have a few options – as you’re likely going to want to move beyond editing and managing one listing at a time through your Google Business dashboard.
Managing multiple Google Business listings generally means moving beyond editing one listing at a time through Google Search or Maps, and using a purpose-built tool instead.
Native Bulk Management via Location Groups
This is Google’s built in, free, method for managing multiple locations. It uses a feature called ‘location groups’. If you’re managing multiple locations for your business or for a client, you’ve already get your set up, right?
You can read Google’s guidance on Location Groups here.
How it works
Once you have created your group you can manage *many* fields (but not all) by downloading the profile data, making your updates and then uploading the new file into Google Business Profile.
You won’t be able to edit these fields or add these functions:
- Google Posts
- Anything to do with reviews
- Adding or responding to Q&A
- Messages
- Products
- Services
- Hotel Attributes
However – you can easily edit name, address, phone number using this method. As always – be careful of making big changes because these can trigger suspensions. I recommend reading our guide to unverified, disabled and suspended profiles.
Google outlines the full process for importing and updating Google Business Profiles in bulk using location groups here.
TOP TIP: Store codes are essential here – you can’t update your profiles in bulk unless each location has a unique store code.
Bulk Verification
If you plan on managing more than 10 Google Business Profiles, you should also know about Google’s bulk verification. You can check their complete documentation for all the details, but we’ll provide you with the basics here.
Keep in mind that bulk verification is only for businesses with brick and mortar locations, NOT for pure service area businesses. If you’re a SAB you won’t be able to get bulk verified.
There is one huge benefit to getting bulk verified: it gives you the ability to create new listings with instant verification. Yes – so no more video verification or other forms of verification that’ll give you a headache.
How to get bulk verified
To get bulk verified, you have to meet the following requirements:
- You must have 10+ locations under the same brand/business.
- All the locations need to have the same name when applying for bulk verification (no modifiers such as location names). However, once you get verified, you will be able to add modifiers to each business name.
- All locations must comply with the guidelines:
- Correct and consistent business name.
- Physical address (no virtual offices or P.O. boxes).
- Primary phone number unique to each location (if applicable).
- Proper business category and other details.
- You’ll need to have a page on your website that gives details of your locations. That number of location, and details of locations, must match the listings for the location group.
- Make sure that each business listing has signage photos that clearly shows the business name – which of course matches the business name in Google Business Profile and on the website.
- Make sure you have a business domain email (something like “listings@yourbusiness.com” rather than a Gmail address) to manage all of this, and that brand domain email must also be the primary owner of each listing.
Once you’ve ensured you meet the requirements, you need to submit for verification:
- Sign in to Business Profile Manager on desktop.
- Click Verifications > Chain.
- Fill out the form. ◦ Business Name ◦ Business Countries / Regions ◦ Contact Name ◦ Contact Phone ◦ Business manager email ◦ Google Account Manager Email
- Submit the form. You will receive an email when you’re verified.
Sound easy? Well – these ARE the steps but in our experience there can be some hoop jumping before you’ll get given bulk verified status. Google Business Profile support might ask for extra details and for further proof – just make sure that you answer their questions and get everything over to them as quickly as you can.
Keep in mind that it is the EMAIL that is bulk verified, rather than the location group. Make sure you keep that email as the primary owner, if you lose the email address or swap out the primary owner for a different email address you will likely lose your bulk verification.
Third Party Management Software for making bulk edits
Given the limited functionality of bulk updates via location groups, most businesses and agencies managing multiple listings turn to third-party software to get things done.
Third-party software connects directly to Google and can sync your listing information automatically — updating everything from one central place instead of editing each listing one by one.
Choosing your SaaS provider will depend on your number of locations, what you actually need the software to do, your budget, and your internal resource to actually get things done.
At this point we want to mention how we have a big bunch of happy clients who use Whitespark’s Local Platform to push their updates. Local Platform lets you edit all your locations’ hours, description, categories, services, phone numbers, etc. from one place. Agencies in particular love this feature because you don’t need to be bulk verified on Google to use it.
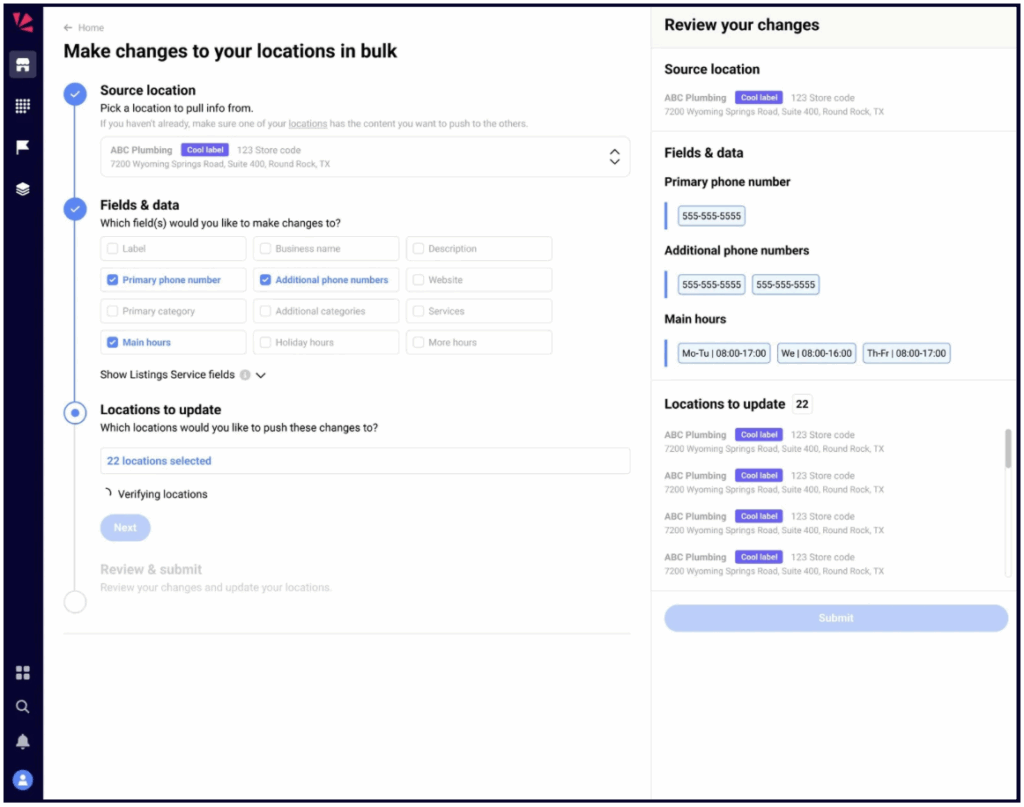
If Local Platform sounds like something you’d like, you’ll be happy to know that it only costs $1/mo, and it comes with a bunch of other Google listing features that you can learn about here.